HP Integrity BL870c HP Integrity iLO 2 Operations Guide, Eleventh Edition - Page 38
Setup Checklist, Table 3-1 Setup Checklist
 |
View all HP Integrity BL870c manuals
Add to My Manuals
Save this manual to your list of manuals |
Page 38 highlights
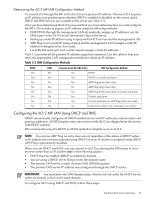
Setup Checklist Use the checklist in Table 3-1 to help set up iLO 2. Table 3-1 Setup Checklist Step Action X Standard For rackmount servers, perform steps 1 and 2. For server blades, see "Server Blade Connection" (page 45) and continue with steps 3-8. 1 Prepare 1. Determine the access method to select and connect cables. 2. Determine the LAN configuration method and assign an IP address if necessary. 3. Find and remove the iLO Network Information Tag. This tag contains the default DNS name and iLO 2 login information. Removing the tag ensures ventilation holes are kept clear for proper server cooling. 2 Configure the MP LAN 3 Log in to iLO 2 Choose a method to configure the LAN for iLO 2 access: • DHCP with DNS (Use the default DNS name supplied on your iLO Network Information Tag.) • ARP Ping (This feature is supported on certain Integrity servers to assign a static IP number to the MP LAN.) • Console serial port (RS-232) (You can perform all iLO 2 text commands from a serial console, or you can use this interface to assign a static IP number, disconnect the serial port, and resume from a web browser.) Log in to iLO 2 from • a supported web browser if using DNS or static IP • the TUI if using the console serial port Use the default user name and password (Admin, Admin) as found on your removable iLO Network Information Tag. 4 Change default user name and password 5 Set up user accounts 6 Set up security access 7 Access the host console Advanced 8 Activate advanced features Change the default user name and password on the administrator account to your predefined selections. Set up the user accounts if you are using the local accounts feature. Set up the security access settings. Access the host console using your method of choice. • Integrity entry class - Activate advanced features by entering your HP Integrity Advanced Pack license key. • Integrity server blades - Ships with Advanced Pack license key factory installed. • Integrity mid range and Superdome - Advanced features are enabled per hard partition with installation of Lights-Out Advanced KVM cards. No Advance Pack license key required. 38 Getting Connected to iLO 2
-
 1
1 -
2
-
3
-
4
-
5
-
6
-
7
-
8
-
9
-
10
-
11
-
12
-
13
-
14
-
15
-
16
-
17
-
18
-
19
-
20
-
21
-
22
-
23
-
24
-
25
-
26
-
27
-
28
-
29
-
30
-
31
-
32
-
 33
33 -
 34
34 -
 35
35 -
 36
36 -
 37
37 -
 38
38 -
 39
39 -
 40
40 -
 41
41 -
 42
42 -
 43
43 -
44
-
45
-
46
-
47
-
48
-
49
-
50
-
51
-
52
-
53
-
54
-
55
-
56
-
57
-
58
-
59
-
60
-
61
-
62
-
63
-
64
-
65
-
66
-
67
-
68
-
69
-
70
-
71
-
72
-
73
-
74
-
75
-
76
-
77
-
78
-
79
-
80
-
81
-
82
-
83
-
84
-
85
-
86
-
87
-
88
-
89
-
90
-
91
-
92
-
93
-
94
-
95
-
96
-
97
-
98
-
99
-
100
-
101
-
102
-
103
-
104
-
105
-
106
-
107
-
108
-
109
-
110
-
111
-
112
-
113
-
114
-
115
-
116
-
117
-
118
-
119
-
120
-
121
-
122
-
123
-
124
-
125
-
126
-
127
-
128
-
129
-
130
-
131
-
132
-
133
-
134
-
135
-
136
-
137
-
138
-
139
-
140
-
141
-
142
-
143
-
144
-
145
-
146
-
147
-
148
-
149
-
150
-
151
-
152
-
153
-
154
-
155
-
156
-
157
-
158
-
159
-
160
-
161
-
162
-
163
-
164
-
165
-
166
-
167
-
168
-
169
-
170
-
171
-
172
-
173
-
174
-
175
-
176
-
177
-
178
-
179
-
180
-
181
-
182
-
183
-
184
-
185
-
186
-
187
-
188
-
189
-
190
-
191
-
192
-
193
-
194
-
195
-
196
-
197
-
198
-
199
-
200
-
201
-
202
-
203
-
204
-
205
-
206
-
207
-
208
-
209
-
210
-
211
-
212
-
213
-
214
-
215
-
216
-
217
-
218
-
219
-
220
-
221
-
222
-
223
-
224
-
225
-
226
-
227
-
228
-
229
 |
 |
