HP Integrity BL870c HP Integrity iLO 2 Operations Guide, Eleventh Edition - Page 44
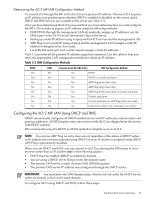
At the MP Main Menu, enter, Table 3-2, Logging In to iLO 2 Using the Command Line Interface
 |
View all HP Integrity BL870c manuals
Add to My Manuals
Save this manual to your list of manuals |
Page 44 highlights
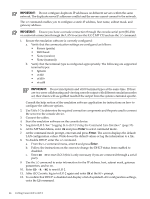
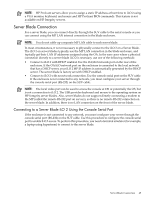
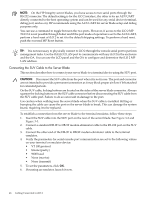
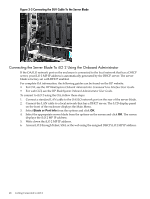
IMPORTANT: Do not configure duplicate IP addresses on different servers within the same network. The duplicate server IP addresses conflict and the servers cannot connect to the network. The LC command enables you to configure a static IP address, host name, subnet mask, and gateway address. IMPORTANT: Ensure you have a console connection through the console serial port (RS-232) or a network connection through the LAN to access the iLO 2 MP CLI and use the LC command. 1. Ensure the emulation software is correctly configured: a. Verify that the communication settings are configured as follows: • 8/none (parity) • 9600 baud • None (receive) • None (transmit) b. Verify that the terminal type is configured appropriately. The following are supported terminal types: • hpterm • vt100 • vt100+ • vt-utf8 IMPORTANT: Do not mix hpterm and vt100 terminal types at the same time. If there are two users collaborating and viewing console output with different emulation modes set, their clients will see garbled results if the output from the system is terminal specific. Consult the help section of the emulation software application for instructions on how to configure the software options. 2. Use Table 3-2 to determine the required connection components and the ports used to connect the server to the console device. 3. Connect the cables. 4. Start the emulation software on the console device. 5. Log in to iLO 2. See "Logging In to iLO 2 Using the Command Line Interface" (page 55). 6. At the MP Main Menu, enter CM and press Enter to select command mode. 7. At the command mode prompt, enter LS and press Enter. The screen displays the default LAN configuration values. Write down the default values or log the information to a file. 8. To disable DHCP, enter the LC command. a. From the LC command menu, enter D and press Enter. b. Follow the instructions on the screen to change the DHCP status from enabled to disabled. c. Enter XD -R to reset iLO 2 (this is only necessary if you are connected through a serial port). 9. Use the LC command to enter information for the IP address, host, subnet mask, gateway parameters, and so on. 10. Enter XD -R -NC to reset iLO 2. 11. After iLO 2 resets, log in to iLO 2 again and enter CM at the MP> prompt. 12. To confirm that DHCP is disabled and display a list of updated LAN configuration settings, enter the LS command. 44 Getting Connected to iLO 2
-
 1
1 -
2
-
3
-
4
-
5
-
6
-
7
-
8
-
9
-
10
-
11
-
12
-
13
-
14
-
15
-
16
-
17
-
18
-
19
-
20
-
21
-
22
-
23
-
24
-
25
-
26
-
27
-
28
-
29
-
30
-
31
-
32
-
33
-
34
-
35
-
36
-
37
-
38
-
 39
39 -
 40
40 -
 41
41 -
 42
42 -
 43
43 -
 44
44 -
 45
45 -
 46
46 -
 47
47 -
 48
48 -
 49
49 -
50
-
51
-
52
-
53
-
54
-
55
-
56
-
57
-
58
-
59
-
60
-
61
-
62
-
63
-
64
-
65
-
66
-
67
-
68
-
69
-
70
-
71
-
72
-
73
-
74
-
75
-
76
-
77
-
78
-
79
-
80
-
81
-
82
-
83
-
84
-
85
-
86
-
87
-
88
-
89
-
90
-
91
-
92
-
93
-
94
-
95
-
96
-
97
-
98
-
99
-
100
-
101
-
102
-
103
-
104
-
105
-
106
-
107
-
108
-
109
-
110
-
111
-
112
-
113
-
114
-
115
-
116
-
117
-
118
-
119
-
120
-
121
-
122
-
123
-
124
-
125
-
126
-
127
-
128
-
129
-
130
-
131
-
132
-
133
-
134
-
135
-
136
-
137
-
138
-
139
-
140
-
141
-
142
-
143
-
144
-
145
-
146
-
147
-
148
-
149
-
150
-
151
-
152
-
153
-
154
-
155
-
156
-
157
-
158
-
159
-
160
-
161
-
162
-
163
-
164
-
165
-
166
-
167
-
168
-
169
-
170
-
171
-
172
-
173
-
174
-
175
-
176
-
177
-
178
-
179
-
180
-
181
-
182
-
183
-
184
-
185
-
186
-
187
-
188
-
189
-
190
-
191
-
192
-
193
-
194
-
195
-
196
-
197
-
198
-
199
-
200
-
201
-
202
-
203
-
204
-
205
-
206
-
207
-
208
-
209
-
210
-
211
-
212
-
213
-
214
-
215
-
216
-
217
-
218
-
219
-
220
-
221
-
222
-
223
-
224
-
225
-
226
-
227
-
228
-
229
 |
 |
