HP Integrity rx2800 Smart Setup Scripting Toolkit Administrator's Guide 4.0 - Page 17
Setting up the boot mechanism, Creating a bootable CD/DVD or virtual media, Virtual Media, Launch
 |
View all HP Integrity rx2800 manuals
Add to My Manuals
Save this manual to your list of manuals |
Page 17 highlights
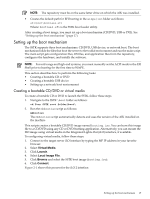
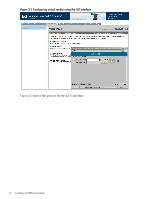
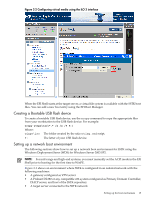
NOTE: The repository must be on the same letter drive on which the AIK was installed. • Creates the default path for EFI booting in the winpe\iso folder as follows: efi\boot\bootia64.efi Where: bootia64.efi is the SSTK boot loader utility. After creating a boot image, you must set up a boot mechanism (CD/DVD, USB or PXE). See "Setting up the boot mechanism" (page 17). Setting up the boot mechanism The SSTK supports three boot mechanisms: CD/DVD, USB device, or network boot. The boot mechanism holds the files that boot the server to the toolkit environment and run the main script. The main script gets configuration files, OS files, and application files from the repository, configures the hardware, and installs the software. NOTE: For mid-range and high-end systems, you must manually set the ACPI mode in the EFI Shell prior to booting for the first time to WinPE. This section describes how to perform the following tasks: • Creating a bootable CD or DVD • Creating a bootable USB device • Setting up a network boot environment Creating a bootable CD/DVD or virtual media To create a bootable CD or DVD to launch the SSTK, follow these steps 1. Navigate to the SSTK \boot folder as follows: cd Your SSTK root folder\boot\ 2. Run the mkbootiso script as follows: mkbootiso The mkbootiso script automatically detects and uses the version of the AIK installed on the machine This scripts creates a bootable CD/DVD image named bootimg.iso. You can burn this image file to a CD/DVD using any CD or DVD-burning application. Alternatively, you can mount the ISO image using virtual media in the Integrated Lights-Out (iLO) interface, if available. To configuring virtual media, follow these steps: 1. Connect to the target server iLO interface by typing the MP IP address in your favorite browser. 2. Select Virtual Media. 3. Click Launch. 4. Select Local Image File. 5. Click Browse and select the SSTK boot image (bootimg.iso). 6. Click Connect. Figure 2-1 shows this process for the iLO 2 interface. Setting up the boot mechanism 17
-
 1
1 -
2
-
3
-
4
-
5
-
6
-
7
-
8
-
9
-
10
-
11
-
 12
12 -
 13
13 -
 14
14 -
 15
15 -
 16
16 -
 17
17 -
 18
18 -
 19
19 -
 20
20 -
 21
21 -
 22
22 -
23
-
24
-
25
-
26
-
27
-
28
-
29
-
30
-
31
-
32
-
33
-
34
-
35
-
36
-
37
-
38
-
39
-
40
-
41
-
42
-
43
-
44
-
45
-
46
-
47
-
48
-
49
-
50
-
51
-
52
-
53
-
54
-
55
-
56
-
57
-
58
-
59
-
60
-
61
-
62
-
63
-
64
-
65
 |
 |
