HP K550 User's Guide - Page 96
To set up wireless communication using SecureEasySetup (SES), Install, Connection Type - reset
 |
UPC - 882780070127
View all HP K550 manuals
Add to My Manuals
Save this manual to your list of manuals |
Page 96 highlights
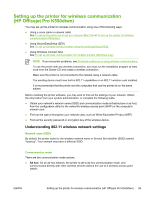
5. Insert the Starter CD into the CD drive. The CD menu runs automatically. If the CD menu does not start automatically, double-click the setup icon on the Starter CD. 6. On the CD menu, click Install and follow the onscreen instructions. 7. On the Connection Type screen, select the option to connect through network and click Next. 8. Follow the onscreen instructions to complete the installation, and when prompted, disconnect the cable. To set up wireless communication using SecureEasySetup (SES) NOTE If your wireless router is SES capable, see the following instructions to set up using SES. 1. Set up the printer hardware (see the setup poster and the getting started guide). 2. Press the SES button on the wireless router. 3. Within 2 minutes, press and hold (Configuration Page button) on the printer, press (Resume button) once, and release (Configuration Page button). The Configuration Page light blinks. 4. Wait about 2 minutes, and press (Configuration Page button) to print the printer's configuration page and verify that the SES settings match the router's wireless settings. NOTE If the connection fails, you might need to reset the printer's network settings (see the instructions under Troubleshooting tips and resources) and repeat the steps. See also Problems setting up or using wireless communication. 88 Chapter 6 Configuring and managing the printer ENWW
-
 1
1 -
2
-
3
-
4
-
5
-
6
-
7
-
8
-
9
-
10
-
11
-
12
-
13
-
14
-
15
-
16
-
17
-
18
-
19
-
20
-
21
-
22
-
23
-
24
-
25
-
26
-
27
-
28
-
29
-
30
-
31
-
32
-
33
-
34
-
35
-
36
-
37
-
38
-
39
-
40
-
41
-
42
-
43
-
44
-
45
-
46
-
47
-
48
-
49
-
50
-
51
-
52
-
53
-
54
-
55
-
56
-
57
-
58
-
59
-
60
-
61
-
62
-
63
-
64
-
65
-
66
-
67
-
68
-
69
-
70
-
71
-
72
-
73
-
74
-
75
-
76
-
77
-
78
-
79
-
80
-
81
-
82
-
83
-
84
-
85
-
86
-
87
-
88
-
89
-
90
-
 91
91 -
 92
92 -
 93
93 -
 94
94 -
 95
95 -
 96
96 -
 97
97 -
 98
98 -
 99
99 -
 100
100 -
 101
101 -
102
-
103
-
104
-
105
-
106
-
107
-
108
-
109
-
110
-
111
-
112
-
113
-
114
-
115
-
116
-
117
-
118
-
119
-
120
-
121
-
122
-
123
-
124
-
125
-
126
-
127
-
128
-
129
-
130
-
131
-
132
-
133
-
134
-
135
-
136
-
137
-
138
 |
 |