HP ML115 HP ProLiant ML115 Generation 5 Server Maintenance and Service Guide - Page 57
System fan, then connect the power cables to all installed drives.
 |
UPC - 884962252765
View all HP ML115 manuals
Add to My Manuals
Save this manual to your list of manuals |
Page 57 highlights
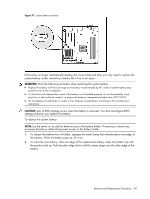
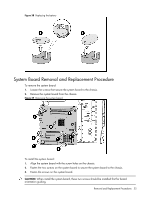
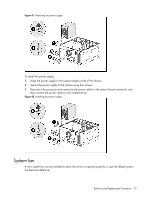
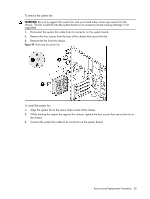
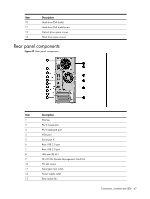
Figure 41 Removing the power supply To install the power supply: 1. Align the power supply to the support edges inside of the chassis. 2. Secure the power supply to the chassis using four screws. 3. Reconnect the processor and system board power cables to the system board connectors and then connect the power cables to all installed drives. Figure 42 Installing the power supply System fan A new system fan can be installed to allow the server to operate properly in case the default system fan becomes defective. Removal and Replacement Procedures 57
-
 1
1 -
2
-
3
-
4
-
5
-
6
-
7
-
8
-
9
-
10
-
11
-
12
-
13
-
14
-
15
-
16
-
17
-
18
-
19
-
20
-
21
-
22
-
23
-
24
-
25
-
26
-
27
-
28
-
29
-
30
-
31
-
32
-
33
-
34
-
35
-
36
-
37
-
38
-
39
-
40
-
41
-
42
-
43
-
44
-
45
-
46
-
47
-
48
-
49
-
50
-
51
-
 52
52 -
 53
53 -
 54
54 -
 55
55 -
 56
56 -
 57
57 -
 58
58 -
 59
59 -
 60
60 -
 61
61 -
 62
62 -
63
-
64
-
65
-
66
-
67
-
68
-
69
-
70
-
71
-
72
-
73
-
74
-
75
-
76
-
77
-
78
-
79
-
80
-
81
-
82
-
83
-
84
-
85
-
86
-
87
-
88
 |
 |

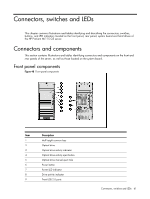
Removal and Replacement Procedures
57
Figure 41
Removing the power supply
To install the power supply:
1.
Align the power supply to the support edges inside of the chassis.
2.
Secure the power supply to the chassis using four screws.
3.
Reconnect the processor and system board power cables to the system board connectors and
then connect the power cables to all installed drives.
Figure 42
Installing the power supply
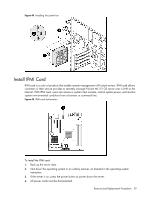
System fan
A new system fan can be installed to allow the server to operate properly in case the default system
fan becomes defective.