HP Notebook 100 Compaq Notebook 100 Series Reference Guide - Page 11
Using Battery Power, Starting Up, configuration and the configuration information stored in CMOS RAM
 |
View all HP Notebook 100 manuals
Add to My Manuals
Save this manual to your list of manuals |
Page 11 highlights
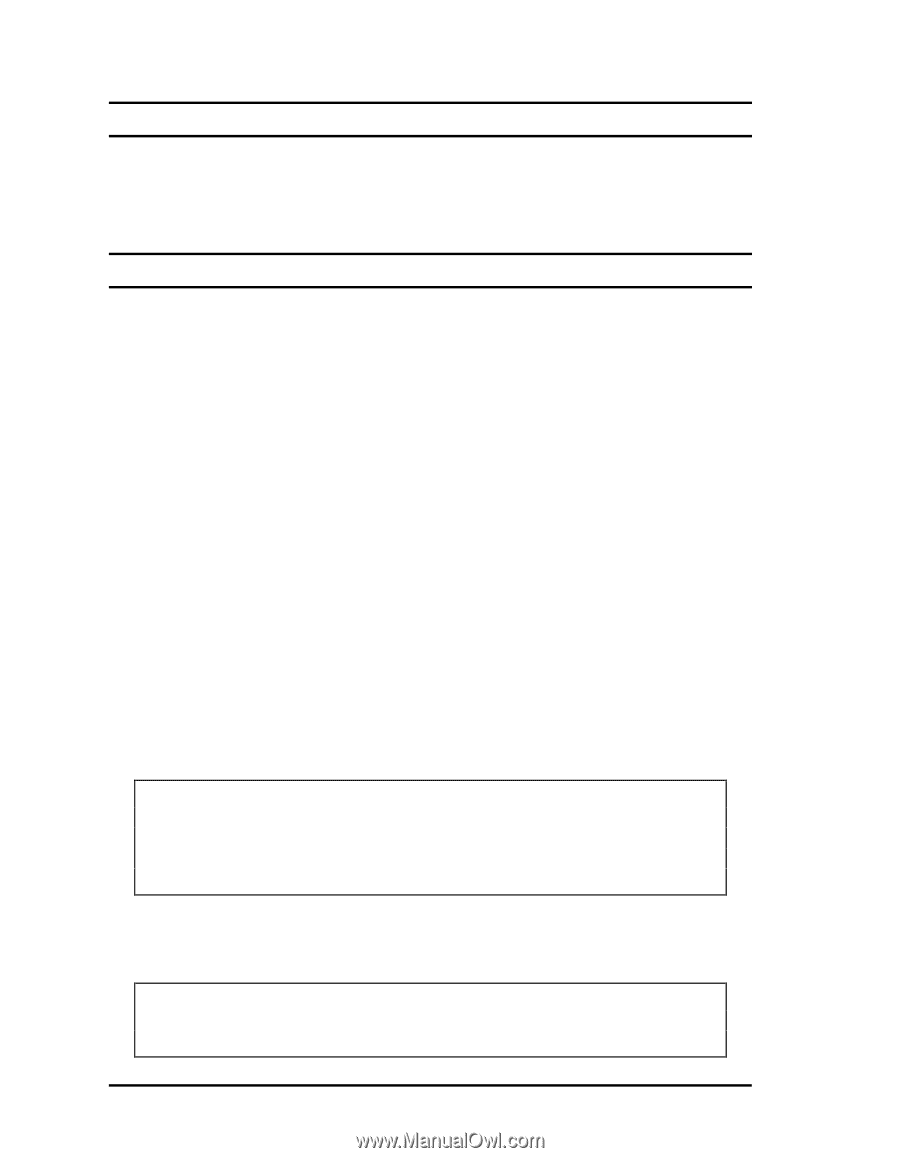
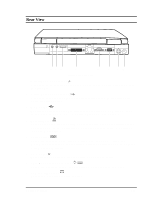
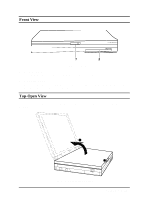
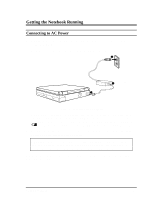
Using Battery Power When the AC adapter is not connected, you can use battery power. To assure optimum battery life, fully charge and discharge the battery at least once and then fully charge the battery before you first use battery power. (For more information on using battery power, see Chapter 3.) Starting Up The notebook starts up with an operating system preinstalled on the hard drive, a CD-ROM, or a diskette. The notebook will automatically load the operating system after you turn it on. This process is called booting. Follow these steps to start the system. 1. Open the notebook by sliding the display latch toward the right and lifting up the display. 2. Turn on the notebook by pressing the power button (Figure 1-2 #2) on the left side of the notebook. 3. Tilt the display forward or backward to a comfortable viewing position. You can also adjust the brightness of the display to attain display clarity. To adjust brightness, press [Fn]+[F6] or [Fn]+[F7]. 4. Each time the notebook is turned on, it performs a Power-On Self Test (POST). This checks the status of major notebook devices including the system board, memory, video, keyboard, and disk drive. Some status messages from POST will appear on the screen. If the POST has detected a mismatch between the actual hardware configuration and the configuration information stored in CMOS RAM, you will see error message(s) telling you to run the Setup Configuration Utility (SCU) program. (See Chapter 5 for instructions on running SCU.) NOTE: The SCU program allows you to enter the configuration information and store it in CMOS RAM. The configuration information is needed by the notebook to identify the installed devices. Under SCU, you can also activate certain features such as Power Saving and Security. 5. When POST successfully completes its check, the notebook first tries to boot from drive A, C, or CD-ROM depending on the "Boot Sequence" setting in the SCU program. NOTE: To avoid viruses brought in by diskettes, boot the system from the hard disk instead of a diskette. If you must boot up from drive A, make sure the booting diskette is clean. 1-10 Getting Started
-
 1
1 -
2
-
3
-
4
-
5
-
 6
6 -
 7
7 -
 8
8 -
 9
9 -
 10
10 -
 11
11 -
 12
12 -
 13
13 -
 14
14 -
 15
15 -
 16
16 -
17
-
18
-
19
-
20
-
21
-
22
-
23
-
24
-
25
-
26
-
27
-
28
-
29
-
30
-
31
-
32
-
33
-
34
-
35
-
36
-
37
-
38
-
39
-
40
-
41
-
42
-
43
-
44
-
45
-
46
-
47
-
48
-
49
-
50
-
51
-
52
-
53
-
54
-
55
-
56
-
57
-
58
-
59
-
60
-
61
 |
 |