HP Notebook 100 Compaq Notebook 100 Series Reference Guide - Page 32
System Expansion, External Connections
 |
View all HP Notebook 100 manuals
Add to My Manuals
Save this manual to your list of manuals |
Page 32 highlights
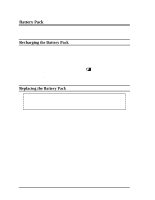
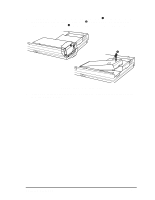
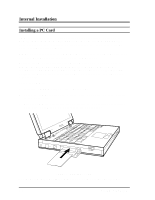
Chapter 4 System Expansion This chapter introduces the optional devices for your notebook provide instructions on how to install some of the devices. External Connections Connectors on the rear and side panels of the notebook allow you to connect external devices. See Figure 1-1 and Figure 1-3 for connector locations and the descriptions that follow. This section provides notes on using some of the connectors. Connecting an External Monitor If you want the benefits of a larger color display screen, you can connect an external VGA-compatible monitor to your notebook. Follow these steps to connect a monitor to your notebook: 1. Make sure that your monitor is configured for analog operation and that the voltage setting corresponds to that of the electrical outlet. Consult the monitor's manual for instructions. 2. Make sure the notebook is not turned on or connected to AC power. 3. Open the cover on the rear of the notebook. Plug the monitor's D-type signal connector to the notebook's VGA port, marked as (Figure 1-3 #7). 4. Plug one end of the monitor's power cord into the power socket on the monitor and the other end to an electrical outlet. 5. To use the monitor, turn on the monitor before turning on the notebook. 6. The monitor should respond by default. If not, you can switch the display to the monitor by pressing [Fn]+[F5]. Supplied with your notebook are several video utilities and drivers that offer extended video modes. See Chapter 6 for additional information. System Expansion 4-1
-
 1
1 -
2
-
3
-
4
-
5
-
6
-
7
-
8
-
9
-
10
-
11
-
12
-
13
-
14
-
15
-
16
-
17
-
18
-
19
-
20
-
21
-
22
-
23
-
24
-
25
-
26
-
 27
27 -
 28
28 -
 29
29 -
 30
30 -
 31
31 -
 32
32 -
 33
33 -
 34
34 -
 35
35 -
 36
36 -
 37
37 -
38
-
39
-
40
-
41
-
42
-
43
-
44
-
45
-
46
-
47
-
48
-
49
-
50
-
51
-
52
-
53
-
54
-
55
-
56
-
57
-
58
-
59
-
60
-
61
 |
 |