HP Notebook 100 Compaq Notebook 100 Series Reference Guide - Page 5
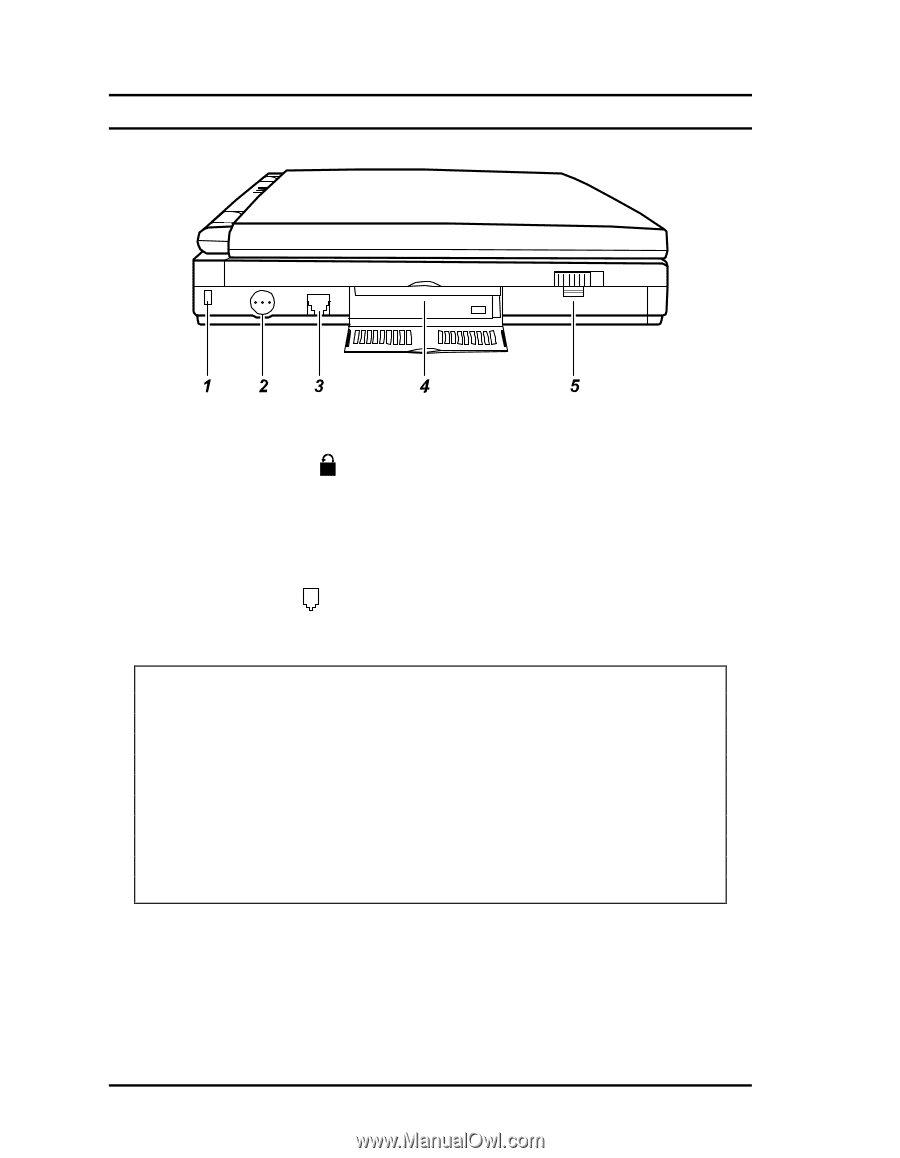
Left-Side View, Cable Lock Anchor, Power Button, RJ-11 Connector, PC Card Slot, Battery Pack
 |
View all HP Notebook 100 manuals
Add to My Manuals
Save this manual to your list of manuals |
Page 5 highlights
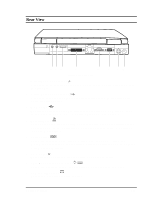
Left-Side View Figure 1-2. Left-Side View 1. Cable Lock Anchor ( ) This rectangular hole can be used as an anchor point for a security cable. Use a cable to lock your notebook to an appropriate location for security. 2. Power Button )!!!!!* Pressing this button turns the notebook power ON or OFF. 3. RJ-11 Connector ( ) (available on select models) With the RJ-11 connector, the standard telephone line can be connected to your notebook. WARNING: 1. Never install telephone wiring during a lightning storm. 2. Never install telephone jacks in wet locations unless the jack is specifically designed for wet locations. 3. Never touch uninsulated telephone wires or terminals unless the telephone line has been disconnected at the network in terface. 4. Use caution when installing or modifying telephone lines. 5. Avoid using the telephone function during an electrical storm. There may be a remote risk of electric shock from lightning. 6. Do not use the telephone function to report a gas leak in the vicinity of the leak. 4. PC Card Slot Open the display to access the PC Card slot. (See "Installing a PC Card" in Chapter 4 for more information.) 5. Battery Pack Inside is the battery pack, which supplies power to your notebook when external power is not connected. (See Chapter 3 for more information.) 1-4 Getting Started
-
 1
1 -
 2
2 -
 3
3 -
 4
4 -
 5
5 -
 6
6 -
 7
7 -
 8
8 -
 9
9 -
 10
10 -
 11
11 -
12
-
13
-
14
-
15
-
16
-
17
-
18
-
19
-
20
-
21
-
22
-
23
-
24
-
25
-
26
-
27
-
28
-
29
-
30
-
31
-
32
-
33
-
34
-
35
-
36
-
37
-
38
-
39
-
40
-
41
-
42
-
43
-
44
-
45
-
46
-
47
-
48
-
49
-
50
-
51
-
52
-
53
-
54
-
55
-
56
-
57
-
58
-
59
-
60
-
61
 |
 |