HP Officejet K7100 User Guide - Page 113
Resolving automatic two-sided printing problems
 |
View all HP Officejet K7100 manuals
Add to My Manuals
Save this manual to your list of manuals |
Page 113 highlights
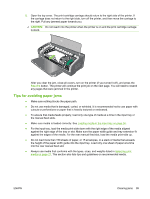
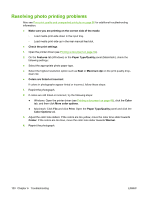
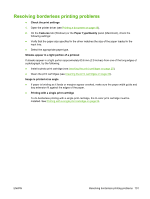
Resolving automatic two-sided printing problems NOTE: You can print on both sides manually for unsupported media types. See Performing manual duplexing on page 66. ● Paper jam occurs inside the duplex unit See Clearing jams on page 97 for instructions. ● Option for printing on both sides cannot be selected ◦ Make sure the duplex unit is installed on the printer. Right-click the printer icon. Select Properties. From the Device Settings tab, select Duplex Unit. Verify that the duplex unit is installed. ◦ Make sure the duplex unit is enabled in the printer driver. See Performing auto-duplexing on page 67. ◦ Make sure the media type and size selected in the printer driver are supported by the duplex unit. See Understanding specifications for supported media on page 27. ● Only one side of the page prints when the print on both sides option is selected ◦ Make sure the correct print options are set in both the printer driver and the application you are using. See Performing auto-duplexing on page 67. ◦ Make sure the photo paper is not curled. Photo paper should be flat before printing. See guidelines under Printing digital photographs on page 41. ◦ Make sure the media type and size selected in the printer driver are supported by the duplex unit. See Understanding specifications for supported media on page 27. ● Binding margin is in the wrong place 1. Open the printer driver (see Printing a document on page 49). 2. Do one of the following: ● Windows: Click the Features tab. ● Macintosh: Open the Two-Sided Printing Panel. 3. Do one of the following: ● Windows: Select Flip Pages Up for binding along the top (tablet binding). Select a booklet layout from the Booklet Layout drop-down list for binding along the side (book binding). ● Macintosh: Select the binding orientation you desire (select the appropriate icon). See Printing on both sides (duplexing) on page 66 for more information. ● Paper size changes when the print on both sides option is selected Make sure the paper size is supported by the duplex unit, and make sure the media type and size selected in the printer driver are supported by the duplex unit. See Understanding specifications for supported media on page 27. ENWW Resolving automatic two-sided printing problems 103
-
 1
1 -
2
-
3
-
4
-
5
-
6
-
7
-
8
-
9
-
10
-
11
-
12
-
13
-
14
-
15
-
16
-
17
-
18
-
19
-
20
-
21
-
22
-
23
-
24
-
25
-
26
-
27
-
28
-
29
-
30
-
31
-
32
-
33
-
34
-
35
-
36
-
37
-
38
-
39
-
40
-
41
-
42
-
43
-
44
-
45
-
46
-
47
-
48
-
49
-
50
-
51
-
52
-
53
-
54
-
55
-
56
-
57
-
58
-
59
-
60
-
61
-
62
-
63
-
64
-
65
-
66
-
67
-
68
-
69
-
70
-
71
-
72
-
73
-
74
-
75
-
76
-
77
-
78
-
79
-
80
-
81
-
82
-
83
-
84
-
85
-
86
-
87
-
88
-
89
-
90
-
91
-
92
-
93
-
94
-
95
-
96
-
97
-
98
-
99
-
100
-
101
-
102
-
103
-
104
-
105
-
106
-
107
-
 108
108 -
 109
109 -
 110
110 -
 111
111 -
 112
112 -
 113
113 -
 114
114 -
 115
115 -
 116
116 -
 117
117 -
 118
118 -
119
-
120
-
121
-
122
-
123
-
124
-
125
-
126
-
127
-
128
-
129
-
130
-
131
-
132
-
133
-
134
-
135
-
136
-
137
-
138
-
139
-
140
-
141
-
142
-
143
-
144
 |
 |