HP Officejet K7100 User Guide - Page 31
Aligning the print cartridges, installing the new print cartridge.
 |
View all HP Officejet K7100 manuals
Add to My Manuals
Save this manual to your list of manuals |
Page 31 highlights
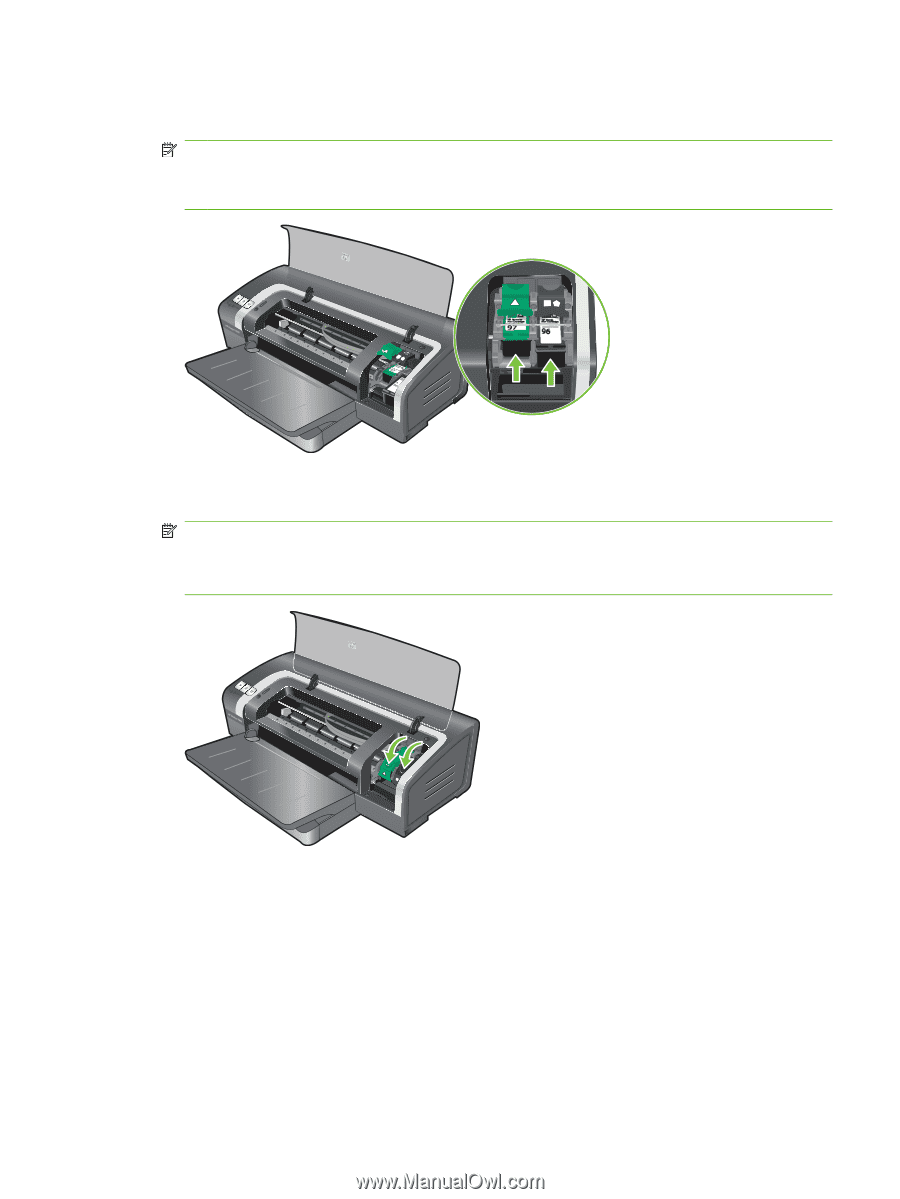
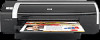
4. Hold the print cartridge with the copper contacts facing the printer, and then slide the print cartridge into the cradle. NOTE: Depending on the cartridge size, they may not align with each other. If you have trouble inserting the print cartridge after lifting the carriage latch, verify the printer is on and wait a few seconds for the carriage to disengage before inserting the print cartridge. 5. Push down on the print cartridge latch until it snaps closed. Make sure the latch does not spring back open. NOTE: If you are installing a new print cartridge, the printer will automatically align the print cartridges and use one sheet of paper to print an alignment page. If you have higher-quality photo media loaded in the input tray, you may want to load a sheet of plain paper before installing the new print cartridge. 6. Close the top cover. Aligning the print cartridges The printer automatically aligns print cartridges whenever a new print cartridge is installed. However, if your printout is grainy, has stray dots, or jagged edges, you can realign the print cartridges. ENWW Using the print cartridges 21
-
 1
1 -
2
-
3
-
4
-
5
-
6
-
7
-
8
-
9
-
10
-
11
-
12
-
13
-
14
-
15
-
16
-
17
-
18
-
19
-
20
-
21
-
22
-
23
-
24
-
25
-
 26
26 -
 27
27 -
 28
28 -
 29
29 -
 30
30 -
 31
31 -
 32
32 -
 33
33 -
 34
34 -
 35
35 -
 36
36 -
37
-
38
-
39
-
40
-
41
-
42
-
43
-
44
-
45
-
46
-
47
-
48
-
49
-
50
-
51
-
52
-
53
-
54
-
55
-
56
-
57
-
58
-
59
-
60
-
61
-
62
-
63
-
64
-
65
-
66
-
67
-
68
-
69
-
70
-
71
-
72
-
73
-
74
-
75
-
76
-
77
-
78
-
79
-
80
-
81
-
82
-
83
-
84
-
85
-
86
-
87
-
88
-
89
-
90
-
91
-
92
-
93
-
94
-
95
-
96
-
97
-
98
-
99
-
100
-
101
-
102
-
103
-
104
-
105
-
106
-
107
-
108
-
109
-
110
-
111
-
112
-
113
-
114
-
115
-
116
-
117
-
118
-
119
-
120
-
121
-
122
-
123
-
124
-
125
-
126
-
127
-
128
-
129
-
130
-
131
-
132
-
133
-
134
-
135
-
136
-
137
-
138
-
139
-
140
-
141
-
142
-
143
-
144
 |
 |