HP Officejet Pro 8100 User Guide - Page 26
Turn on accessories in the printer driver, To turn on accessories (Windows) - software
 |
View all HP Officejet Pro 8100 manuals
Add to My Manuals
Save this manual to your list of manuals |
Page 26 highlights
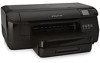
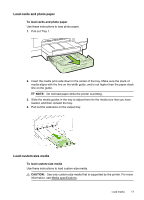
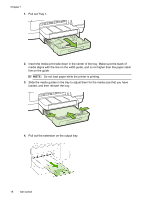
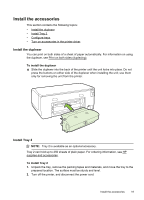
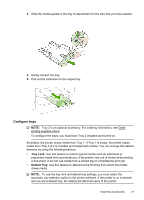
Chapter 1 Tray 2 is designed to hold only plain paper. The following table lists possible ways you can use the tray settings to meet your printing needs. I want to... Follow these steps Load both trays with the same media, and • have the printer pick media from one tray if the other one is empty. • Load media in Tray 1 and Tray 2. For more information, see Load media. Make sure tray lock is disabled. Have both special media (such as transparencies or letterhead) and plain paper loaded in the trays. • Load special media in Tray 1 and plain paper in Tray 2. • Make sure the default tray is set to Tray 2. • Make sure tray lock is set to Tray 1. Load media in both trays but have the printer pick media from a specific tray first. • Load media in Tray 1 and Tray 2. • Make sure default tray is set to the appropriate tray. To configure the trays 1. Make sure the printer is turned on. 2. Perform one of the following: • Embedded web server: Click the Settings tab and click Paper Handling in the left panel. • Print driver (Windows): Click the Printer services button on the Features tab, and then select Paper Handling. • HP Printer Utility (Mac OS X): Click Paper Handling from the Printer Settings panel. 3. Click OK or Apply after changing the desired tray settings. Turn on accessories in the printer driver • To turn on accessories (Windows) • To turn on accessories (Mac OS X) To turn on accessories (Windows) 1. Click Start, point to Settings, and then click Printers or Printers and Faxes. - Or Click Start, click Control Panel, and then double-click Printers. 2. Right-click the printer icon, and then click Properties. 3. Select the Device Settings tab. Click the accessory that you want to turn on, click Installed from the drop-down menu, and then click OK. To turn on accessories (Mac OS X) Mac OS X automatically turns on all accessories in the printer driver when you install the printer software. If you add a new accessory later, follow these steps: 1. Open the System Preferences and then select Print & Fax. 2. Select the printer from list of printers, and then click Options & Supplies. 22 Get started
-
 1
1 -
2
-
3
-
4
-
5
-
6
-
7
-
8
-
9
-
10
-
11
-
12
-
13
-
14
-
15
-
16
-
17
-
18
-
19
-
20
-
 21
21 -
 22
22 -
 23
23 -
 24
24 -
 25
25 -
 26
26 -
 27
27 -
 28
28 -
 29
29 -
 30
30 -
 31
31 -
32
-
33
-
34
-
35
-
36
-
37
-
38
-
39
-
40
-
41
-
42
-
43
-
44
-
45
-
46
-
47
-
48
-
49
-
50
-
51
-
52
-
53
-
54
-
55
-
56
-
57
-
58
-
59
-
60
-
61
-
62
-
63
-
64
-
65
-
66
-
67
-
68
-
69
-
70
-
71
-
72
-
73
-
74
-
75
-
76
-
77
-
78
-
79
-
80
-
81
-
82
-
83
-
84
-
85
-
86
-
87
-
88
-
89
-
90
-
91
-
92
-
93
-
94
-
95
-
96
-
97
-
98
-
99
-
100
-
101
-
102
-
103
-
104
-
105
-
106
-
107
-
108
-
109
-
110
-
111
-
112
-
113
-
114
-
115
-
116
-
117
-
118
-
119
-
120
-
121
-
122
-
123
-
124
-
125
-
126
-
127
-
128
-
129
-
130
-
131
-
132
-
133
-
134
-
135
-
136
-
137
-
138
-
139
-
140
-
141
-
142
-
143
-
144
-
145
-
146
 |
 |