HP StorageWorks MSA1510i HP StorageWorks 1510i Modular Smart Array installatio - Page 83
Update, Controller, Flash Firmware, Browse, FIRMWARE FLASH DONE, FIRMWARE FLASH DONE ON BOX <n>
 |
View all HP StorageWorks MSA1510i manuals
Add to My Manuals
Save this manual to your list of manuals |
Page 83 highlights
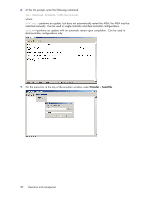
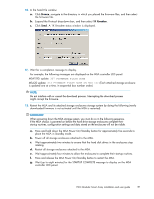
7. From within the SMU, select Update > Controller > Flash Firmware. 8. Under the Flash Firmware banner, click Browse and navigate to the location of the previously-obtained firmware file, and then click OK. 9. Wait for a completion message to display. For example, the following messages are displayed on the MSA controller LCD panel: MSA1510i update: 307 FIRMWARE FLASH DONE MSA20 update: 313 FIRMWARE FLASH DONE ON BOX (Each attached storage enclosure is updated one at a time, in sequential box number order.) NOTE: Do not interfere with or cancel the download process. Interrupting the download process might corrupt the firmware. 10. Restart the MSA and its attached storage enclosures storage system by doing the following (newly downloaded firmware is not activated until the MSA is restarted): IMPORTANT: When powering down the MSA storage system, you must do so in the following sequence. If the MSA chassis is powered on before the hard drive storage enclosures complete their startup routines, configuration settings and data stored on the enclosures will not be visible. a. Press and hold down the MSA Power on/Standby button for approximately five seconds to place the MSA in Standby mode. b. Power off all storage enclosures attached to the MSA. c. Wait approximately two minutes to ensure that the hard disk drives in the enclosures stop rotating. d. Restart all storage enclosures attached to the MSA. e. Wait approximately four minutes to allow the enclosures to complete their startup routines. f. Press and release the MSA Power on/Standby button to restart the MSA. g. Wait (up to eight minutes) for the STARTUP COMPLETE message to display on the MSA controller LCD panel. 1510i Modular Smart Array installation and user guide 83
-
 1
1 -
2
-
3
-
4
-
5
-
6
-
7
-
8
-
9
-
10
-
11
-
12
-
13
-
14
-
15
-
16
-
17
-
18
-
19
-
20
-
21
-
22
-
23
-
24
-
25
-
26
-
27
-
28
-
29
-
30
-
31
-
32
-
33
-
34
-
35
-
36
-
37
-
38
-
39
-
40
-
41
-
42
-
43
-
44
-
45
-
46
-
47
-
48
-
49
-
50
-
51
-
52
-
53
-
54
-
55
-
56
-
57
-
58
-
59
-
60
-
61
-
62
-
63
-
64
-
65
-
66
-
67
-
68
-
69
-
70
-
71
-
72
-
73
-
74
-
75
-
76
-
77
-
 78
78 -
 79
79 -
 80
80 -
 81
81 -
 82
82 -
 83
83 -
 84
84 -
 85
85 -
 86
86 -
 87
87 -
 88
88 -
89
-
90
-
91
-
92
-
93
-
94
-
95
-
96
-
97
-
98
-
99
-
100
-
101
-
102
-
103
-
104
-
105
-
106
-
107
-
108
-
109
-
110
-
111
-
112
-
113
-
114
-
115
-
116
-
117
-
118
-
119
-
120
-
121
-
122
-
123
-
124
-
125
-
126
-
127
-
128
-
129
-
130
-
131
-
132
-
133
-
134
-
135
-
136
-
137
-
138
-
139
-
140
-
141
-
142
-
143
-
144
-
145
-
146
-
147
-
148
-
149
-
150
-
151
-
152
-
153
-
154
-
155
-
156
-
157
-
158
-
159
-
160
 |
 |
