HP Tc4100 hp server tc4100 operation and maintenance guide (English, 2.1) - Page 109
Installing the Fan Tray, Air Scoop, Fan Tray, Thumbscrews
 |
View all HP Tc4100 manuals
Add to My Manuals
Save this manual to your list of manuals |
Page 109 highlights
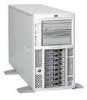
Chapter 7 3. Remove the fan tray by loosening the two thumbscrews holding it in place. Replacing Parts Air Scoop Thumbscrews Fan Tray Figure 7-5. Removing the Fan Tray 4. Lift the fan tray up and out of the chassis. Installing the Fan Tray Install the new fan tray and air scoop, then reverse the steps listed above to reassemble the server. Installing the Fan Assembly Install the new fan assembly then reverse the steps listed above to reassemble the server. NOTE Wear a wrist strap and use a static-dissipating work surface connected to the chassis when handling components. Ensure that the metal of the wrist strap contacts your skin. 107
-
 1
1 -
2
-
3
-
4
-
5
-
6
-
7
-
8
-
9
-
10
-
11
-
12
-
13
-
14
-
15
-
16
-
17
-
18
-
19
-
20
-
21
-
22
-
23
-
24
-
25
-
26
-
27
-
28
-
29
-
30
-
31
-
32
-
33
-
34
-
35
-
36
-
37
-
38
-
39
-
40
-
41
-
42
-
43
-
44
-
45
-
46
-
47
-
48
-
49
-
50
-
51
-
52
-
53
-
54
-
55
-
56
-
57
-
58
-
59
-
60
-
61
-
62
-
63
-
64
-
65
-
66
-
67
-
68
-
69
-
70
-
71
-
72
-
73
-
74
-
75
-
76
-
77
-
78
-
79
-
80
-
81
-
82
-
83
-
84
-
85
-
86
-
87
-
88
-
89
-
90
-
91
-
92
-
93
-
94
-
95
-
96
-
97
-
98
-
99
-
100
-
101
-
102
-
103
-
 104
104 -
 105
105 -
 106
106 -
 107
107 -
 108
108 -
 109
109 -
 110
110 -
 111
111 -
 112
112 -
 113
113 -
 114
114 -
115
-
116
-
117
-
118
-
119
-
120
-
121
-
122
-
123
-
124
-
125
-
126
-
127
-
128
-
129
-
130
 |
 |

107
Chapter 7
Replacing Parts
3.
Remove the fan tray by loosening the two thumbscrews holding it in place.
Figure 7-5.
Removing the Fan Tray
4.
Lift the fan tray up and out of the chassis.
Installing the Fan Tray
Install the new fan tray and air scoop, then reverse the steps listed above to reassemble the server.
Installing the Fan Assembly
Install the new fan assembly then reverse the steps listed above to reassemble the server.
NOTE
Wear a wrist strap and use a static-dissipating work surface connected to the chassis
when handling components. Ensure that the metal of the wrist strap contacts your skin.
Air Scoop
Fan Tray
Thumbscrews