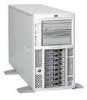
HP Tc4100 hp server tc4100 operation and maintenance guide (English, 2.1) - Page 26
Remove top cover and press, down on two self-locking tabs - power distribution
 |
View all HP Tc4100 manuals
Add to My Manuals
Save this manual to your list of manuals |
Page 26 highlights
Chapter 3 Installing and Configuring 11. Press down on the two self-locking tabs as shown in Figure 3-3 to release the bezel from the chassis. 1 2 Note: Remove top cover and press 2 down on two self-locking tabs to release the bezel. Bottom tabs will slide out without removing the bottom cover. 3 3 4 Figure 3-2. Removing the HP Server tc4100's Bezel 12. Pull the bezel away from the front of the HP Server tc4100. WARNING Do not operate the HP Server tc4100 with the bezel removed due to the possibility of damaging the system with Electrostatic Discharge (ESD) or with foreign objects shorting out exposed electronic circuits. 13. If necessary, remove the bottom cover by lifting the plastic latch and pulling it forward. See Figure 3-1. The bottom cover only provides access to the Power Distribution Board and Floppy Disk Drive. 14. Support the bottom cover with your free hand, as you pull the cover forward to disengage it, catching it as it falls away from the chassis. 15. To replace the top cover, position the cover's tabs over the respective holes along the top edge on both sides of the chassis. 16. Slide the cover toward the rear. 17. Close the plastic latch. 18. To replace the bottom cover, position the cover's tabs under the respective holes along the bottom edge on both sides of the chassis. 19. Slide the cover toward the rear. 20. Close the plastic latch. 21. Release the safety latches in the slide members on both sides of the chassis. 22. Slide the HP Server tc4100 into the rack. 24
-
 1
1 -
2
-
3
-
4
-
5
-
6
-
7
-
8
-
9
-
10
-
11
-
12
-
13
-
14
-
15
-
16
-
17
-
18
-
19
-
20
-
 21
21 -
 22
22 -
 23
23 -
 24
24 -
 25
25 -
 26
26 -
 27
27 -
 28
28 -
 29
29 -
 30
30 -
 31
31 -
32
-
33
-
34
-
35
-
36
-
37
-
38
-
39
-
40
-
41
-
42
-
43
-
44
-
45
-
46
-
47
-
48
-
49
-
50
-
51
-
52
-
53
-
54
-
55
-
56
-
57
-
58
-
59
-
60
-
61
-
62
-
63
-
64
-
65
-
66
-
67
-
68
-
69
-
70
-
71
-
72
-
73
-
74
-
75
-
76
-
77
-
78
-
79
-
80
-
81
-
82
-
83
-
84
-
85
-
86
-
87
-
88
-
89
-
90
-
91
-
92
-
93
-
94
-
95
-
96
-
97
-
98
-
99
-
100
-
101
-
102
-
103
-
104
-
105
-
106
-
107
-
108
-
109
-
110
-
111
-
112
-
113
-
114
-
115
-
116
-
117
-
118
-
119
-
120
-
121
-
122
-
123
-
124
-
125
-
126
-
127
-
128
-
129
-
130
 |
 |
