HP Tc4100 hp server tc4100 operation and maintenance guide (English, 2.1) - Page 29
Removing the Pedestal, HP Server tc4100 Covers
 |
View all HP Tc4100 manuals
Add to My Manuals
Save this manual to your list of manuals |
Page 29 highlights
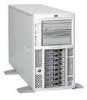
Chapter 3 9. Remove top cover (only if necessary). 8a 7a Installing and Configuring 3 4 6 1 5 3 2 8 7 Figure 3-4. HP Server tc4100 Covers 10. To replace the left side cover, position the cover's tabs next to the respective holes along the outer edge on the side of the chassis. 11. Slide the cover toward the rear. 12. Close the plastic latch. 13. To replace the right side cover, position the cover's tabs next to the respective holes along the outer edge on each side of the chassis. 14. Slide the cover toward the rear. 15. Close the plastic latch. 16. To replace the bezel, insert the tabs at the bottom of the bezel into the slots on the chassis. 17. Swing the top of the bezel toward the chassis until it snaps into place. Removing the Pedestal The pedestal version of the HP Server tc4100 mounts to an anti-tip pedestal, which can be easily removed, if necessary. 1. Perform Steps 1-4 in the previous section, "Removing Covers - Pedestal" on page 25. NOTE The front bezel is shown removed, but the bezel may remain on the chassis while removing the pedestal. 2. Disconnect all cables connected to the rear of the Server that would limit its rotation before continuing. 27
-
 1
1 -
2
-
3
-
4
-
5
-
6
-
7
-
8
-
9
-
10
-
11
-
12
-
13
-
14
-
15
-
16
-
17
-
18
-
19
-
20
-
21
-
22
-
23
-
 24
24 -
 25
25 -
 26
26 -
 27
27 -
 28
28 -
 29
29 -
 30
30 -
 31
31 -
 32
32 -
 33
33 -
 34
34 -
35
-
36
-
37
-
38
-
39
-
40
-
41
-
42
-
43
-
44
-
45
-
46
-
47
-
48
-
49
-
50
-
51
-
52
-
53
-
54
-
55
-
56
-
57
-
58
-
59
-
60
-
61
-
62
-
63
-
64
-
65
-
66
-
67
-
68
-
69
-
70
-
71
-
72
-
73
-
74
-
75
-
76
-
77
-
78
-
79
-
80
-
81
-
82
-
83
-
84
-
85
-
86
-
87
-
88
-
89
-
90
-
91
-
92
-
93
-
94
-
95
-
96
-
97
-
98
-
99
-
100
-
101
-
102
-
103
-
104
-
105
-
106
-
107
-
108
-
109
-
110
-
111
-
112
-
113
-
114
-
115
-
116
-
117
-
118
-
119
-
120
-
121
-
122
-
123
-
124
-
125
-
126
-
127
-
128
-
129
-
130
 |
 |
