HP Tc4100 hp server tc4100 operation and maintenance guide (English, 2.1) - Page 68
Clearing CMOS, Choose Yes and press Enter.
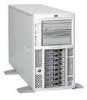 |
View all HP Tc4100 manuals
Add to My Manuals
Save this manual to your list of manuals |
Page 68 highlights
Chapter 3 Installing and Configuring 10. Choose "Yes" and press Enter. Then the HP Server tc4100 reboots. Clearing CMOS The Setup Utility provides a method of clearing CMOS from within the Utility. You may alsoclear the CMOS of the configuration settings using the configuration switch on the system board. Clearing CMOS via the Setup Utility 1. To clear CMOS from the BIOS Setup utility, press F11 during server POST when prompted to "Press F2 to enter Setup". This will provide advanced features in the Setup utility. 2. From the Exit menu, select "Clear system configuration". 3. Press F10 to save and exit the utility. Clearing CMOS via the System Board Switches 1. To clear CMOS configurations using the System Board switch, power down the HP Server tc4100 and open the side panel to gain access to the System Board. 2. On the system board, reset switch 4, on the configuration switch block, from Off (open) to On (closed). See Figure 3-23 and Table 3-3. Shaded rectangle represents the position of slide switch OPEN Open = Off Closed = On 1 2 3 4 5 6 7 8 Figure 3-23. Configuration Switch Block - Clearing CMOS Table 3-3. Configuration Switch Block Switch Number Switch On 1 Not Used 2 Not Used 3 Clear Password 4 Clear CMOS 5 Not Used 6 Not Used 7 Not Used 8 Not Used Switch Off Not Used Not Used Keep Password Keep CMOS Not Used Not Used Not Used Not Used 3. Power up the HP Server tc4100. 4. When you see a message diaplayed indicating that the configurations have been cleared, power off the HP Server tc4100. 66
-
 1
1 -
2
-
3
-
4
-
5
-
6
-
7
-
8
-
9
-
10
-
11
-
12
-
13
-
14
-
15
-
16
-
17
-
18
-
19
-
20
-
21
-
22
-
23
-
24
-
25
-
26
-
27
-
28
-
29
-
30
-
31
-
32
-
33
-
34
-
35
-
36
-
37
-
38
-
39
-
40
-
41
-
42
-
43
-
44
-
45
-
46
-
47
-
48
-
49
-
50
-
51
-
52
-
53
-
54
-
55
-
56
-
57
-
58
-
59
-
60
-
61
-
62
-
 63
63 -
 64
64 -
 65
65 -
 66
66 -
 67
67 -
 68
68 -
 69
69 -
 70
70 -
 71
71 -
 72
72 -
 73
73 -
74
-
75
-
76
-
77
-
78
-
79
-
80
-
81
-
82
-
83
-
84
-
85
-
86
-
87
-
88
-
89
-
90
-
91
-
92
-
93
-
94
-
95
-
96
-
97
-
98
-
99
-
100
-
101
-
102
-
103
-
104
-
105
-
106
-
107
-
108
-
109
-
110
-
111
-
112
-
113
-
114
-
115
-
116
-
117
-
118
-
119
-
120
-
121
-
122
-
123
-
124
-
125
-
126
-
127
-
128
-
129
-
130
 |
 |
