HP Tc4100 hp server tc4100 operation and maintenance guide (English, 2.1) - Page 111
Power Supply 1, or Filler panel, Power Supply Location, Removing Power Supply
 |
View all HP Tc4100 manuals
Add to My Manuals
Save this manual to your list of manuals |
Page 111 highlights
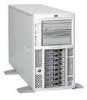
Chapter 7 Replacing Parts Power Supply 1 Power Supply 2 (or Filler panel) Filler panel Figure 7-7. Power Supply Location 2. Remove the AC power cord from the inlet on the supply. 3. Loosen the two captive screws. 4. Grasp the handle and use your thumb to depress the release latch. 5. Pull the power supply out of the chassis. Figure 7-8. Removing Power Supply 109
-
 1
1 -
2
-
3
-
4
-
5
-
6
-
7
-
8
-
9
-
10
-
11
-
12
-
13
-
14
-
15
-
16
-
17
-
18
-
19
-
20
-
21
-
22
-
23
-
24
-
25
-
26
-
27
-
28
-
29
-
30
-
31
-
32
-
33
-
34
-
35
-
36
-
37
-
38
-
39
-
40
-
41
-
42
-
43
-
44
-
45
-
46
-
47
-
48
-
49
-
50
-
51
-
52
-
53
-
54
-
55
-
56
-
57
-
58
-
59
-
60
-
61
-
62
-
63
-
64
-
65
-
66
-
67
-
68
-
69
-
70
-
71
-
72
-
73
-
74
-
75
-
76
-
77
-
78
-
79
-
80
-
81
-
82
-
83
-
84
-
85
-
86
-
87
-
88
-
89
-
90
-
91
-
92
-
93
-
94
-
95
-
96
-
97
-
98
-
99
-
100
-
101
-
102
-
103
-
104
-
105
-
 106
106 -
 107
107 -
 108
108 -
 109
109 -
 110
110 -
 111
111 -
 112
112 -
 113
113 -
 114
114 -
 115
115 -
 116
116 -
117
-
118
-
119
-
120
-
121
-
122
-
123
-
124
-
125
-
126
-
127
-
128
-
129
-
130
 |
 |

109
Chapter 7
Replacing Parts
Figure 7-7.
Power Supply Location
2.
Remove the AC power cord from the inlet on the supply.
3.
Loosen the two captive screws.
4.
Grasp the handle and use your thumb to depress the release latch.
5.
Pull the power supply out of the chassis.
Figure 7-8.
Removing Power Supply
Power Supply 1
Power Supply 2
(or Filler panel)
Filler panel