HP Vectra VE C/xxx 7 HP Vectra VE C/xxx Series 7 PC - Upgrade and Maintenance - Page 26
The connectors are shaped to go in one way only
 |
View all HP Vectra VE C/xxx 7 manuals
Add to My Manuals
Save this manual to your list of manuals |
Page 26 highlights
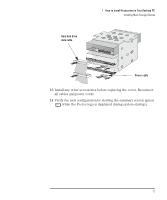
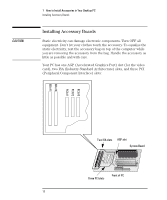
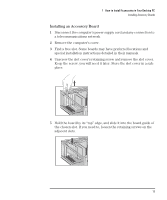
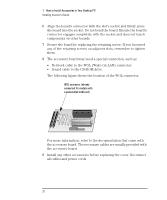
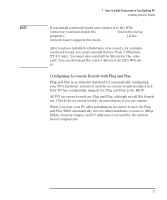
1 How to Install Accessories in Your Desktop PC Installing Mass Storage Devices The connectors are shaped to go in one way only. If you are not sure which connector to use, refer to "Connecting IDE Devices", on page 7. Power cable CD-ROM drive data cable 10 To allow access to the device, remove the plastic plate from the cover by unclipping it on one side and pivoting it out. Store the plate in a safe place. 11 Replace the front bezel. 12 Carefully put the floppy disk drive/hard disk drive tray back into the PC, and secure it in position using the two retaining screws you removed earlier. Reconnect the power and data cables to the floppy disk drive and hard disk drive(s). 16 English
-
 1
1 -
2
-
3
-
4
-
5
-
6
-
7
-
8
-
9
-
10
-
11
-
12
-
13
-
14
-
15
-
16
-
17
-
18
-
19
-
20
-
 21
21 -
 22
22 -
 23
23 -
 24
24 -
 25
25 -
 26
26 -
 27
27 -
 28
28 -
 29
29 -
 30
30 -
 31
31 -
32
-
33
-
34
-
35
-
36
-
37
-
38
-
39
-
40
-
41
-
42
-
43
-
44
-
45
-
46
-
47
-
48
-
49
-
50
-
51
-
52
-
53
-
54
-
55
-
56
-
57
-
58
-
59
-
60
-
61
-
62
-
63
-
64
-
65
-
66
-
67
-
68
-
69
-
70
-
71
-
72
-
73
-
74
-
75
-
76
-
77
-
78
-
79
-
80
-
81
-
82
-
83
-
84
-
85
-
86
-
87
-
88
-
89
-
90
-
91
-
92
-
93
-
94
-
95
-
96
-
97
-
98
-
99
-
100
-
101
-
102
 |
 |

1
How to Install Accessories in Your Desktop PC
Installing Mass Storage Devices
16
English
The connectors are shaped to go in one way only
. If you are not
sure which connector to use, refer to "Connecting IDE Devices", on
page 7.
10
To allow access to the device, remove the plastic plate from the
cover by unclipping it on one side and pivoting it out. Store the plate
in a safe place.
11
Replace the front bezel.
12
Carefully put the floppy disk drive/hard disk drive tray back into the
PC, and secure it in position using the two retaining screws you
removed earlier. Reconnect the power and data cables to the floppy
disk drive and hard disk drive(s).
Power cable
CD-ROM drive
data cable