Konica Minolta AccurioPress C6085 IC-314 User Guide - Page 31
Removing the Print Driver software in Mac OS X, Open Printer Utility
 |
View all Konica Minolta AccurioPress C6085 manuals
Add to My Manuals
Save this manual to your list of manuals |
Page 31 highlights
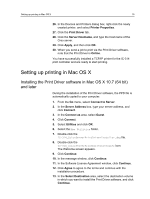
Removing the Print Driver software in Mac OS X 21 Press type PPD file Color Press 101/86 IC-314c.PPD Color Press 83/73 IC-314.PPD Color Press 72/62 IC-314.PPD 5. Click Open. 6. Click Add. The network printer is defined with the PPD file. 7. In the Print & Scan window, double-click the network printer. 8. Click Printer Setup. 9. Click Utility. 10. Click Open Printer Utility. 11. In the Enable Enhanced User Interface list, make sure that On is selected. 12. In the Server Hostname box, type the IP address of the server or the server name. 13. Click Apply, and then click OK. Removing the Print Driver software in Mac OS X Perform this procedure if you need to upgrade to a later software version of the Print Driver software. Requirements: All applications must be closed. 1. From the Go menu, select Connect to Server. 2. In the Server Address box, type your Creo server host name or address, and click Connect. 3. In the Connect as area, select Guest. 4. Click Connect. 5. Select Utilities, and then click OK. 6. Select the Mac Utilities folder. 7. Double-click the CCSUninstall.dmg file. 8. Double-click the CCSUninstall.app file. 9. Close all the running applications on your Mac computer, and then click OK. 10. Select the suitable Creo print driver, and then click OK. 11. If necessary, type your name and password, and then click OK.
-
 1
1 -
2
-
3
-
4
-
5
-
6
-
7
-
8
-
9
-
10
-
11
-
12
-
13
-
14
-
15
-
16
-
17
-
18
-
19
-
20
-
21
-
22
-
23
-
24
-
25
-
 26
26 -
 27
27 -
 28
28 -
 29
29 -
 30
30 -
 31
31 -
 32
32 -
 33
33 -
 34
34 -
 35
35 -
 36
36 -
37
-
38
-
39
-
40
-
41
-
42
-
43
-
44
-
45
-
46
-
47
-
48
-
49
-
50
-
51
-
52
-
53
-
54
-
55
-
56
-
57
-
58
-
59
-
60
-
61
-
62
-
63
-
64
-
65
-
66
-
67
-
68
-
69
-
70
-
71
-
72
-
73
-
74
-
75
-
76
-
77
-
78
-
79
-
80
-
81
-
82
-
83
-
84
-
85
-
86
-
87
-
88
-
89
-
90
-
91
-
92
-
93
-
94
-
95
-
96
-
97
-
98
-
99
-
100
-
101
-
102
-
103
-
104
-
105
-
106
-
107
-
108
-
109
-
110
-
111
-
112
-
113
-
114
-
115
-
116
-
117
-
118
-
119
-
120
-
121
-
122
-
123
-
124
-
125
-
126
-
127
-
128
-
129
-
130
-
131
-
132
-
133
-
134
-
135
-
136
-
137
-
138
-
139
-
140
-
141
-
142
-
143
-
144
-
145
-
146
-
147
-
148
-
149
-
150
-
151
-
152
-
153
-
154
-
155
-
156
-
157
-
158
-
159
-
160
-
161
-
162
-
163
-
164
-
165
-
166
-
167
-
168
-
169
-
170
-
171
-
172
-
173
-
174
-
175
-
176
-
177
-
178
-
179
-
180
-
181
-
182
-
183
-
184
-
185
-
186
-
187
-
188
-
189
-
190
-
191
-
192
-
193
-
194
-
195
-
196
-
197
-
198
-
199
-
200
-
201
-
202
-
203
-
204
-
205
-
206
-
207
-
208
-
209
-
210
-
211
-
212
-
213
-
214
-
215
-
216
-
217
-
218
-
219
-
220
-
221
-
222
-
223
-
224
-
225
-
226
-
227
-
228
-
229
-
230
-
231
-
232
-
233
-
234
-
235
-
236
-
237
-
238
-
239
-
240
-
241
-
242
-
243
-
244
-
245
-
246
-
247
-
248
-
249
-
250
-
251
-
252
-
253
-
254
-
255
-
256
-
257
-
258
-
259
-
260
-
261
-
262
-
263
-
264
-
265
-
266
-
267
-
268
-
269
-
270
-
271
-
272
-
273
-
274
-
275
-
276
-
277
-
278
-
279
-
280
-
281
-
282
-
283
-
284
-
285
-
286
-
287
-
288
-
289
-
290
-
291
-
292
-
293
-
294
-
295
-
296
-
297
-
298
-
299
-
300
-
301
-
302
-
303
-
304
-
305
 |
 |
