Lexmark X5150 X5150 All-In-One Series User's Guide - Page 35
Enlarge or reduce needlepoint or woodworking patterns
 |
UPC - 734646570039
View all Lexmark X5150 manuals
Add to My Manuals
Save this manual to your list of manuals |
Page 35 highlights
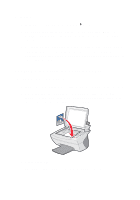
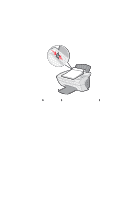
10 Write a note to accompany the attached photograph. 11 Click Send. Enlarge or reduce needlepoint or woodworking patterns You can enlarge or reduce patterns or photos using the operator panel or the All-In-One Center on your computer. Using the operator panel 1 Open the top cover. 2 Place the pattern or photo you want to enlarge or reduce face down on the scanner glass. Make sure the upper left corner of the front of the item aligns with the arrow at the bottom right of the scanner. 3 Close the top cover. 4 On the operator panel, press Reduce/Enlarge. 5 Press the right arrow button until you see the option you want to select (50% (Half), 100% (Same), 200% (Double), Custom %, Fit to Page, 2x2 Poster, 3x3 Poster, or 4x4 Poster). 6 Press Select. 7 To begin copying, press Color Copy or Black Copy. 8 After your image prints, press Stop/Clear to return to Normal Quality. Using the All-In-One software 1 Open the top cover. 2 Place the pattern or photo you want to enlarge or reduce face down on the scanner glass. Make sure the upper left corner of the front of the item aligns with the arrow at the bottom right of the scanner. 3 Close the top cover. 31
-
 1
1 -
2
-
3
-
4
-
5
-
6
-
7
-
8
-
9
-
10
-
11
-
12
-
13
-
14
-
15
-
16
-
17
-
18
-
19
-
20
-
21
-
22
-
23
-
24
-
25
-
26
-
27
-
28
-
29
-
 30
30 -
 31
31 -
 32
32 -
 33
33 -
 34
34 -
 35
35 -
 36
36 -
 37
37 -
 38
38 -
 39
39 -
 40
40 -
41
-
42
-
43
-
44
-
45
-
46
-
47
-
48
-
49
-
50
-
51
-
52
-
53
-
54
-
55
-
56
-
57
-
58
-
59
-
60
-
61
-
62
-
63
-
64
-
65
-
66
-
67
-
68
-
69
-
70
-
71
-
72
-
73
-
74
-
75
-
76
-
77
 |
 |
