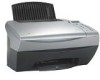
Lexmark X5150 X5150 All-In-One Series User's Guide - Page 36
Scan multiple s or images, The All-In-One Main appears.
 |
UPC - 734646570039
View all Lexmark X5150 manuals
Add to My Manuals
Save this manual to your list of manuals |
Page 36 highlights
4 From your desktop, double-click the Lexmark X5100 Series All-In-One Center icon. The All-In-One Main Page appears. 5 From the Creative Tasks menu, click Enlarge or reduce an image. 6 Click Preview Now to see your scanned image. 7 Adjust the dotted lines to fit around the portion of the image you want to print. 8 Follow the instructions on the screen to select the size of your new image. 9 Click Printer Settings to select your paper size. 10 When you are finished customizing your image, click Print Now. Scan multiple pages or images 1 Open the top cover. 2 Put the first image that you want to scan face down on the scanner glass. Make sure the upper left corner of the front of the item aligns with the arrow at the bottom right of the scanner. 3 Close the top cover. 4 From your desktop, double-click the Lexmark X5100 Series All-In-One Center icon. The All-In-One Main Page appears. 5 Select your scan destination from the drop-down box. 6 In the Scan... area, click See More Scan Settings, and then click Display Advanced Scan Settings. 7 On the Scan tab, select Scan multiple items before output. 8 Click OK. The All-In-One Main Page appears. 9 Click Scan Now. 32
-
 1
1 -
2
-
3
-
4
-
5
-
6
-
7
-
8
-
9
-
10
-
11
-
12
-
13
-
14
-
15
-
16
-
17
-
18
-
19
-
20
-
21
-
22
-
23
-
24
-
25
-
26
-
27
-
28
-
29
-
30
-
 31
31 -
 32
32 -
 33
33 -
 34
34 -
 35
35 -
 36
36 -
 37
37 -
 38
38 -
 39
39 -
 40
40 -
 41
41 -
42
-
43
-
44
-
45
-
46
-
47
-
48
-
49
-
50
-
51
-
52
-
53
-
54
-
55
-
56
-
57
-
58
-
59
-
60
-
61
-
62
-
63
-
64
-
65
-
66
-
67
-
68
-
69
-
70
-
71
-
72
-
73
-
74
-
75
-
76
-
77
 |
 |