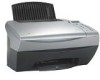
Lexmark X5150 X5150 All-In-One Series User's Guide - Page 60
Edges of copied documents are cut off, Fit - manual
 |
UPC - 734646570039
View all Lexmark X5150 manuals
Add to My Manuals
Save this manual to your list of manuals |
Page 60 highlights
2 Under Scan... click See More Scan Settings. 3 Click Display Advanced Scan Settings. 4 Click the Scan tab. 5 Select Auto-crop the scanned item. 6 Slide the bar to the left to crop less or to the right to crop more. 7 Click OK. To adjust cropping manually: 1 From your desktop, double-click the Lexmark X5100 Series All-In-One Center icon. The All-In-One Main Page appears. 2 Click Preview Now to see your scanned image. 3 To resize and crop the image, drag the box around the image in the preview area until the size is satisfactory for your scan. Edges of copied documents are cut off If you are using your All-In-One without it being attached to a computer and scanning a document that is getting cut off on the edges: 1 Move the document to a different place on the glass. 2 On the operator panel, press the Reduce/Enlarge button repeatedly until Fit to Page appears. 3 Press Select. If you are using your All-In-One attached to a computer: 1 Move the document to a different place on the glass. 2 From the software, select a copy setting with autocrop on (Color Photo or Black and White Photo) to make sure that autocrop finds the object and prints it completely. 56
-
 1
1 -
2
-
3
-
4
-
5
-
6
-
7
-
8
-
9
-
10
-
11
-
12
-
13
-
14
-
15
-
16
-
17
-
18
-
19
-
20
-
21
-
22
-
23
-
24
-
25
-
26
-
27
-
28
-
29
-
30
-
31
-
32
-
33
-
34
-
35
-
36
-
37
-
38
-
39
-
40
-
41
-
42
-
43
-
44
-
45
-
46
-
47
-
48
-
49
-
50
-
51
-
52
-
53
-
54
-
 55
55 -
 56
56 -
 57
57 -
 58
58 -
 59
59 -
 60
60 -
 61
61 -
 62
62 -
 63
63 -
 64
64 -
 65
65 -
66
-
67
-
68
-
69
-
70
-
71
-
72
-
73
-
74
-
75
-
76
-
77
 |
 |
