LiftMaster 61LM Owners Manual - Page 157
Wireless Keyless Entry - Model Series 66 And 740
 |
View all LiftMaster 61LM manuals
Add to My Manuals
Save this manual to your list of manuals |
Page 157 highlights
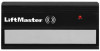
WIRELESS KEYLESS ENTRY - MODEL SERIES 66 AND 740 FEATURES OF THE KEYPAD TRANSMITTER Personalized Code: Up to 10,000 possible combinations. Code can easily be changed if desired. Operation: Opener activates when 4-code digits and ENTER button are pressed. The Keypad Transmitter will open and close the door even if the Door Control Lock Switch feature is ON. If wrong numbers are accidentally pressed, correction can be made immediately. The ENTER key will transmit only the last four digits. The keypad will blink for 15 seconds after the code is transmitted. During that time, you can STOP or REVERSE door travel just by pressing the ENTER key. The keypad transmitter can be used with garage door opener receivers having a yellow, grey, white or green "learn" button. Setting the Code 1 2 3 9 1 7 3 5 KG 9 1 7 3 5 KG 1 2 1. Press and release the "learn" button on motor unit. The learn indicator light will glow steadily for 30 seconds. 2. Within 30 seconds, enter a four digit personal identification number (PIN) of your choice on the keypad. Then press and hold the ENTER button. 3. Release the button when the motor unit lights blink. It has learned the code. If light bulbs are not installed, two clicks will be heard. The Keyless Entry Battery WARNING To prevent possible SERIOUS INJURY or DEATH: • NEVER allow small children near batteries. • If battery is swallowed, immediately notify doctor. The 12 volt battery should produce power for at least one year. Replace when the keypad illumination becomes dim. Dispose of old batteries properly. 1 2 KG WARNING To prevent possible SERIOUS INJURY or DEATH from a moving gate or garage door: • ALWAYS keep remote controls out of reach of children. NEVER permit children to operate, or play with remote control transmitters. • Activate gate or door ONLY when it can be seen clearly, is properly adjusted, and there are no obstructions to door travel. • ALWAYS keep gate or garage door in sight until completely closed. NEVER permit anyone to cross path of moving gate or door. Installation Keypad Open the keypad cover and remove the battery compartment screw. Take out the battery. Note the battery polarity as marked on compartment. Follow the installation instructions described below. 1. Center the keypad at eye level against the selected location on garage exterior as shown. Typical Installation Exterior Front Wall 1-Piece or Sectional Door Door Jamb Edge (Optional Location for 1-Piece Door) Door Jamb Face SECTIONAL DOOR ONLY KEYPAD MUST BE INSTALLED WITHIN SIGHT OF THE DOOR NOTE: For a one-piece door on a Plug brick, stone or aluminum sided garage, use the optional location shown in the illustration to avoid injury as the door swings up and out. 2. Hold keypad firmly with cover half open so both the top and bottom mounting holes are visible. Use a punch to mark each hole. Drill two 1/8" pilot holes. Fasten securely with screws provided. 3. Insert the plug provided into the top Battery hole to cover the fastening screw. Battery Cover Return the battery, being sure to observe polarity. Re-fasten compartment cover. FOR SERVICE DIAL OUR TOLL-FREE NUMBER: 1-800-654-4736 NOTICE: To comply with FCC and or Industry Canada rules, adjustment or modifications of this receiver and/or transmitter are prohibited, except for changing the code setting or replacing the battery. THERE ARE NO OTHER USER SERVICEABLE PARTS. Tested to Comply with FCC Standards FOR HOME OR OFFICE USE. Operation is subject to the following two conditions: (1) this device may not cause harmful interference, and (2) this device must accept any interference received, including interference that may cause undesired operation. 114A1401D ©2001, The Chamberlain Group All Rights Reserved Printed in Mexico
-
 1
1 -
2
-
3
-
4
-
5
-
6
-
7
-
8
-
9
-
10
-
11
-
12
-
13
-
14
-
15
-
16
-
17
-
18
-
19
-
20
-
21
-
22
-
23
-
24
-
25
-
26
-
27
-
28
-
29
-
30
-
31
-
32
-
33
-
34
-
35
-
36
-
37
-
38
-
39
-
40
-
41
-
42
-
43
-
44
-
45
-
46
-
47
-
48
-
49
-
50
-
51
-
52
-
53
-
54
-
55
-
56
-
57
-
58
-
59
-
60
-
61
-
62
-
63
-
64
-
65
-
66
-
67
-
68
-
69
-
70
-
71
-
72
-
73
-
74
-
75
-
76
-
77
-
78
-
79
-
80
-
81
-
82
-
83
-
84
-
85
-
86
-
87
-
88
-
89
-
90
-
91
-
92
-
93
-
94
-
95
-
96
-
97
-
98
-
99
-
100
-
101
-
102
-
103
-
104
-
105
-
106
-
107
-
108
-
109
-
110
-
111
-
112
-
113
-
114
-
115
-
116
-
117
-
118
-
119
-
120
-
121
-
122
-
123
-
124
-
125
-
126
-
127
-
128
-
129
-
130
-
131
-
132
-
133
-
134
-
135
-
136
-
137
-
138
-
139
-
140
-
141
-
142
-
143
-
144
-
145
-
146
-
147
-
148
-
149
-
150
-
151
-
 152
152 -
 153
153 -
 154
154 -
 155
155 -
 156
156 -
 157
157 -
 158
158 -
 159
159 -
 160
160 -
 161
161 -
 162
162 -
163
-
164
-
165
-
166
-
167
-
168
-
169
-
170
-
171
-
172
-
173
-
174
-
175
-
176
-
177
-
178
-
179
-
180
-
181
-
182
-
183
-
184
-
185
-
186
-
187
-
188
-
189
-
190
-
191
-
192
-
193
-
194
-
195
-
196
-
197
-
198
-
199
-
200
-
201
-
202
-
203
-
204
-
205
-
206
-
207
-
208
-
209
-
210
-
211
-
212
-
213
-
214
-
215
-
216
-
217
-
218
-
219
-
220
-
221
-
222
-
223
-
224
-
225
-
226
-
227
-
228
-
229
-
230
-
231
-
232
-
233
-
234
-
235
-
236
-
237
-
238
-
239
-
240
-
241
-
242
-
243
-
244
-
245
-
246
-
247
-
248
-
249
-
250
-
251
-
252
-
253
-
254
-
255
-
256
-
257
-
258
-
259
-
260
-
261
-
262
-
263
-
264
-
265
-
266
-
267
-
268
-
269
-
270
-
271
-
272
-
273
-
274
-
275
-
276
-
277
-
278
-
279
-
280
-
281
-
282
-
283
-
284
-
285
-
286
 |
 |
