Linksys EFSP42 User Guide - Page 39
myprinter, myprinter_P2, myprinter_P3, Context, Printer, Create, Configuration, Communication, - print server utility
 |
UPC - 745883549108
View all Linksys EFSP42 manuals
Add to My Manuals
Save this manual to your list of manuals |
Page 39 highlights
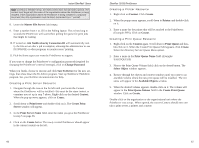
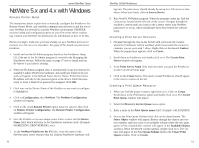
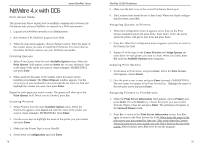
Creating a Printer Resource Instant EtherFast® Series 1. Right-click on the Context again. When the popup menu appears, scroll down to Printer and double-click on it. 2. Enter a name for the printer to be attached to the PrintServer. The name you enter must be the same as the one you gave your NetWare print server when you created it on the file server or elsewhere. When you're finished, click on the Create button. The Context now shows a print server resource, a print queue, and a printer. Configuring the Printer Resource 1. In the selected Context, double-click on the printer object, then click on the Configuration tab. 2. Set the Printer type to Parallel. Click on Communication. 3. Set the LPT value to the appropriate port on the PrintServer where the printer will be connected. Choose parallel (LPT) port 1, 2, or 3 if you have a 3-Port model. 4. Set the Interrupts value to Polled. Set the Connection type to Manual Load. Click OK. 5. Click on the Assignments tab. Click on Add. The queue you created above will appear in the list of available queues. Double-click on it so that it appears in the print queues field . Click OK. Configuring the Print Server Object 1. Double-click on the print server object in the Context. 2. Click on the Assignments button, followed by Add. The printer you created above will appear. Double-click on it. When the printer appears in the Printer List field , click OK. 3. On your file server, take the running print server resource service down, then bring it back up. The setup is complete. Refer to your NetWare documentation to see the PrintServer on the network using PSERVER or another NetWare printer utility. 72 EtherFast 10/100 PrintServers Adding More Than One Printer (for EPSX3 and EFSP42) If your PrintServer has more than one parallel port and you want to add more than one printer, repeat all of the steps from "Creating a Printer Resource" on the previous page. When you create a new printer resource, use the same printer name you used for the first printer, with an additional _P2 or _P3 at the end to designate which additional printer you're adding. If printer number one is called myprinter, for example, printer two would be called myprinter_P2, and printer three would be myprinter_P3. If you need to change the PrintServer's internal setup or configuration at any time, see page 37 on Bi-Admin. 73
-
 1
1 -
2
-
3
-
4
-
5
-
6
-
7
-
8
-
9
-
10
-
11
-
12
-
13
-
14
-
15
-
16
-
17
-
18
-
19
-
20
-
21
-
22
-
23
-
24
-
25
-
26
-
27
-
28
-
29
-
30
-
31
-
32
-
33
-
 34
34 -
 35
35 -
 36
36 -
 37
37 -
 38
38 -
 39
39 -
 40
40 -
 41
41 -
 42
42 -
 43
43 -
 44
44 -
45
-
46
-
47
-
48
-
49
 |
 |