Magellan Triton 400 Manual - English - Page 16
Data Fields, Customizing the Data Field for the Map Screen, Compass or Satellite Status Screen - downloads
 |
UPC - 763357117769
View all Magellan Triton 400 manuals
Add to My Manuals
Save this manual to your list of manuals |
Page 16 highlights
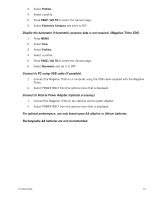
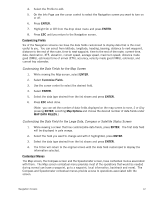
Data Fields The Map screen, Large Data screen, the Compass screen, and the Satellite Status screen have data fields that can be customized to display navigation information. You can change what information is being displayed from 20 different data type options. Customizing the Data Field for the Map Screen 1. While viewing the Map screen, select ENTER. 2. Select Customize Fields. 3. Use the cursor control to select the desired field. 4. Select ENTER. 5. Select the data type desired from the list shown and press ENTER. 6. Press ESC when done. Customizing the Data Field for the Large Data, Compass or Satellite Status Screen 1. While viewing a screen that has customizable data fields, press ENTER. The first data field will be displayed in pale orange. 2. Select the field you want to change and with it highlighted, press ENTER. 3. Select the data type desired from the list shown and press ENTER. 4. The Triton will return to the original screen with the data field customized to display the information selected. Selecting Maps Detailed maps, including National Geographic maps, can be purchased and downloaded from the Magellan Store and installed using the optional National Geographic software. Magellan Triton 300 installs the National Geographic maps into their internal memory, while Magellan Triton 400 and 500 stores the maps on an SD card. Once loaded, you will need to select the detailed map you want to use to activate it. 1. From the Map screen, press MENU. 2. Select View. 3. Select Maps. 4. Highlight the detailed map from the list that you want to activate and press ENTER. 5. A checkmark will appear before the name of the map when it has been activated. 6. Select OK. Fundamentals 8
-
 1
1 -
2
-
3
-
4
-
5
-
6
-
7
-
8
-
9
-
10
-
 11
11 -
 12
12 -
 13
13 -
 14
14 -
 15
15 -
 16
16 -
 17
17 -
 18
18 -
 19
19 -
 20
20 -
 21
21 -
22
-
23
-
24
-
25
-
26
-
27
-
28
-
29
-
30
-
31
-
32
-
33
-
34
-
35
-
36
-
37
-
38
-
39
-
40
-
41
-
42
-
43
-
44
-
45
-
46
-
47
-
48
-
49
-
50
-
51
-
52
-
53
-
54
-
55
-
56
-
57
-
58
-
59
-
60
-
61
-
62
-
63
-
64
-
65
 |
 |