Magnavox MWR20V6 Owners Manual - Page 64
Setting or releasing disc protect cont'd
 |
UPC - 053818570180
View all Magnavox MWR20V6 manuals
Add to My Manuals
Save this manual to your list of manuals |
Page 64 highlights
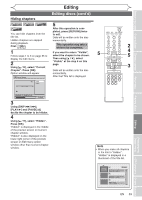
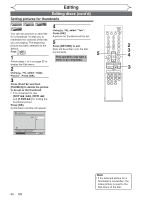
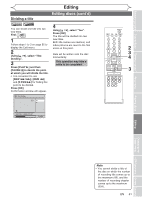
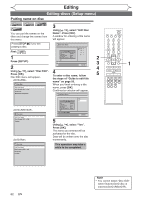
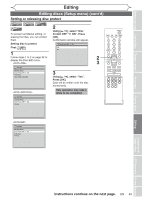
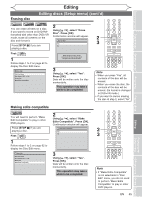
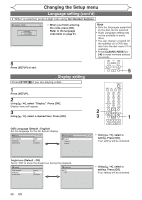
Editing Editing discs (Setup menu) (cont'd) Setting or releasing disc protect (cont'd) Releasing disc from protect First: DVD 1 Follow steps 1 to 2 on page 62 to display the Disc Edit menu. Disc Edit Edit Disc Name Disc Protect ON OFF Erase Disc Make Edits Compatible 2 Using [K / L]], select "Disc Protect". Press [OK]. Confirmation window will appear. Disc Protect ON Yes No OFF 2 3 STANDBY-ON VIDEO/TV VCR DVD OPEN/CLOSE .@/: ABC 1 2 GHI JKL 4 5 PQRS TUV 7 8 CLEAR/C-RESET SPACE 0 RETURN DEF 3 MNO 6 WXYZ 9 TITLE DISPLAY OK DISC MENU SETUP Disc Edit Edit Disc Name Disc Protect ON Finalize OFF 3 Using [K / L], select "Yes". Press [OK]. This operation may take a while to be completed. Data will be written onto the disc momentarily. CHANNEL TIMER VCR REC DVD REC REC MODE TIMER SET SLOW CM SKIP RAPID PLAY SEARCH AUDIO DUBBING Disc Edit Edit Disc Name Disc Protect ON Erase Disc Finalize OFF 64 EN
-
 1
1 -
2
-
3
-
4
-
5
-
6
-
7
-
8
-
9
-
10
-
11
-
12
-
13
-
14
-
15
-
16
-
17
-
18
-
19
-
20
-
21
-
22
-
23
-
24
-
25
-
26
-
27
-
28
-
29
-
30
-
31
-
32
-
33
-
34
-
35
-
36
-
37
-
38
-
39
-
40
-
41
-
42
-
43
-
44
-
45
-
46
-
47
-
48
-
49
-
50
-
51
-
52
-
53
-
54
-
55
-
56
-
57
-
58
-
 59
59 -
 60
60 -
 61
61 -
 62
62 -
 63
63 -
 64
64 -
 65
65 -
 66
66 -
 67
67 -
 68
68 -
 69
69 -
70
-
71
-
72
-
73
-
74
-
75
-
76
-
77
-
78
-
79
-
80
-
81
-
82
-
83
-
84
-
85
-
86
-
87
-
88
-
89
-
90
 |
 |