Magnavox MWR20V6 Owners Manual - Page 69
Audio setting, Display setting cont'd
 |
UPC - 053818570180
View all Magnavox MWR20V6 manuals
Add to My Manuals
Save this manual to your list of manuals |
Page 69 highlights
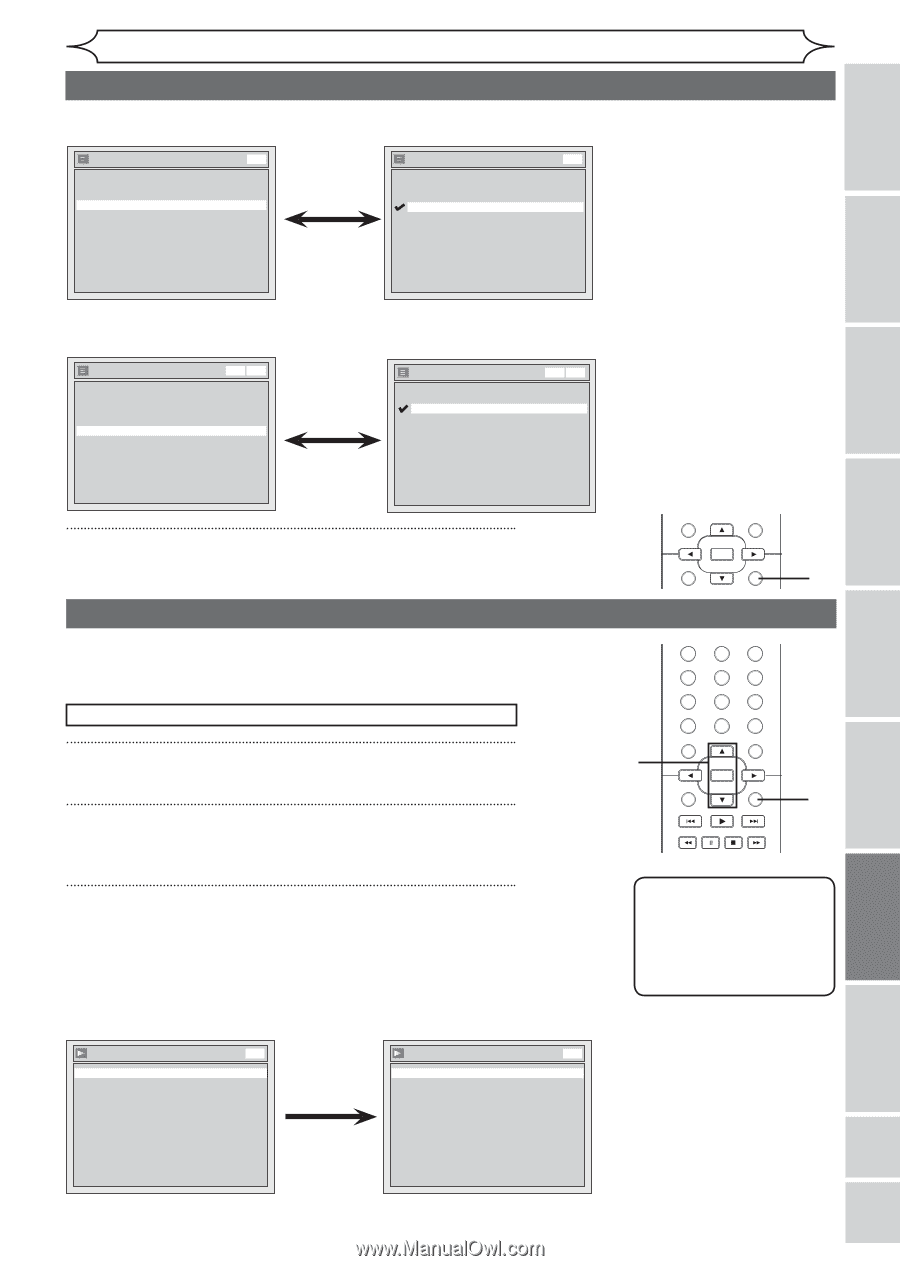
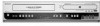
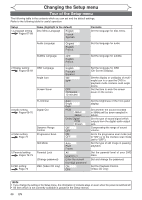
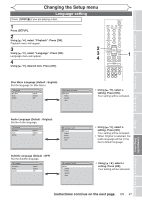
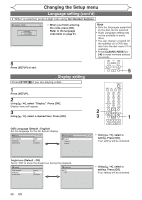
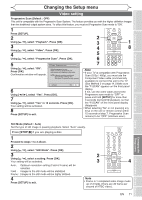
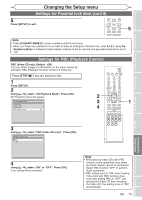
Before you start Connections Getting started Recording Changing the Setup menu Display setting (cont'd) Screen Saver (Default : 10 minutes) Set the time to work the screen saver function on the screen. Display OSD Language Angle Icon Screen Saver DVD English ON 10 minutes Screen Saver OFF 5 minutes 10 minutes 15 minutes 30 minutes DVD • Using [K / L], select a setting. Press [OK]. Your setting will be activated. FL Dimmer (Default : Bright) Set the brightness of front panel display. You can choose one among "Auto", "Bright" and "Dark". Display OSD Language Angle Icon Screen Saver FL Dimmer VCR DVD English ON 10 minutes Bright FL Dimmer Auto Bright Dark VCR DVD 4 Press [SETUP] to exit. Audio setting Choose the appropriate Audio settings for your external equipment. It will only affect a disc playback. Press [STOP C] if you are playing a disc. 1 Press [SETUP]. 2 Using [K / L], select "Playback". Press [OK]. Playback menu will appear. 3 Using [K / L], select "Disc Audio". Press [OK]. Digital Out Set the digital audio output. Disc Audio Digital Out Dynamic Range Control DVD ON Digital Out PCM Dolby Digital DVD 48kHz Stream • Using [K / L], select STANDBY-ON a setting. Press [OK]. VIDEO/TV VCR DVD OPEN/CLOSE Your setting will be activated. • If "Auto" is.@/: 1 seleA2BCctedD3E,F the display isGHsI howJKLn brMiNgO hter when the powePrQ4RSis oTn5UV, daW6XrYkZ er when the power7 is of8f. 9 CLEAR/C-RESET SPACE TITLE 0 RETURN DISPLAY 2 3 DISC MENU OK SETUP STANDBY-ON VIDEO/TV VCR DVD OPEN/CLOSE CHANNEL .@/: ABC DEF 1 2 3 TIGMHEIR VCR RECJKLDVD REC RMECNOMODE 4 5 6 TIMPEQRRSSET SLOWTUVCM SKIP RWAPXIYDZPLAY 7 8 9 CLESAERA/CR-CRHESEATUDISOPADCUEBBING TITLE 0 RETURN DISPLAY OK DISC MENU SETUP 4 1 CHANNEL NoteTIMER VCR REC DVD REC REC MODE • Dynamic Range Control TIMER SET SLOW CM SKIP RAPID PLAY funcSEtAiRCoH nAUDiIOsDUaBBINvG ailable only on the discs which are recorded in the Dolby Digital format. • Using [K / L], select a setting. Press [OK]. Option window will appear. Proceed to step A or B. Playing discs Editing Changing the Setup menu VCR functions Others Español Instructions continue on the next page. EN 69
-
 1
1 -
2
-
3
-
4
-
5
-
6
-
7
-
8
-
9
-
10
-
11
-
12
-
13
-
14
-
15
-
16
-
17
-
18
-
19
-
20
-
21
-
22
-
23
-
24
-
25
-
26
-
27
-
28
-
29
-
30
-
31
-
32
-
33
-
34
-
35
-
36
-
37
-
38
-
39
-
40
-
41
-
42
-
43
-
44
-
45
-
46
-
47
-
48
-
49
-
50
-
51
-
52
-
53
-
54
-
55
-
56
-
57
-
58
-
59
-
60
-
61
-
62
-
63
-
 64
64 -
 65
65 -
 66
66 -
 67
67 -
 68
68 -
 69
69 -
 70
70 -
 71
71 -
 72
72 -
 73
73 -
 74
74 -
75
-
76
-
77
-
78
-
79
-
80
-
81
-
82
-
83
-
84
-
85
-
86
-
87
-
88
-
89
-
90
 |
 |