McAfee AVM85M User Guide - Page 21
Configuring the On-Demand scanner, Preferences, Close, More Options, On-Demand Scanner, Customize - removal tool
 |
UPC - 731944564609
View all McAfee AVM85M manuals
Add to My Manuals
Save this manual to your list of manuals |
Page 21 highlights
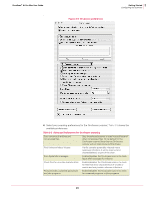
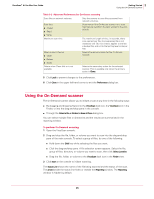
VirusScan® 8.6 for Mac User Guide 3 Getting Started Configuring the scanners Table 3-1 General preferences for On-Demand and On-Access scanners Customize eUpdate Server Settings Manages your update server with user name and password. Click Customize to modify the FTP settings for eUpdate. Exclude specific disks, files and folders Configures your scanning exclusions. If this is not selected, you will not have any exclusions set. To add an exclusion: „ Click Add in the Exclude File or Folder list. Select the file or folder from the Open dialog box. To remove an exclusion: „ Select the file or folder from the Exclude File or Folder list. Click Remove. To modify an exclusion: „ Select the file or folder from the Excluded File or Folder list. Click Modify. The Open dialog box appears. Select the file or folder to replace the existing exclusion. 3 Set the advanced preferences you require. These are shown in the lower pane in the Preferences dialog box. Two different sets of preferences are available; one for the On-Demand scanner, the other for the On-Access scanner. See Configuring the On-Demand scanner on page 21 and Configuring the On-Access scanner on page 23 for details. 4 Click Lock to prevent changes to the preferences. 5 Click Close in the upper left-hand corner to exit the Preferences dialog box. Configuring the On-Demand scanner The On-Demand scanner allows you to initiate a scan at any time. You configure the On-Demand scanner advanced preferences using options available in the lower pane of the Preferences dialog. To configure the On-Demand scanner: 1 Click Preferences on the tool bar to display the Preferences dialog box. 2 Click More Options in the lower right-hand corner of the dialog box to reveal Advanced Preferences. 3 Select On-Demand Scanner from the drop-down menu (if not already selected) to display the On-Demand scanning version of this dialog box. 21
-
 1
1 -
2
-
3
-
4
-
5
-
6
-
7
-
8
-
9
-
10
-
11
-
12
-
13
-
14
-
15
-
 16
16 -
 17
17 -
 18
18 -
 19
19 -
 20
20 -
 21
21 -
 22
22 -
 23
23 -
 24
24 -
 25
25 -
 26
26 -
27
-
28
-
29
-
30
-
31
-
32
-
33
-
34
-
35
-
36
-
37
-
38
-
39
-
40
-
41
-
42
-
43
-
44
-
45
-
46
-
47
-
48
-
49
-
50
-
51
-
52
-
53
-
54
-
55
-
56
-
57
-
58
-
59
-
60
-
61
-
62
-
63
-
64
-
65
-
66
-
67
-
68
 |
 |
