Netgear R8900 User Manual - Page 46
Control Access to the Internet, Nighthawk X10 AD7000 Smart WiFi Router, Send to This E-mail Address
 |
View all Netgear R8900 manuals
Add to My Manuals
Save this manual to your list of manuals |
Page 46 highlights
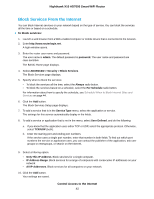
Nighthawk X10 AD7000 Smart WiFi Router 8. In the Outgoing Mail Server Port Number section, select the Auto Detection port number or the Specific Port Number radio button: You might be able to find this information in the configuration window of your email program. If you leave this field blank, log and alert messages are not sent. 9. In the Send to This E-mail Address field, type the email address to which logs and alerts are to be sent. This email address is also used for the From address. If this field is blank, log and alert messages are not sent. 10. If your outgoing email server requires authentication, select the My Mail Server requires authentication check box, and do the following: a. In the User Name field, type the user name for the outgoing email server. b. In the Password field, type the password for the outgoing email server. 11. To send alerts when someone attempts to visit a blocked site, select the Send Alerts Immediately check box. Email alerts are sent immediately when someone attempts to visit a blocked site. 12. To send logs based on a schedule, specify these settings: a. From Send logs according to this schedule menu, select the schedule type. b. From the Day menu, select the day. c. From the Time menu, select the time, and select the am or pm radio button. 13. Click the Apply button. Your settings are saved. Logs are sent automatically according to the schedule that you set. If the log fills before the specified time, it is sent. After the log is sent, it is cleared from the router memory. If the router cannot email the log and the log buffer fills, the router overwrites the log. Control Access to the Internet 46
-
 1
1 -
2
-
3
-
4
-
5
-
6
-
7
-
8
-
9
-
10
-
11
-
12
-
13
-
14
-
15
-
16
-
17
-
18
-
19
-
20
-
21
-
22
-
23
-
24
-
25
-
26
-
27
-
28
-
29
-
30
-
31
-
32
-
33
-
34
-
35
-
36
-
37
-
38
-
39
-
40
-
 41
41 -
 42
42 -
 43
43 -
 44
44 -
 45
45 -
 46
46 -
 47
47 -
 48
48 -
 49
49 -
 50
50 -
 51
51 -
52
-
53
-
54
-
55
-
56
-
57
-
58
-
59
-
60
-
61
-
62
-
63
-
64
-
65
-
66
-
67
-
68
-
69
-
70
-
71
-
72
-
73
-
74
-
75
-
76
-
77
-
78
-
79
-
80
-
81
-
82
-
83
-
84
-
85
-
86
-
87
-
88
-
89
-
90
-
91
-
92
-
93
-
94
-
95
-
96
-
97
-
98
-
99
-
100
-
101
-
102
-
103
-
104
-
105
-
106
-
107
-
108
-
109
-
110
-
111
-
112
-
113
-
114
-
115
-
116
-
117
-
118
-
119
-
120
-
121
-
122
-
123
-
124
-
125
-
126
-
127
-
128
-
129
-
130
-
131
-
132
-
133
-
134
-
135
-
136
-
137
-
138
-
139
-
140
-
141
-
142
-
143
-
144
-
145
-
146
-
147
-
148
-
149
-
150
-
151
-
152
-
153
-
154
-
155
 |
 |
