Nikon COOLPIX S9500 Reference Manual - Page 79
Adjusting Brightness Exposure Compensation, Adjusting Vividness Saturation Adjustment
 |
View all Nikon COOLPIX S9500 manuals
Add to My Manuals
Save this manual to your list of manuals |
Page 79 highlights
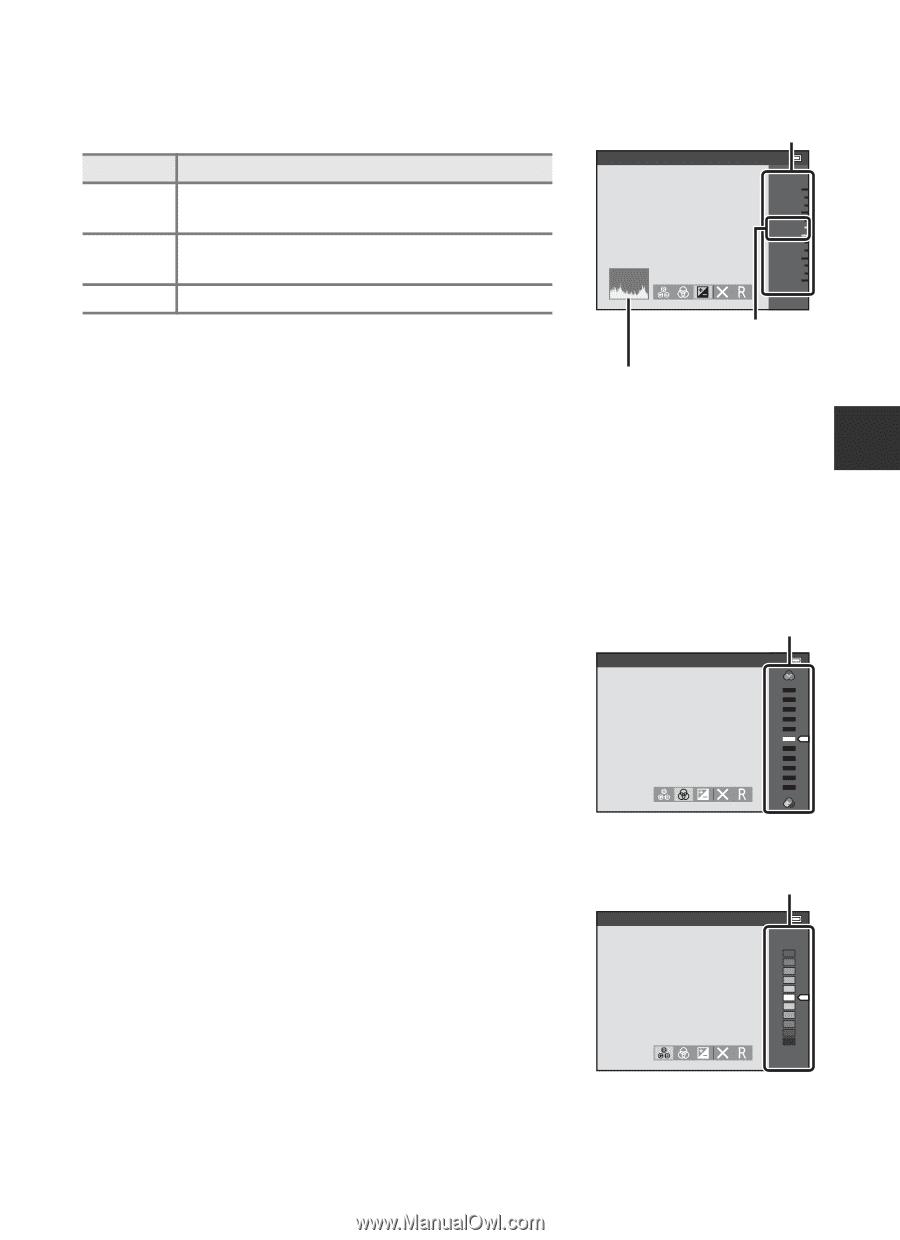
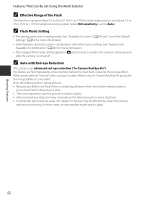
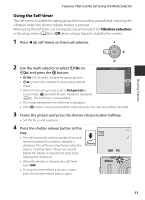
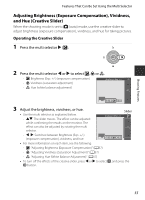
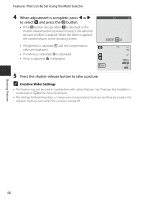
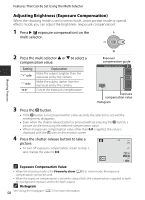
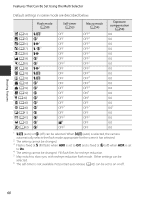
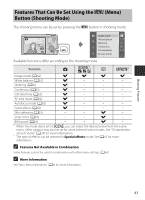
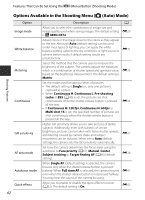
Features That Can Be Set Using the Multi Selector Adjusting Brightness (Exposure Compensation) Adjust the overall brightness of the image. Slider Setting "+" side "-" side "0.0" Explanation Make the subject brighter than the exposure set by the camera. Make the subject darker than the exposure set by the camera. Cancel the exposure compensation. Brightness (Exp. +/-) + 2.0 + 0.3 - 2.0 Exposure compensation value C Using the Histogram Histogram A histogram is a graph showing the distribution of tones in the image. Use as a guide when using exposure compensation and shooting without the flash. • The horizontal axis corresponds to pixel brightness, with dark tones to the left and bright tones to the right. The vertical axis shows the number of pixels. • Increasing exposure compensation shifts tone distribution to the right, and decreasing it shifts tone distribution to the left. Adjusting Vividness (Saturation Adjustment) Adjust the overall vividness of the image. • The overall image vividness increases as the slider is moved up. The overall image vividness decreases as the slider is moved down. Vividness Slider Shooting Features Adjusting Hue (White Balance Adjustment) Adjust the overall hue of the image. • The overall image becomes more reddish as the slider is moved up. The overall image becomes more bluish as the slider is moved down. Slider Hue B Note On White Balance Adjustment When hue is adjusted using the creative slider, White balance in the shooting menu (A62) cannot be set. To set White balance, select P in the creative slider setting screen to reset the brightness, vividness, and hue. 57
-
 1
1 -
2
-
3
-
4
-
5
-
6
-
7
-
8
-
9
-
10
-
11
-
12
-
13
-
14
-
15
-
16
-
17
-
18
-
19
-
20
-
21
-
22
-
23
-
24
-
25
-
26
-
27
-
28
-
29
-
30
-
31
-
32
-
33
-
34
-
35
-
36
-
37
-
38
-
39
-
40
-
41
-
42
-
43
-
44
-
45
-
46
-
47
-
48
-
49
-
50
-
51
-
52
-
53
-
54
-
55
-
56
-
57
-
58
-
59
-
60
-
61
-
62
-
63
-
64
-
65
-
66
-
67
-
68
-
69
-
70
-
71
-
72
-
73
-
 74
74 -
 75
75 -
 76
76 -
 77
77 -
 78
78 -
 79
79 -
 80
80 -
 81
81 -
 82
82 -
 83
83 -
 84
84 -
85
-
86
-
87
-
88
-
89
-
90
-
91
-
92
-
93
-
94
-
95
-
96
-
97
-
98
-
99
-
100
-
101
-
102
-
103
-
104
-
105
-
106
-
107
-
108
-
109
-
110
-
111
-
112
-
113
-
114
-
115
-
116
-
117
-
118
-
119
-
120
-
121
-
122
-
123
-
124
-
125
-
126
-
127
-
128
-
129
-
130
-
131
-
132
-
133
-
134
-
135
-
136
-
137
-
138
-
139
-
140
-
141
-
142
-
143
-
144
-
145
-
146
-
147
-
148
-
149
-
150
-
151
-
152
-
153
-
154
-
155
-
156
-
157
-
158
-
159
-
160
-
161
-
162
-
163
-
164
-
165
-
166
-
167
-
168
-
169
-
170
-
171
-
172
-
173
-
174
-
175
-
176
-
177
-
178
-
179
-
180
-
181
-
182
-
183
-
184
-
185
-
186
-
187
-
188
-
189
-
190
-
191
-
192
-
193
-
194
-
195
-
196
-
197
-
198
-
199
-
200
-
201
-
202
-
203
-
204
-
205
-
206
-
207
-
208
-
209
-
210
-
211
-
212
-
213
-
214
-
215
-
216
-
217
-
218
-
219
-
220
-
221
-
222
-
223
-
224
-
225
-
226
-
227
-
228
-
229
-
230
-
231
-
232
-
233
-
234
-
235
-
236
-
237
-
238
-
239
-
240
-
241
-
242
-
243
-
244
-
245
-
246
-
247
-
248
-
249
-
250
-
251
-
252
 |
 |