Panasonic WJRT208 WJRT208 User Guide - Page 29
Panning/Tilting, 5.2 Auto function Auto Pan, etc., PTZ Protocol
 |
View all Panasonic WJRT208 manuals
Add to My Manuals
Save this manual to your list of manuals |
Page 29 highlights
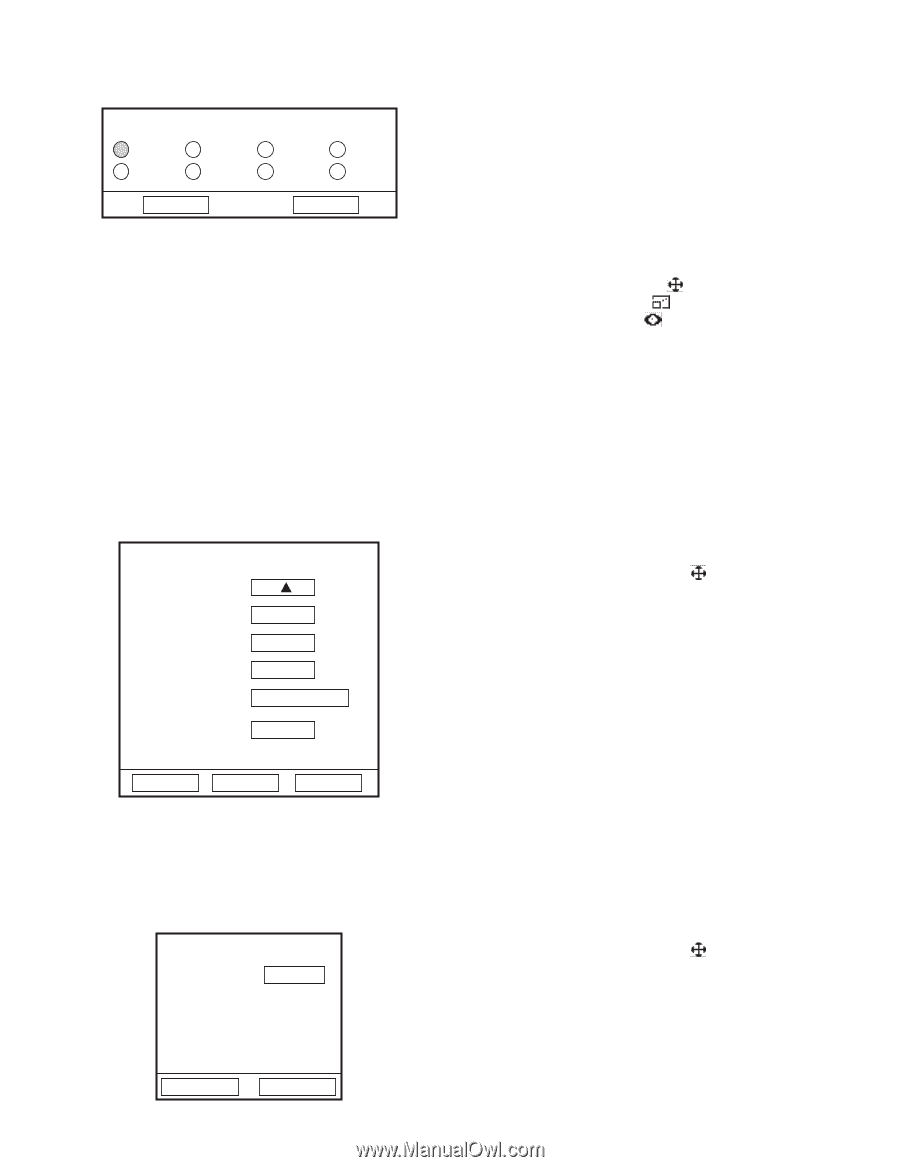
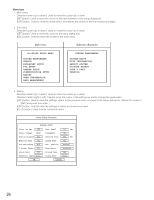
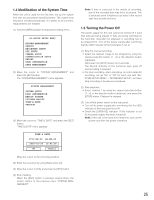
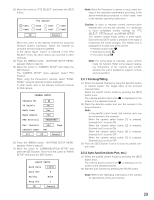
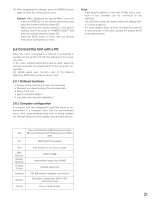
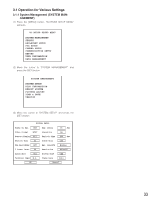
(3) Move the cursor to "PTZ SELECT" and press the [SET] button. Cam1 Cam5 PTZ SELECT Cam2 Cam6 Cam3 Cam7 Cam4 Cam8 OK Cancel Move the cursor to the desired channel by using the direction buttons (up/down). Select the channel by using the direction buttons (right/left). In the above figure, "Cam1" is selected in the "PTZ SELECT" menu. No other camera are selected in other channels. (4) Press the [MENU] button. "WJ-RT208 SETUP MENU" appears. Refer to step (1). (5) Move the cursor to "CAMERA SETUP" and press the [SET] button. The "CAMERA SETUP" menu appears. Select "PTZ Protocol". When using the Panasonic's camera, select "PANASONIC" using the direction buttons (left/right). In other cases, refer to the relevant instruction manual for that camera. CAMERA SETUP Channel No. CH Enable Mask Area Mask Enable PTZ Protocol 1 On Set Off PANASONIC Rec. Reserve 000 Days Channel Name CH1 All OK Cancel (6) Press the [MENU] button. "WJ-RT208 SETUP MENU" appears. Refer to step (1). (7) Move the cursor to "COMMUNICATION SETUP" and press the [SET] button. Then move the cursor to "RS485 SETUP" and press the [SET] button. RS485 SETUP Baud Rate 19200 Data Bit 8 Parity None Stop Bit 1 OK Cancel Note: When the Panasonic's camera is used, make settings of the respective parameters according to the above-mentioned procedures. In other cases, refer to the relevant operating instructions. Caution: In order to maintain normal communication between this unit and the cameras, it is necessary to have completely correct settings for "PTZ SELECT", "PTZ Protocol", and "RS485 SETUP". The camera control mode comes in three types. Each time the [SET] button is pressed in the state of monitoring, the mode changes. The related icon is displayed in a lower area of the screen. • Pan/tilt control mode • Zoom/focus mode • Iris control mode Note: For some types of cameras, some controls many not function. Refer to the relevant operating instructions of the camera and confirm whether this unit is enabled to support controls and connections. 2.5.1 Panning/Tilting (1) Select the desired channel by using the direction button or numeric button. The image frame of the selected channel blinks. Select the pan/tilt control mode by pressing the [SET] button once. The camera pan/tilt control icon is displayed on the screen of the selected channel. (2) Press the direction button and turn the camera in the proper direction. Note: In the pan/tilt control mode, two external units can be connected to the cameras. When the camera select button [1] is pressed, External Unit 1 is set to ON. When the camera select button [2] is pressed, External Unit 2 is set to ON. When the camera select button [6] is pressed, External Unit 1 is set to OFF. When the camera select button [7] is pressed, External Unit 2 is set to OFF. (3) Press the [SET] button 3 times to close the pan/tilt control mode. 2.5.2 Auto function (Auto Pan, etc.) (1) Select the pan/tilt control mode by pressing the [SET] button once. The camera pan/tilt control icon is displayed on the screen of the selected channel. (2) Start the auto function by pressing the [PLAY] button. Note: Refer to the Operating Instructions of the camera for descriptions of the auto function. 29
-
 1
1 -
2
-
3
-
4
-
5
-
6
-
7
-
8
-
9
-
10
-
11
-
12
-
13
-
14
-
15
-
16
-
17
-
18
-
19
-
20
-
21
-
22
-
23
-
 24
24 -
 25
25 -
 26
26 -
 27
27 -
 28
28 -
 29
29 -
 30
30 -
 31
31 -
 32
32 -
 33
33 -
 34
34 -
35
-
36
-
37
-
38
-
39
-
40
-
41
-
42
-
43
-
44
-
45
-
46
-
47
-
48
-
49
-
50
-
51
-
52
-
53
-
54
-
55
-
56
-
57
-
58
-
59
-
60
-
61
-
62
 |
 |