Pioneer AVH P3100DVD Owner's Manual - Page 13
Adjusting the volume, Touch panel key basic, operation, Basic Operations - car video player
 |
UPC - 012562944050
View all Pioneer AVH P3100DVD manuals
Add to My Manuals
Save this manual to your list of manuals |
Page 13 highlights
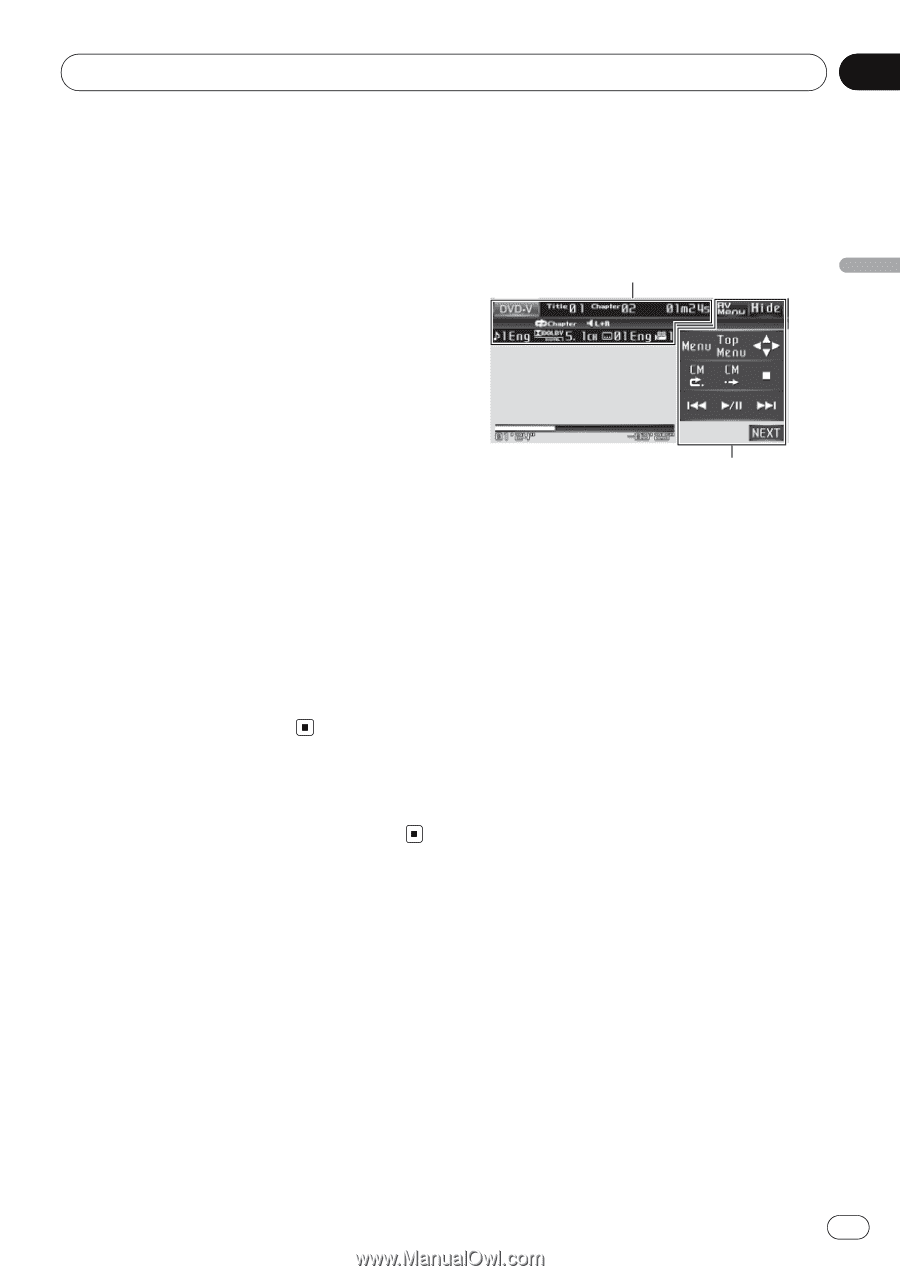
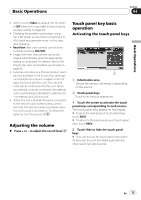
Basic Operations Section 04 Basic Operations ! AUX1 is set to Video by default. Set the AUX1 to Off when not in use (refer to Switching the auxiliary setting on page 50). ! Charging the portable audio player using car's DC power source while connecting it to AUX input may generate noise. In this case, stop charging. ! RearView (rear view camera) cannot be selected by pressing SRC/OFF. ! Image from rear view camera can be displayed automatically when the appropriate setting is conducted. For details, refer to Setting for rear view camera (back up camera) on page 55. ! External unit refers to a Pioneer product (such as ones available in the future) that, although incompatible as a source, enables control of basic functions with this unit. Two external units can be controlled with this unit. When two external units are connected, the external unit is automatically allocated to external unit 1 or external unit 2 by this unit. ! When this unit's blue/white lead is connected to the vehicle's auto-antenna relay control terminal, the vehicle's antenna extends when this unit's source is turned on. To retract the antenna, turn the source off. Adjusting the volume % Press + or - to adjust the sound level. Touch panel key basic operation Activating the touch panel keys 1 2 1 Information area Shows the various information depending on the source. 2 Touch panel keys Touch to do various operations. 1 Touch the screen to activate the touch panel keys corresponding to each source. The touch panel keys appear on the display. # To go to the next group of touch panel keys, touch NEXT. # To return to the previous group of touch panel keys, touch PREV. 2 Touch Hide to hide the touch panel keys. # If you do not use the touch panel keys within 30 seconds, they will be hidden automatically when selecting video sources. En 13
-
 1
1 -
2
-
3
-
4
-
5
-
6
-
7
-
 8
8 -
 9
9 -
 10
10 -
 11
11 -
 12
12 -
 13
13 -
 14
14 -
 15
15 -
 16
16 -
 17
17 -
 18
18 -
19
-
20
-
21
-
22
-
23
-
24
-
25
-
26
-
27
-
28
-
29
-
30
-
31
-
32
-
33
-
34
-
35
-
36
-
37
-
38
-
39
-
40
-
41
-
42
-
43
-
44
-
45
-
46
-
47
-
48
-
49
-
50
-
51
-
52
-
53
-
54
-
55
-
56
-
57
-
58
-
59
-
60
-
61
-
62
-
63
-
64
-
65
-
66
-
67
-
68
-
69
-
70
-
71
-
72
-
73
-
74
-
75
-
76
-
77
-
78
-
79
-
80
-
81
-
82
-
83
-
84
-
85
-
86
-
87
-
88
-
89
-
90
-
91
-
92
-
93
-
94
-
95
-
96
-
97
-
98
-
99
-
100
-
101
-
102
-
103
-
104
-
105
-
106
-
107
-
108
-
109
-
110
-
111
-
112
-
113
-
114
-
115
-
116
 |
 |