Pioneer AVH P3100DVD Owner's Manual - Page 83
Digital Signal Processor, Available accessories
 |
UPC - 012562944050
View all Pioneer AVH P3100DVD manuals
Add to My Manuals
Save this manual to your list of manuals |
Page 83 highlights
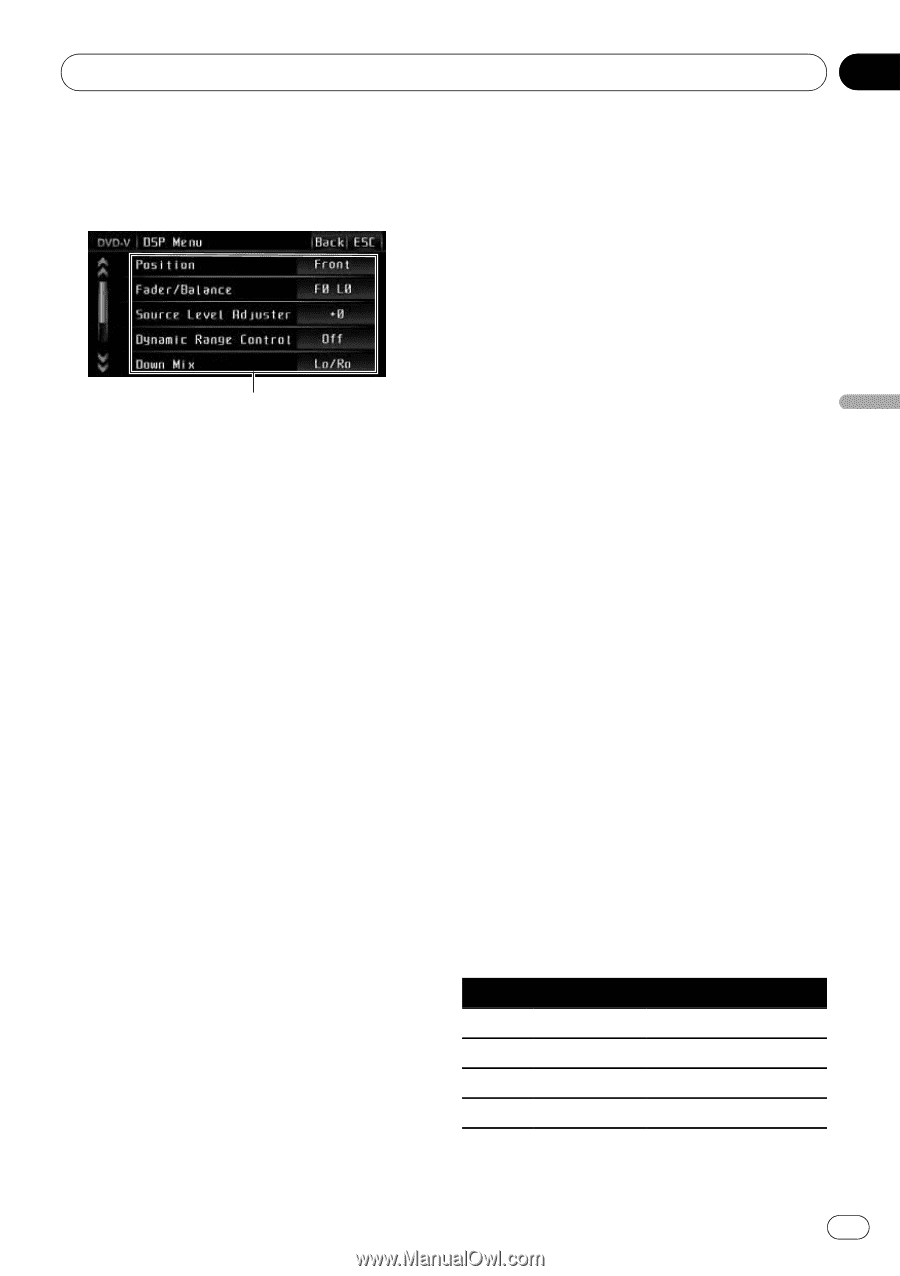
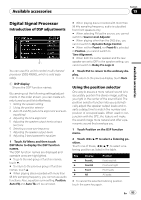
Available accessories Section 19 Available accessories Digital Signal Processor Introduction of DSP adjustments 1 You can use this unit to control multi-channel processor (DEQ-P8000), which is sold separately. 1 DSP display Shows the DSP function names. By carrying out the following settings/adjustments in the order shown, you can create a finely-tuned sound field effortlessly. 1 Setting the speaker setting 2 Using the position selector 3 Auto TA and EQ (auto-time alignment and auto- equalizing) 4 Adjusting the time alignment 5 Adjusting the speaker output levels using a test tone 6 Selecting a cross-over frequency 7 Adjusting the speaker output levels 8 Adjusting 3-band parametric equalizer 1 Touch AV Menu and then touch DSP Menu to display the DSP function names. The DSP function names are displayed and operable ones are highlighted. # To go to the next group of function names, touch b. # To return to the previous group of function names, touch a. # When playing discs recorded with more than 96 kHz sampling frequency, you cannot use audio functions. Also, equalizer curve setting, Position, Auto EQ and Auto TA will be canceled. # When playing discs recorded with more than 96 kHz sampling frequency, audio is outputted from front speakers only. # When selecting FM as the source, you cannot switch to Source Level Adjuster. # When playing other than the DVD disc, you cannot switch to Dynamic Range Control. # When neither Front-L nor Front-R is selected in Position, you cannot switch to Time Alignment. # When both the center speaker and the rear speaker are set to OFF in the speaker setting, you cannot switch to Dolby Pro Logic II. 2 Touch ESC to return to the ordinary display. # To return to the previous display, touch Back. Using the position selector One way to assure a more natural sound is to accurately position the stereo image, putting you right in the center of the sound field. The position selector function lets you automatically adjust the speaker output levels and inserts a delay time to match the number and position of occupied seats. When used in conjunction with the SFC, the feature will make the sound image more natural and offer a panoramic sound that envelops you. 1 Touch Position on the DSP function menu. 2 Touch c/d/a/b to select a listening position. Touch one of these, c/d/a/b, to select a listening position as listed in the table. Key Display c Front-L d Front-R a Front b All Position Front seat left Front seat right Front seats All seats # To cancel the selected listening position, touch the same key again. En 83
-
 1
1 -
2
-
3
-
4
-
5
-
6
-
7
-
8
-
9
-
10
-
11
-
12
-
13
-
14
-
15
-
16
-
17
-
18
-
19
-
20
-
21
-
22
-
23
-
24
-
25
-
26
-
27
-
28
-
29
-
30
-
31
-
32
-
33
-
34
-
35
-
36
-
37
-
38
-
39
-
40
-
41
-
42
-
43
-
44
-
45
-
46
-
47
-
48
-
49
-
50
-
51
-
52
-
53
-
54
-
55
-
56
-
57
-
58
-
59
-
60
-
61
-
62
-
63
-
64
-
65
-
66
-
67
-
68
-
69
-
70
-
71
-
72
-
73
-
74
-
75
-
76
-
77
-
 78
78 -
 79
79 -
 80
80 -
 81
81 -
 82
82 -
 83
83 -
 84
84 -
 85
85 -
 86
86 -
 87
87 -
 88
88 -
89
-
90
-
91
-
92
-
93
-
94
-
95
-
96
-
97
-
98
-
99
-
100
-
101
-
102
-
103
-
104
-
105
-
106
-
107
-
108
-
109
-
110
-
111
-
112
-
113
-
114
-
115
-
116
 |
 |