Pioneer HTZ-575DV Owner's Manual
Pioneer HTZ-575DV Manual
 |
UPC - 125629032550
View all Pioneer HTZ-575DV manuals
Add to My Manuals
Save this manual to your list of manuals |
Pioneer HTZ-575DV manual content summary:
- Pioneer HTZ-575DV | Owner's Manual - Page 1
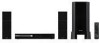
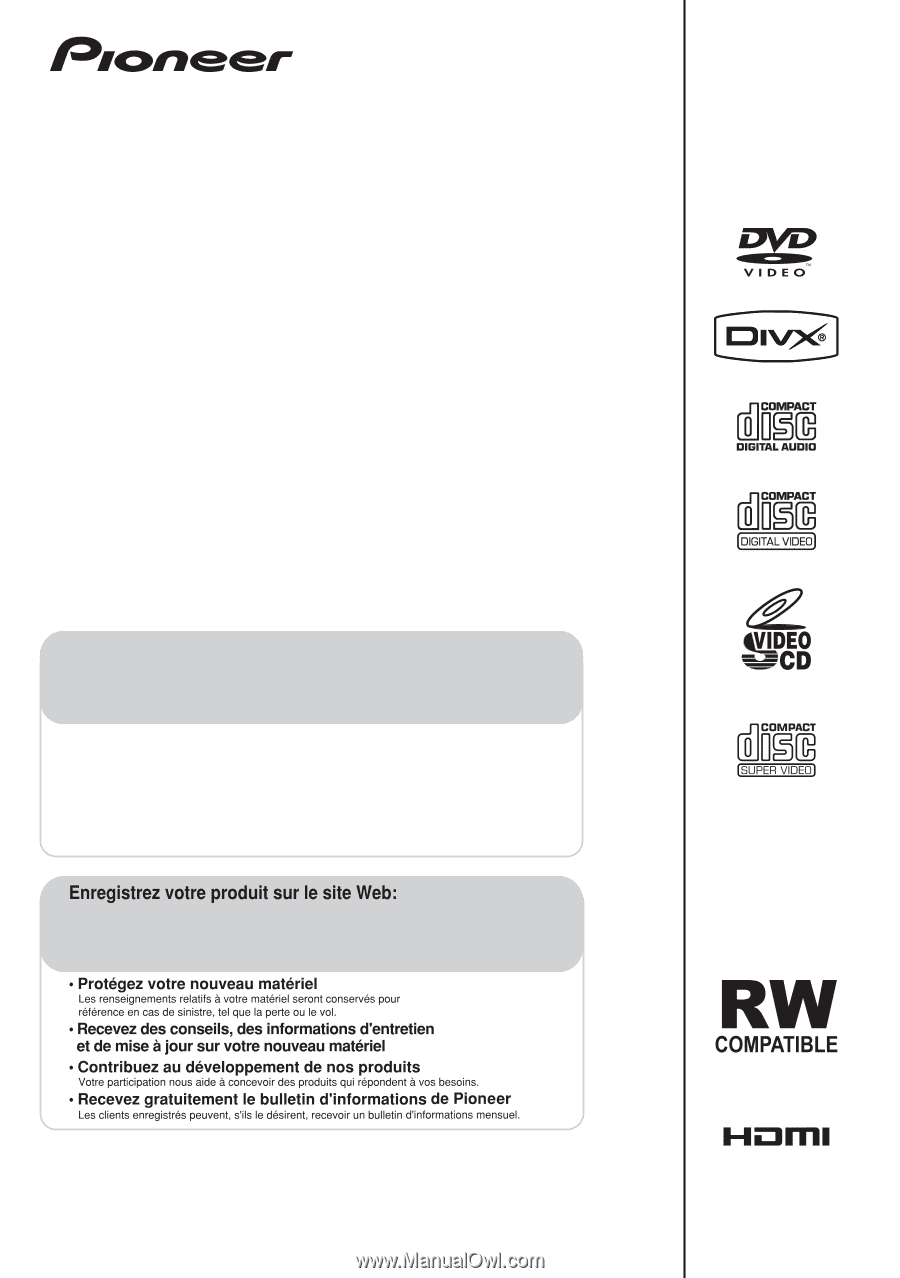
CD XV-DV575 Speaker System | Enceintes Acoustiques S-DV385 HTZ-580DV DVD/CD Receiver | Récepteur-lecteur DVD/CD XV-DV580 Speaker System | Enceintes Acoustiques S-DV395T S-DV395SW Register your product at: http://www.pioneerelectronics.com (US) http://www.pioneerelectronics.ca (Canada) • Protect your - Pioneer HTZ-575DV | Owner's Manual - Page 2
user to the presence of important operating and maintenance (servicing) instructions in the literature accompanying the appliance. D3-4-2-1-1_En-A NOTE: THE NO USER-SERVICEABLE PARTS de la Classe B est conforme à la norme NMB-003 du Canada. D8-10-1-3_EF CAUTION : USE OF CONTROLS OR ADJUSTMENTS OR - Pioneer HTZ-575DV | Owner's Manual - Page 3
openings. Install in accordance with the manufacturer's instructions. 8) Do not install near any heat DECLARATION OF CONFORMITY This device complies with part 15 of the FCC Rules. Operation XV-DV575, XV-DV580 Responsible Party Name: PIONEER ELECTRONICS SERVICE, INC. Address: 1925 E. DOMINGUEZ ST - Pioneer HTZ-575DV | Owner's Manual - Page 4
cord once in a while. When you find it damaged, ask your nearest PIONEER authorized service center or your dealer for a replacement. S002*_En CAUTION The STANDBY/ON saw, pneumatic drill 120 Rock band concert in front of speakers, thunderclap 140 Gunshot blast, jet plane 180 Rocket launching pad - Pioneer HTZ-575DV | Owner's Manual - Page 5
how to operate your model properly. After you have finished reading the instructions, put them in a safe place for future reference. Contents 01 Controls and displays Front panel 7 Remote control 8 Display 10 02 Getting started Home theater sound setup 11 Using the Auto MCACC setup for optimal - Pioneer HTZ-575DV | Owner's Manual - Page 6
Widescreen TV users 43 Standard TV users 43 Troubleshooting 44 General 44 DVD/CD/Video CD player 45 Tuner 46 USB connection 46 HDMI connection 47 Error Messages 47 Resetting the system 48 Using the language code list 48 Language code list 49 Country/Area code list 49 Specifications 50 - Pioneer HTZ-575DV | Owner's Manual - Page 7
and starts/ pauses/resumes playback. 3 Stops playback. 4 USB Selects the USB function and starts/pauses playback. 5 VOLUME +/- buttons 6 STANDBY/ON Switches the system on or into standby. 7 Disc tray 8 Remote Sensor 9 Display See Display below. 10 PHONES jack Connect headphones. 7 En - Pioneer HTZ-575DV | Owner's Manual - Page 8
HOME MENU ENTER SR + ST RETURN MCACC TUNE TEST TONE F.S. SURR SURROUND ADVANCED SOUND 11 12 13 14 15 TV CONTROL SLEEP INPUT CHANNEL VOLUME MUTE SHIFT VOLUME 16 17 18 1 STANDBY/ON Switches the system (page 17). ADVANCED - Selects a Pioneer original surround mode (page 17). SOUND - Pioneer HTZ-575DV | Owner's Manual - Page 9
an explanation of these controls. 9 TV CONTROL buttons These control Pioneer flat panel TVs. 10 SHIFT Press to access the controls highlighted 15 RETURN - Returns to a previous menu screen. SHIFT+TEST TONE - Outputs the test tone (for speaker setup) (page 28). 16 SLEEP Press to set the sleep timer ( - Pioneer HTZ-575DV | Owner's Manual - Page 10
98 7 1 DTS Lights during playback of a DTS source (page 16). 2 PRGSVE Lights when progressive scan video signal is given from the component video output terminal (page 35). 3 SOUND Lights when the Sound Retriever is active (page 18). 4 SURR. Lights when one of the Advanced surround listening modes - Pioneer HTZ-575DV | Owner's Manual - Page 11
below for optimal surround sound (see the Speaker Setup Guide for more placement tips). • Standard surround setup - This is a standard multichannel surround sound speaker setup for optimal 5.1 channel home theater sound. HTZ-575DV model speaker configuration: • Front surround setup - This setup is - Pioneer HTZ-575DV | Owner's Manual - Page 12
channel delay and channel level. After you have set up the microphone provided with your system, the receiver uses the information from a series of test tones to optimize the speaker increases automatically and the system outputs a series of power, and check the problem indicated by the error message - Pioneer HTZ-575DV | Owner's Manual - Page 13
ease of use, this system makes extensive use of graphical with the label side facing up, using the disc tray guide to align the disc (if you're loading a manual, 'Select' means use the cursor buttons to highlight an item on-screen, then press ENTER. Button What it does HOME parts of the disc. 13 En - Pioneer HTZ-575DV | Owner's Manual - Page 14
02 Getting started Button What it does Stops playback or cancels the resume function (if the display shows RESUME). Press to start fast reverse scanning. Press to start fast forward scanning. Skips to the start of the current track or chapter, then previous tracks/chapters. Skips - Pioneer HTZ-575DV | Owner's Manual - Page 15
the frequency you want. If necessary, fine tune the frequency using the manual tuning method. Improving poor FM reception If you're listening to an (TV, satellite receiver, etc.) to this unit for playback through the speaker system. See Connecting auxiliary components on page 34 for more on this. • - Pioneer HTZ-575DV | Owner's Manual - Page 16
mode The Auto listening mode is the simplest way to listen to any source as it was mastered: the output from the speakers mirrors the channels in the source material. • If you set up the system for Front surround (page 11), the Front Surround modes will give the best results. MCACC TUNE TEST TONE - Pioneer HTZ-575DV | Owner's Manual - Page 17
You can listen to any source - stereo or multichannel - in stereo. When playing a multichannel source, all channels are downmixed to the front left/right speakers and the subwoofer. MCACC TUNE TEST TONE F.S.SURR SURROUND ADVANCED SOUND • Press SURROUND repeatedly until STEREO shows in the - Pioneer HTZ-575DV | Owner's Manual - Page 18
03 Listening to your system Listening with Acoustic Calibration EQ You can listen press ENTER to confirm. • If you select EQ OFF, equalization is set to off but speaker settings (channel delay and channel level) remain in effect. • EQ ON is selected automatically after the Auto MCACC setup is - Pioneer HTZ-575DV | Owner's Manual - Page 19
varies slightly with the kind of disc loaded. • Some DVDs restrict the use of some functions (random or repeat, for example) in some or all parts of the disc. This is not a malfunction. • When playing Video CD/Super VCDs, some of the functions are not available during PBC playback. If you - Pioneer HTZ-575DV | Owner's Manual - Page 20
Use the Disc Navigator to browse through the contents of a DVD or Video CD/Super VCD disc to find the part you want to play. 1 During playback, press HOME MENU and select 'Disc Navigator' from the onscreen menu. Disc Navigator 2 Select a view option. Disc Navigator Title Chapter The options - Pioneer HTZ-575DV | Owner's Manual - Page 21
or DivX video/WMV file is selected, playback begins from that file, and continues until the end of the folder. 1 With the disc stopped, press HOME MENU and select 'Disc Navigator' from the on-screen menu. 2 Select the file you want to add to the playlist. See Browsing Windows MediaTM Audio - Pioneer HTZ-575DV | Owner's Manual - Page 22
) that form a loop which is played over and over. 1 During playback, press HOME MENU and select 'Play Mode'. Play Mode 2 Select 'A-B Repeat'. 3 Press ENTER and Video CD/Super VCD) in a random order.2 1 During playback, press HOME MENU and select 'Play Mode'. Note 1 You can't use repeat play with - Pioneer HTZ-575DV | Owner's Manual - Page 23
play (see below), erase the program list (see below), eject the disc or switch off. Tip • Use the following controls during program play: Button HOME MENU What it does Save the program list and exit without starting playback. Skip to the next step in the program list. Other functions available - Pioneer HTZ-575DV | Owner's Manual - Page 24
time; DivX video/ WMV discs by time. 1 Press HOME MENU and select 'Play Mode'. 2 Select 'Search Mode'. the screen Using the zoom feature you can magnify a part of the screen by a factor of 2 or 4, switch between the two soundtracks as well as individual channels in each. 3 Some discs only allow you - Pioneer HTZ-575DV | Owner's Manual - Page 25
English Deutsch Français Italiano Nederlands Español Disc playback features 04 Switching camera angles Some DVD discs feature scenes shot from two or more angles - check the disc box for details. When a multi-angle scene is playing, a icon appears on screen (this can be switched off if you prefer - Pioneer HTZ-575DV | Owner's Manual - Page 26
listen to two-channel audio1 and USB power. If this doesn't remedy the problem, it is likely your USB device is incompatible in the front panel display (or the system is in standby) when disconnecting. Button What computer for USB playback. • Pioneer cannot guarantee compatibility (operation and/or - Pioneer HTZ-575DV | Owner's Manual - Page 27
USB playback 05 English Deutsch Français Italiano Nederlands Español Scanning files You can fast-scan forward or backward at various different speeds. • During playback, press or . Press repeatedly to increase the scanning speed (shown on-screen). • To resume playback, press (play).1 - Pioneer HTZ-575DV | Owner's Manual - Page 28
.3 Use / to switch between channels in the following order: • L - Front left speaker • C - Center speaker • R - Front right speaker • SR - Surround right speaker • SL - Surround left speaker • SW - Subwoofer The channel level range is ±10 dB. Speaker distance setting Specifies the distance from - Pioneer HTZ-575DV | Owner's Manual - Page 29
Español Chapter 7 Video Adjust menu Video Adjust menu From the Video Adjust screen you can adjust settings that affect picture presentation. 1 Press HOME MENU and select 'Video Adjust' from the on-screen display. Video Adjust 2 Make settings using and ENTER. Video Adjust Sharpness Brightness - Pioneer HTZ-575DV | Owner's Manual - Page 30
, press HOME MENU and output on page 35.) Interlace Progressive HDMI Resolution (See Connecting using HDMI instruction manual for details). Press ENTER once more to confirm (or RETURN to cancel). Note that progressive scan video is only output from the component video jacks. Set if your TV supports - Pioneer HTZ-575DV | Owner's Manual - Page 31
DVI devices). Use this setting if colors appear overly rich on the Full Range RGB setting. Outputs 8-bit component video format (default setting for HDMI-compatible devices). Language settings Setting Audio Language Option English Languages as displayed Other Language Subtitle Language English - Pioneer HTZ-575DV | Owner's Manual - Page 32
lower level than the disc, the disc won't play. Some discs also support the Country/Area Code feature. The player does not play certain scenes on . You can't lock level 1. Initial Settings Video Output Language Display Options Parental Lock DivX (R) VOD Password Level system on page 48). 32 En - Pioneer HTZ-575DV | Owner's Manual - Page 33
is protected by a DRM (Digital Rights Management) system. This restricts playback of content to specific, registered devices. • If you load a disc that code 1 Press HOME MENU and select 'Initial Settings'. 2 Select 'Options', then 'DivX (R) VOD'. Initial Settings Video Output Language Display - Pioneer HTZ-575DV | Owner's Manual - Page 34
Y CONTROL VIDEO OUT • Connect the LINE 1 DIGITAL IN jack to the digital output of an external playback component. These include digital components such as a digital TV, an MD player, digital satellite, or a game system. Connecting an analog audio component You can use the (LINE 2) AUDIO IN jacks - Pioneer HTZ-575DV | Owner's Manual - Page 35
of 525 progressive scan picture problems, it is recommended that the user switch the connection to the 'standard definition' output (Interlace). If there are questions regarding our TV set compatibility with this model, please contact our customer service center. 3 • An HDMI connection can only be - Pioneer HTZ-575DV | Owner's Manual - Page 36
Note 1 Audio output from the HDMI terminal is 2 channel linear PCM only. 2 This system is compatible with all Pioneer flat panel TVs from 2003 onward. 3 The 3-ringed SR+ cable from Pioneer is commercially available under the part number ADE7095. Contact the Pioneer Customer Support division for more - Pioneer HTZ-575DV | Owner's Manual - Page 37
SR+ features, you need to make a few settings in the unit. See SR+ Setup for Pioneer Flat Panel TVs below for detailed instructions. SR+ Setup for Pioneer Flat Panel TVs Make the following settings if you have connected a Pioneer flat panel TV to this unit using an SR+ cable. Note that the number of - Pioneer HTZ-575DV | Owner's Manual - Page 38
. The first setting in each section is the default. 1 Switch the system into standby. 2 Press SHIFT+SETUP and use / then ENTER to choose hear the decoded signal. • NORMAL - Regular CD playback; some DTS-encoded CDs output a noisy signal. • DTS-CD - Proper decoding of DTSencoded CDs; the beginning - Pioneer HTZ-575DV | Owner's Manual - Page 39
supports the IEC's Super VCD standard for superior picture quality, dual soundtracks, and widescreen support with the CD Audio specification and therefore may not play XA Form1. Romeo and Joliet file systems are both compatible. • Multi-session manual or disc boxes for more on compatibility. • - Pioneer HTZ-575DV | Owner's Manual - Page 40
1 Playback of .avi video files larger than 4 GB is not possible. 2 • For external subtitle files the following subtitle format filename extensions are supported (please note that these files are not shown within the disc navigation menu): .srt, .sub, .ssa, .smi • Some external subtitle files may - Pioneer HTZ-575DV | Owner's Manual - Page 41
Media Encoder 9 Series, with .wmv as an extension. • Compatible with size under 720 x 576 pixels/ 720 x 480 pixels. • Advanced Profile is not supported. • DRM-protected video files will not play in this player. • File extensions .wmv. • Compatible with bit rate under 192 kbps. About MPEG-4 AAC - Pioneer HTZ-575DV | Owner's Manual - Page 42
circular discs only. Pioneer disclaims all liability compatible with. Your DVD system also has a region you to enjoy using this system for years to come, so place where the system will be exposed in your stereo system that becomes hot or other room where the system may be exposed to smoke or - Pioneer HTZ-575DV | Owner's Manual - Page 43
Pioneer authorized service center. Although lens cleaners are commercially available, we do not recommend using them since some may damage the lens. Problems on. Moving the system unit If you need ; see the instructions that came with bottom of the screen. Standard TV users If you have a standard TV, - Pioneer HTZ-575DV | Owner's Manual - Page 44
• If the problem persists, take it to your nearest Pioneer authorized service center or your dealer for servicing. No sound is output when a function or VIRTUAL mode (see Listening to your system on page 16). • Connect the speakers properly (refer to the Setup Guide). • If the source is 96 kHz, - Pioneer HTZ-575DV | Owner's Manual - Page 45
are inserted fully. • Check the manual of the TV/monitor to make Output settings on page 30). When recorded on a VCR or passed through an AV selector, there is disturbance in the playback picture. • This system uses copy-protection technology which may prevent recording or cause picture problems - Pioneer HTZ-575DV | Owner's Manual - Page 46
the AM antenna (refer to the Setup Guide) and adjust the direction and position for , connect an outdoor antenna. USB connection Problem Remedy USB mass storage • Make sure you FAT16 or FAT32. by the system. • USB devices with an internal USB hub are not supported. Files don't show up in - Pioneer HTZ-575DV | Owner's Manual - Page 47
36 to make sure that AUDIO ON is selected. No HDMI video output. • Make sure that you've selected this player as the HDMI input in the settings for the component you're using (refer to the component's instruction manual). • Check that the HDMI cable is connected properly and isn't damaged. • Check - Pioneer HTZ-575DV | Owner's Manual - Page 48
ERR EEP ERR EXIT Description • See HDMI connection above for troubleshooting tips. See also Resetting the HDMI connection on page 36 if the problem persists. • See Important in Using the USB interface on page 26 for more on this. • Contact your Pioneer authorized service center or your dealer for - Pioneer HTZ-575DV | Owner's Manual - Page 49
list Country/Area, Country/Area code, Country/Area code letter Argentina, 0118, ar Australia, 0121, au Austria, 0120, at Belgium, 0205, be Brazil, 0218, br Canada, 0301, ca Chile, 0312, cl China, 0314, cn Denmark, 0411, dk Finland, 0609, fi France, 0618, fr Germany, 0405, de Hong Kong, 0811, hk - Pioneer HTZ-575DV | Owner's Manual - Page 50
Auto MCACC setup 1 Power cord 1 Warranty card 1 Setup Guide These operating instructions 50 En S-DV385 Speaker system • Front/surround speakers Enclosure Closed-box bookshelf type (magnetically shielded) System 6.6 cm (2 1/2 in.) 1-way system Speakers 6.6 cm (2 1/2 in.) cone type Impedance - Pioneer HTZ-575DV | Owner's Manual - Page 51
Speaker cables 5 Non-skid pads (large 16 Speaker stand bases 4 Screws (for bases 12 S-DV395SW Speaker system • Subwoofer Enclosure Bass-reflex floorstanding type System 16 cm (6 1/4 in.) 1-way system Speaker Speaker cables 1 Non-skid pads (large 4 Note • Specifications home instruction manuals - Pioneer HTZ-575DV | Owner's Manual - Page 52
et, s'il n'est pas installé et utilisé conformément aux instructions, peut causer des interférences graves sur les communications radio. Toutefois, appareil numérique de la Classe B est conforme à la norme NMB-003 du Canada. D8-10-1-3_EF ATTENTION : L'UTILISATION DE COMMANDES OU DE RÉGLAGES, OU L' - Pioneer HTZ-575DV | Owner's Manual - Page 53
7) Ne pas bloquer les évents d'aération. Installer l'appareil selon les instructions du fabricant. 8) Ne pas installer l'appareil près d'un appareil de 12) N'utiliser l'appareil qu'avec un chariot, meuble, trépied, support ou table recommandé par le fabricant ou vendu avec l'appareil. Si un - Pioneer HTZ-575DV | Owner's Manual - Page 54
le câble d'alimentation de temps en temps. Contacter le service après-vente PIONEER le plus proche ou le revendeur pour un remplacement. S002* voyez une période prolongée de non utilisation (par exemple avant un départ en vacances). D3-4-2-2-2a_A_Fr Ce produit est destiné à une utilisation - Pioneer HTZ-575DV | Owner's Manual - Page 55
Nederlands Español Nous vous remercions d'avoir acheté ce produit Pioneer. Veuillez lire attentivement ce mode d'emploi afin d'apprendre à manipuler votre modèle correctement. Lorsque vous avez terminé, rangez ces instructions en lieu sûr afin de pouvoir vous y référer à l'avenir. Contents 01 - Pioneer HTZ-575DV | Owner's Manual - Page 56
. . . . . .30 Réglage du paramètre Video Output (sortie vidéo 30 Réglage du paramètre Language (langue 31 HDMI 35 Utilisation de l'option HDMI audio . . . . .36 Réactivation de la connexion HDMI. . . . .36 À propos de HDMI 36 Utilisation de ce système avec un Téléviseur à Écran Plat Pioneer - Pioneer HTZ-575DV | Owner's Manual - Page 57
English Français Deutsch Italiano Nederlands Español Chapitre 1 Commandes et écrans Panneau avant 1 234 5 6 11 Interface USB Permet de connecter et d'utiliser un appareil USB comme source de lecture (voir Lecture USB page 26). COMPATIBLE 7 8 9 10 11 1 OPEN/CLOSE Cette touche ouvre/ - Pioneer HTZ-575DV | Owner's Manual - Page 58
ST HOME MENU ENTER SR + ST RETURN MCACC TUNE TEST TONE F.S. SURR SURROUND ADVANCED SOUND 11 12 13 14 15 TV CONTROL SLEEP INPUT CHANNEL lecture en mode stéréo (page 17). ADVANCED - Sélectionne un mode d'ambiance Pioneer original (page 17). SOUND - Permet d'accéder au menu audio pour régler - Pioneer HTZ-575DV | Owner's Manual - Page 59
disque page 19 et Lecture USB page 26 pour une explication sur ces commandes. 9 Touches TV CONTROL Ces commandes pilotent les téléviseurs à écran plat Pioneer. 10 SHIFT Appuyez sur cette touche pour accéder aux commandes allumées en vert. 11 SOUND RETRIEVER - Appuyez sur cette touche pour rétablir - Pioneer HTZ-575DV | Owner's Manual - Page 60
Écran 1 23 4 56 PRGSVE SOUND DTS F.SURR. 2D 2PL RPT -1 kHz PGM MHz RDM 14 13 12 11 10 98 7 1 DTS S'allume pendant la lecture d'une source DTS (page 16). 2 PRGSVE S'allume lorsque la vidéo à balayage progressif est disponible uniquement à partir de la sortie vidéo composante (page 35). 3 - Pioneer HTZ-575DV | Owner's Manual - Page 61
Guide d'installation des enceintes pour plus d'informations). • Installation standard des enceintes d'ambiance - Installation standard des enceintes d'ambiance multivoies pour un son Home Cinema optimal 5.1 voies. Configuration de l'enceinte modèle HTZ l'enceinte modèle HTZ-580DV : Avant gauche - Pioneer HTZ-575DV | Owner's Manual - Page 62
LINE OPEN/CLOSE CLEAR TOP MENU DISPLAY 0 TUNE MENU SETUP ST HOME MENU ENTER SR ST RETURN TV CONTROL SLEEP INPUT CHANNEL VOLUME MUTE SHIFT VOLUME PLAYLIST 1 2 31 AUDIO SUBTITLE 4 5 acoustique EQ page 18 pour mettre en/hors service l'équilibrage (EQ) de Calibrage Acoustique. 12 Fr - Pioneer HTZ-575DV | Owner's Manual - Page 63
l'écran, puis appuyer sur la touche ENTER. Touches Leur rôle HOME MENU Cette touche commande l'affichage sur l'écran Ces touches permettent la le menu principal sans enregistrer les modifications effectuées Note • Le guide de touches situé en bas de chaque écran OSD indique les touches - Pioneer HTZ-575DV | Owner's Manual - Page 64
Touches Leur rôle Cette touche permet le début ou la reprise de la lecture normale. • Si la mention RESUME ou LAST MEM est affichée sur l'écran, la lecture commence à partir du point d'arrêt ou du point défini par la mémoire de la dernière image (reportez-vous à la section Reprise de la - Pioneer HTZ-575DV | Owner's Manual - Page 65
English Français Deutsch Italiano Nederlands Español Touches Leur rôle Cette touche affiche la page de menu suivante (si elle existe). Écoute de la radio Le syntoniseur peut recevoir des canaux FM et AM. Il vous permet de mémoriser vos stations préférées pour ne pas devoir les rechercher - Pioneer HTZ-575DV | Owner's Manual - Page 66
Chapitre 3 Écoute de votre système Mode d'écoute Auto Le mode d'écoute Auto représente le moyen le plus simple d'écouter une source puisqu'il a été masterisé : la sortie des enceintes reflète les voies de l'appareil source. • Si vous configurez le système pour un son d'ambiance frontal (page 11), - Pioneer HTZ-575DV | Owner's Manual - Page 67
la section page 11.1 0 TOP MENU TUNE MENU SETUP ST HOME MENU ENTER SR ST RETURN MCACC TUNE TEST TONE F.S.SURR SURROUND ADVANCED le cas des sources multicanaux, down-mixed stereo sound) from the surround speakers for powerful stereo effect. • Appuyez sur ADVANCED pour sélectionner un mode - Pioneer HTZ-575DV | Owner's Manual - Page 68
Écoute avec l'équilibrage acoustique EQ Vous pouvez écouter des sources à l'aide de l'égalisation d'étalonnage acoustique définie à la section Utilisation de la configuration Auto MCACC pour des sonorités d'ambiance optimales page 12.1 1 Appuyez sur SOUND et utilisez / pour sélectionner MCACC EQ, - Pioneer HTZ-575DV | Owner's Manual - Page 69
English Français Deutsch Italiano Nederlands Español Chapitre 4 Fonctions de lecture de disque Important • De nombreuses fonctions traitées dans ce chapitre s'appliquent aux disques DVD, Vidéo CD, Super VCD, CD, vidéo DivX/WMV et aux disques WMA/MP3/MPEG-4 AAC/ JPEG, bien que les effets exacts de - Pioneer HTZ-575DV | Owner's Manual - Page 70
Disc Navigator pour examiner le contenu d'un DVD ou d'un Vidéo CD/Super VCD et trouver le passage souhaité. 1 Pendant la lecture, appuyez sur HOME MENU, puis sélectionnez 'Disc Navigator' sur le menu affiché. 04 05 06 Disc Navigator: Title 01- 49: - - Pour sélectionner une miniature, vous pouvez - Pioneer HTZ-575DV | Owner's Manual - Page 71
DivX/WMV et JPEG avec Disc Navigator Utilisez Disc Navigator pour localiser un fichier ou un dossier dont vous connaissez le nom. 1 Appuyez sur HOME MENU, puis sélectionnez 'Disc Navigator' dans le menu affiché. 00:00/ 00:00 0kbps Folder1 Folder2 Folder3 Folder4 2 Utilisez les touches et ENTER - Pioneer HTZ-575DV | Owner's Manual - Page 72
boucle. Si vous appuyez sur ENTER, la lecture reprend au point de départ et la boucle est lue. 5 Pour revenir à la lecture normale, CD et Super VCD) dans un ordre aléatoire.2 1 Pendant la lecture, appuyez sur HOME MENU et sélectionnez 'Play Mode'. 2 Sélectionnez 'Random', puis une option. • Pour - Pioneer HTZ-575DV | Owner's Manual - Page 73
de lecture Cette fonction permet de programmer l'ordre de lecture des titres, chapitres ou plages d'un disque.1 1 Pendant la lecture, appuyez sur HOME MENU et sélectionnez 'Play Mode'. 2 Sélectionnez 'Program', puis 'Create/Edit' dans la liste des options de programmation. 3 Utilisez les touches de - Pioneer HTZ-575DV | Owner's Manual - Page 74
CD et les Super VCD, par numéro de piste ou par durée ; sur les disques vidéo DivX/WMV, par durée. 1 Appuyez sur la touche HOME MENU et sélectionnez 'Play Mode'. 2 Sélectionnez 'Search Mode'. Les options de recherche qui s'affichent dépendent de la nature du disque chargé. 3 Sélectionnez un mode de - Pioneer HTZ-575DV | Owner's Manual - Page 75
English Français Deutsch Italiano Nederlands Español Choix de l'angle de prise de vues Certains DVD comportent des scènes filmées sous différents angles (deux ou plus), consultez le coffret du disque pour plus de détails. Pendant la lecture d'une scène filmée sous plusieurs angles, une icône appara - Pioneer HTZ-575DV | Owner's Manual - Page 76
FAT16/32. Il n'est pas possible d'effectuer la lecture sur cet appareil de fichiers se trouvant sur un ordinateur personnel, via l'interface USB. • Pioneer ne garantit pas la compatibilité (utilisation et/ou alimentation) avec tous les périphériques de stockage de masse USB, et ne peut être tenu - Pioneer HTZ-575DV | Owner's Manual - Page 77
English Français Deutsch Italiano Nederlands Español Exploration rapide des fichiers Vous pouvez parcourir rapidement le contenu d'une source vers le début ou vers la fin à différentes vitesses. • Pendant la lecture, appuyez sur ou . Appuyez à plusieurs reprises pour augmenter la vitesse d' - Pioneer HTZ-575DV | Owner's Manual - Page 78
Chapitre 6 Réglages de sonorités d'ambiance Utilisation du menu Setup (Configuration) À partir du menu de configuration, vous avez accès à tous les réglages du son d'ambiance du système1, y compris le niveau des canaux, la distance des enceintes et le réglage de la plage dynamique. La fonction Auto - Pioneer HTZ-575DV | Owner's Manual - Page 79
7 Menu Video Adjust Menu Video Adjust L'écran Video Adjust permet d'ajuster les réglages qui affectent la présentation des images. 1 Appuyez sur HOME MENU et sélectionnez 'Video Adjust' sur l'écran. Video Adjust 2 Pour effectuer des réglages, utilisez les touches de déplacement et ENTER. Video - Pioneer HTZ-575DV | Owner's Manual - Page 80
cours de lecture, appuyez sur HOME MENU et sélectionnez 'Initial Settings .1 Réglage du paramètre Video Output (sortie vidéo) Réglage TV Screen HDMI a été connecté à cet appareil via la prise HDMI. 2 Ce réglage peut être utilisé uniquement lors d'une connexion via HDMI et lorsque la résolution HDMI - Pioneer HTZ-575DV | Owner's Manual - Page 81
ées sont pâles, cette option permet d'obtenir des couleurs plus vives et des noirs plus profonds (option par défaut pour les appareils DVI compatibles HDMI). Utilisez cette option si l'option Full Range RGB produit des couleurs trop vives ou saturées. Cette option produit une sortie vidéo au format - Pioneer HTZ-575DV | Owner's Manual - Page 82
mot de passe pour modifier le niveau de restriction parentale ou indiquer un code de pays/région.1 1 Sélectionnez 'Password'. Initial Settings Video Output Language Display Options Parental Lock DivX (R) VOD Password Level Change Country Code 2 Utilisez les touches numérotées pour taper un mot - Pioneer HTZ-575DV | Owner's Manual - Page 83
message ne s'affiche. Affichage du code d'enregistrement DivX VOD 1 Appuyez sur HOME MENU, puis sélectionnez 'Initial Settings'. 2 Sélectionnez 'Options', puis 'DivX (R) VOD'. Initial Settings Video Output Language Display Options Parental Lock DivX (R) VOD Display 3 Sélectionnez 'Display'. Le - Pioneer HTZ-575DV | Owner's Manual - Page 84
numériques, les enregistreurs CD, etc. Nous recommandons l'utilisation d'un câble HDMI pour connecter les sources dotées de prises HDMI. Pour en savoir plus, reportezvous à la section Connexion au moyen de l'interface HDMI page 35. Pour entendre l'audio en provenance d'un téléviseur, connectez le - Pioneer HTZ-575DV | Owner's Manual - Page 85
System Copy Guard.2 Vous pouvez ajuster la résolution et la couleur au moyen des réglages HDMI. Pour plus d'informations sur ces réglages, reportez-vous à la section Réglage du paramètre Video Output contacter notre centre de service après-vente. 3 • Une connexion HDMI peut uniquement être ré - Pioneer HTZ-575DV | Owner's Manual - Page 86
HDMI est codée uniquement en PCM linéaire à 2 canaux. 2 Ce système est compatible avec tous les téléviseurs à écran plat Pioneer, fabriqués à partir de 2003. 3 Le câble SR+ à 3 anneaux de Pioneer est disponible dans le commerce sous la référence ADE7095. Contactez le service clientèle de Pioneer - Pioneer HTZ-575DV | Owner's Manual - Page 87
Écran Plat Pioneer ci-dessous pour les instructions détaillées. Configuration SR+ pour les Téléviseurs à Écran Plat Pioneer Effectuez les même après avoir basculé ce système en mode veille, puis à nouveau en service. La mise en sourdine automatique sera activée lorsque ce système est sous tension. - Pioneer HTZ-575DV | Owner's Manual - Page 88
Chapitre 10 Informations complémentaires Réglages optionnels du système Tous les réglages disponibles dans le menu de configuration du mode veille sont énumérés ci-dessous. Consultez les remarques propres à chaque section pour plus d'informations sur les réglages. Le premier réglage de chaque - Pioneer HTZ-575DV | Owner's Manual - Page 89
amples informations au sujet des spécifications DualDisc, consultez le fabricant ou le revendeur de ce type de disque. Tableau de compatibilité des disques Support Formats compatibles CD-R/-RW • CD-Audio, Vidéo CD/Super VCD, CD-ROM* ISO 9660 contenant des fichiers MP3, WMA, MPEG-4 AAC, JPEG ou - Pioneer HTZ-575DV | Owner's Manual - Page 90
Support Formats compatibles À propos de DivX Fichiers audio compressés • MPEG-1 Audio Layer 3 (MP3), Windows Media Audio (WMA), MPEG-4 AAC • Fréquence d'échantillonnage : 32 kHz/44,1 kHz/ - Pioneer HTZ-575DV | Owner's Manual - Page 91
English Français Deutsch Italiano Nederlands Español Groupe 2 : Albanian (sq), Croatian (hr), Czech (cs), Hungarian (hu), Polish (pl), Romanian (ro), Slovak (sk), Slovenian (sl) Groupe 3 : Bulgarian (bg), Byelorussian (be), Macedonian (mk), Russian (ru), Serbian (sr), Ukrainian (uk) Groupe 4 : - Pioneer HTZ-575DV | Owner's Manual - Page 92
avec votre lecteur. Vous pourriez endommager l'appareil. Cet appareil est exclusivement conçu pour l'utilisation de disques conventionnels parfaitement circulaires. Pioneer décline toute responsabilité liée à l'utilisation de disques de forme non standard. Régions DVD Vidéo Tout DVD Vidéo présente - Pioneer HTZ-575DV | Owner's Manual - Page 93
normale, mais si, pour une raison quelconque, des poussières ou saletés perturbaient son fonctionnement, consultez un centre d'entretien agréé par Pioneer. Bien que des agents de nettoyage pour optique soient disponibles dans le commerce, nous vous déconseillons de les utiliser car ils risquent - Pioneer HTZ-575DV | Owner's Manual - Page 94
Guide de dépannage Les erreurs de commande sont souvent prises pour une anomalie et é. Si ces vérifications ne vous permettent pas de remédier au dysfonctionnement, consultez le service après-vente agréé par Pioneer le plus proche de chez vous ou votre revendeur pour faire réparer l'appareil. • Si - Pioneer HTZ-575DV | Owner's Manual - Page 95
l'option TV Screen en fonction du format ne change pas. téléviseur/moniteur que vous utilisez (reportez-vous à la section Réglage du paramètre Video Output (sortie vidéo) page 30). Les images enregistrées • Ce système intègre une technologie de protection contre la copie pouvant à partir d'un emp - Pioneer HTZ-575DV | Owner's Manual - Page 96
Anomalie Le disque DVD-ROM n'est pas reconnu. Les fichiers ne s'affichent pas dans Disc Navigator/Photo Browser. Lecture des fichiers WMA ou MPEG-4 AAC impossible. Impossible de lire les fichiers WMV. Action corrective • Assurez-vous que le DVD-ROM a bien été enregistré au format UDF Bridge. - Pioneer HTZ-575DV | Owner's Manual - Page 97
connecté via l'interface HDMI. Pour modifier la résolution HDMI, reportez-vous à la section Réglage du paramètre Video Output (sortie vidéo) page 30 Le mode Sound Demo est activé. Reportez-vous à la section Généralités de Guide de dépannage page 44. NOISY • Les bruits de fond sont trop élevés - Pioneer HTZ-575DV | Owner's Manual - Page 98
également la section Réactivation de la connexion HDMI page 36. • Reportez-vous à la rubrique Important de la section Utilisation de l'interface USB page 26 pour plus d'informations. • Pour les réparations, contactez le service après-vente agréé par Pioneer ou votre revendeur. • S'affiche lorsqu'une - Pioneer HTZ-575DV | Owner's Manual - Page 99
de pays/région, Lettre de code de pays/région Argentine, 0118, ar Australie, 0121, au Autriche, 0120, at Belgique, 0205, be Brésil, 0218, br Canada, 0301, ca Chili, 0312, cl Chine, 0314, cn Danemark, 0411, dk Finlande, 0609, fi France, 0618, fr Allemagne, 0405, de Hong Kong, 0811, hk Inde - Pioneer HTZ-575DV | Owner's Manual - Page 100
34 Hz à 1,2 kHz Puissance d'entrée max 60 W Dimensions 216 mm (L) x 391 mm (H) x 393 mm (P) Poids 5,5 kg • Accessoires Câbles d'enceinte 6 Supports 2 Fixation de montage 6 Vis (utilisation commune pour les fixations et les fixations de montage 8 Coussinets antidérapants (petits 18 Coussinets - Pioneer HTZ-575DV | Owner's Manual - Page 101
Coussinets antidérapants (grands 16 Bases pour support de haut-parleur 4 Vis (pour les supports 12 Système d'enceintes S-DV395SW • Caisson , veuillez vous reporter au manuel d'instruction ou aux fichiers d'aide de l'ordinateur Pioneer Corporation. © 2008 Pioneer Corporation. Tous droits de reproduction - Pioneer HTZ-575DV | Owner's Manual - Page 102
, or if you wish to purchase replacement parts, operating instructions, service manuals, or accessories, please call the number shown below. 1 - 8 0 0 - 4 2 1 - 1 4 0 4 Please do not ship your product to Pioneer without first calling the Customer Support at the above listed number for assistance
-
 1
1 -
 2
2 -
 3
3 -
 4
4 -
 5
5 -
 6
6 -
 7
7 -
8
-
9
-
10
-
11
-
12
-
13
-
14
-
15
-
16
-
17
-
18
-
19
-
20
-
21
-
22
-
23
-
24
-
25
-
26
-
27
-
28
-
29
-
30
-
31
-
32
-
33
-
34
-
35
-
36
-
37
-
38
-
39
-
40
-
41
-
42
-
43
-
44
-
45
-
46
-
47
-
48
-
49
-
50
-
51
-
52
-
53
-
54
-
55
-
56
-
57
-
58
-
59
-
60
-
61
-
62
-
63
-
64
-
65
-
66
-
67
-
68
-
69
-
70
-
71
-
72
-
73
-
74
-
75
-
76
-
77
-
78
-
79
-
80
-
81
-
82
-
83
-
84
-
85
-
86
-
87
-
88
-
89
-
90
-
91
-
92
-
93
-
94
-
95
-
96
-
97
-
98
-
99
-
100
-
101
-
102
 |
 |
Operating Instructions
Mode d’emploi
HTZ-575DV
DVD/CD Receiver | Récepteur-lecteur DVD/CD
XV-DV575
Speaker System | Enceintes Acoustiques
S-DV385
HTZ-580DV
DVD/CD Receiver | Récepteur-lecteur DVD/CD
XV-DV580
Speaker System | Enceintes Acoustiques
S-DV395T
S-DV395SW
Register your product at:
http://www.pioneerelectronics.ca (Canada)
http://www.pioneerelectronics.ca (Canada)
• Protect your new investment
The details of your purchase will be on file for reference in the event of an insurance claim such as loss or theft.
• Improve product development
Your input helps us continue to design products that meet your needs.
• Receive a free Pioneer newsletter
Registered customers can opt in to receive a monthly newsletter.
• Receive free tips, updates and service bulletins on your new product