Pioneer VSX-830-K Owner's Manual - Page 90
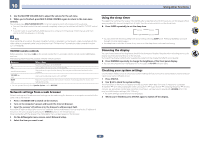
Network settings from a web browser, Using the sleep timer, Dimming the display, Checking your
 |
View all Pioneer VSX-830-K manuals
Add to My Manuals
Save this manual to your list of manuals |
Page 90 highlights
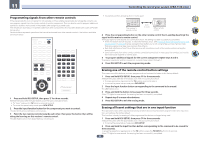
10 Using other functions 4 Use the MASTER VOLUME dial to adjust the volume for the sub zone. 5 When you're finished, press MULTI-ZONE CONTROL again to return to the main zone controls. You can also press MULTI-ZONE ON/OFF on the front panel to switch off all output to the sub zone. ! You won't be able to switch the main zone off completely unless you've switched off the MULTI-ZONE control first. ! If you don't plan to use the MULTI-ZONE feature for a while, turn off the power in both the sub and main rooms so that this receiver is in standby. Note When HDZONE is turned on, the video converter function is disabled. For that reason, video connected with the video cable or component cable is not output from the HDMI terminal. To enable the video converter function, turn off HDZONE. HDZONE remote controls Before operation, hold down HDZ on the remote control (for 1.5 seconds) until the remote control LED flashes one time. The following table shows the possible HDZONE remote controls: Button(s) u ALL Input function buttons VOLUME +/- MUTE What it does Switches on/off power in the HDZONE. Use to select the input function in the HDZONE. Use to select the input function directly (this may not work for some functions) in the HDZONE. Use to set the listening volume in the HDZONE. Mutes the sound or restores the sound if it has been muted (adjusting the volume also restores the sound). a You can operate this only when Speaker System is set to HDZONE. Network settings from a web browser Network settings and Pandora account settings can be made using the browser on a computer connected to the same LAN as the receiver. 1 Press u STANDBY/ON to switch on the receiver. 2 Turn on the computer's power and launch the Internet browser. 3 Input the receiver's IP address into the browser's address input field. Access the IP address"http://(the receiver's IP address)" from a web browser. You can display the IP address of the unit on the unit's display by pressing the STATUS button on the remote control. When connected with the receiver, the AVNavigator menu screen appears in the browser. 4 On the AVNavigator menu screen, select Network Setup. 5 Select the item you want to set. Using the sleep timer The sleep timer switches the receiver into standby after a specified amount of time so you can fall asleep without worrying about the receiver being left on all night. Use the remote control to set the sleep timer. % Press SLEEP repeatedly to set the sleep time. 30 min 60 min Off 90 min ! You can check the remaining sleep time at any time by pressing SLEEP once. Pressing repeatedly will cycle through the sleep options again. ! The sleep timer is valid for all zones. If any zone is on, the sleep timer continues functioning. Dimming the display You can choose between four brightness levels for the front panel display. Note that when selecting sources, the display automatically brightens for a few seconds. Turning off the display is effective for suppressing noise from the display that affects sound quality. % Press DIMMER repeatedly to change the brightness of the front panel display. ! You can also choose to turn the display off. In this case, the FL OFF indicator lights. Checking your system settings Use the status display screen to check your current settings for features such as surround back channel processing and your current MCACC preset. 1 Press STATUS. 2 Use i/j to check the system setting. The information on the main unit display switches as shown below each time one of the buttons is pressed. IP address f Wi-Fi status (displayed when running Wi-Fi) f audio format f sampling frequency f MCACC memory f auto-phase control plus correction result value f Input source played with HDZONE (VSX-1130 only) f HDMI output settings (VSX-1130 only) ! For some settings, some items are not displayed. 3 When you're finished, press STATUS again to switch off the display. 90
-
 1
1 -
2
-
3
-
4
-
5
-
6
-
7
-
8
-
9
-
10
-
11
-
12
-
13
-
14
-
15
-
16
-
17
-
18
-
19
-
20
-
21
-
22
-
23
-
24
-
25
-
26
-
27
-
28
-
29
-
30
-
31
-
32
-
33
-
34
-
35
-
36
-
37
-
38
-
39
-
40
-
41
-
42
-
43
-
44
-
45
-
46
-
47
-
48
-
49
-
50
-
51
-
52
-
53
-
54
-
55
-
56
-
57
-
58
-
59
-
60
-
61
-
62
-
63
-
64
-
65
-
66
-
67
-
68
-
69
-
70
-
71
-
72
-
73
-
74
-
75
-
76
-
77
-
78
-
79
-
80
-
81
-
82
-
83
-
84
-
 85
85 -
 86
86 -
 87
87 -
 88
88 -
 89
89 -
 90
90 -
 91
91 -
 92
92 -
 93
93 -
 94
94 -
 95
95 -
96
-
97
-
98
-
99
-
100
-
101
-
102
-
103
-
104
-
105
-
106
-
107
-
108
-
109
-
110
-
111
-
112
-
113
-
114
-
115
-
116
-
117
-
118
-
119
-
120
-
121
-
122
-
123
-
124
-
125
-
126
-
127
-
128
-
129
-
130
-
131
-
132
-
133
-
134
-
135
-
136
-
137
 |
 |
