Samsung CLP-365W User Guide - Page 192
Printer Connection Type, Information Collection Program
 |
View all Samsung CLP-365W manuals
Add to My Manuals
Save this manual to your list of manuals |
Page 192 highlights
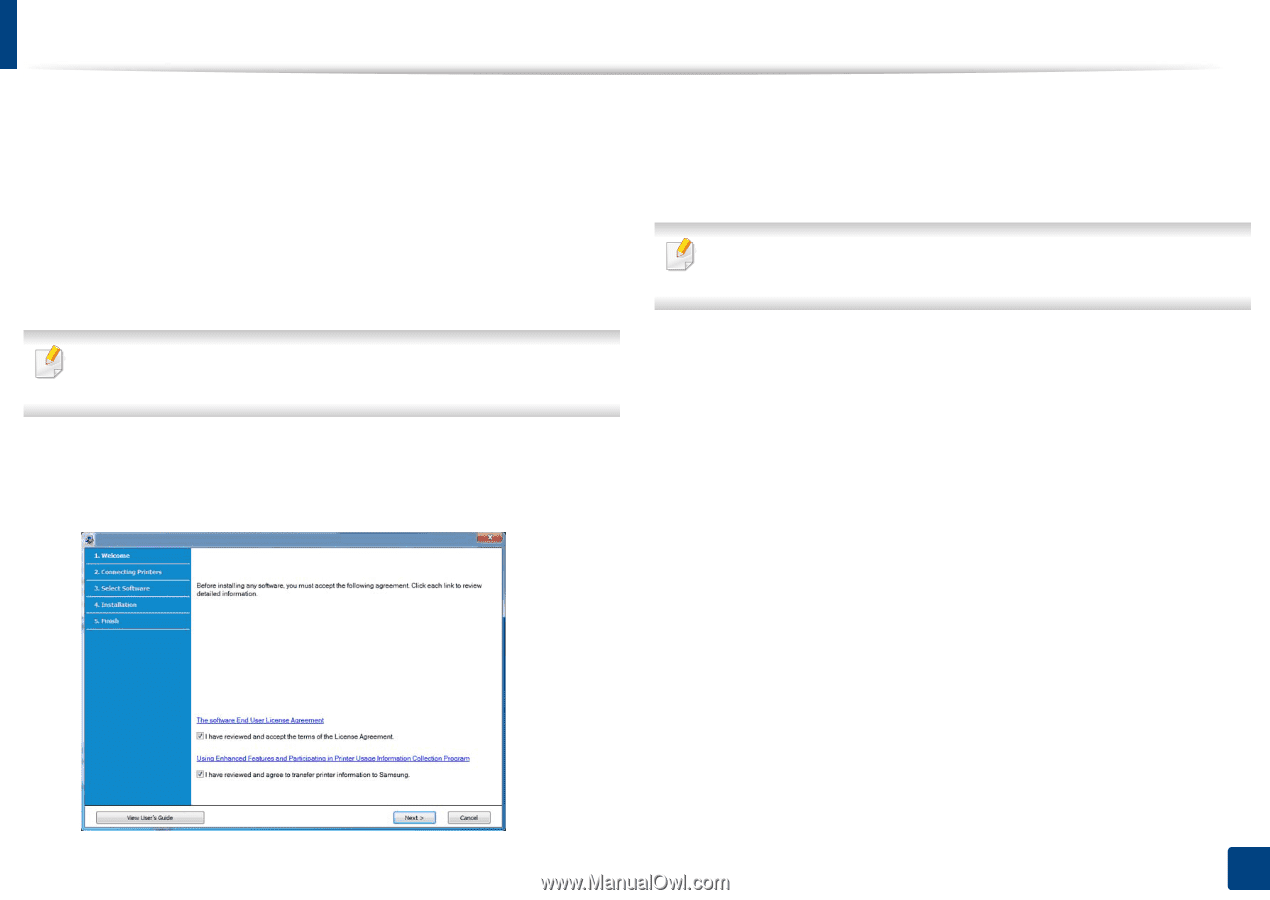
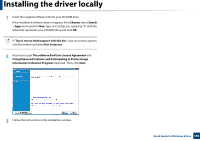
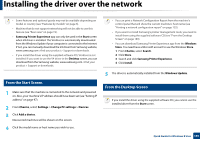
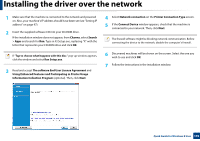
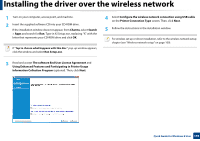
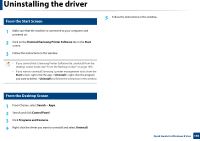
Installing the driver over the network 1 Make sure that the machine is connected to the network and powered on. Also, your machine's IP address should have been set (see "Setting IP address" on page 97). 2 Insert the supplied software CD into your CD-ROM drive. If the installation window does not appear, from Charms, select Search > Apps and search for Run. Type in X:\Setup.exe, replacing "X" with the letter that represents your CD-ROM drive and click OK. If "Tap to choose what happens with this disc." pop-up window appears, click the window and select Run Setup.exe. 3 Read and accept The software End User License Agreement and Using Enhanced Features and Participating in Printer Usage Information Collection Program (optional). Then, click Next. 4 Select Network connection on the Printer Connection Type screen. 5 If the Connect Device window appears, check that the machine is connected to your network. Then, click Next. The firewall software might be blocking network communication. Before connecting the device to the network, disable the computer's firewall. 6 Discovered machines will be shown on the screen. Select the one you wish to use and click OK. 7 Follow the instructions in the installation window. Quick Guide for Windows 8 User 192
-
 1
1 -
2
-
3
-
4
-
5
-
6
-
7
-
8
-
9
-
10
-
11
-
12
-
13
-
14
-
15
-
16
-
17
-
18
-
19
-
20
-
21
-
22
-
23
-
24
-
25
-
26
-
27
-
28
-
29
-
30
-
31
-
32
-
33
-
34
-
35
-
36
-
37
-
38
-
39
-
40
-
41
-
42
-
43
-
44
-
45
-
46
-
47
-
48
-
49
-
50
-
51
-
52
-
53
-
54
-
55
-
56
-
57
-
58
-
59
-
60
-
61
-
62
-
63
-
64
-
65
-
66
-
67
-
68
-
69
-
70
-
71
-
72
-
73
-
74
-
75
-
76
-
77
-
78
-
79
-
80
-
81
-
82
-
83
-
84
-
85
-
86
-
87
-
88
-
89
-
90
-
91
-
92
-
93
-
94
-
95
-
96
-
97
-
98
-
99
-
100
-
101
-
102
-
103
-
104
-
105
-
106
-
107
-
108
-
109
-
110
-
111
-
112
-
113
-
114
-
115
-
116
-
117
-
118
-
119
-
120
-
121
-
122
-
123
-
124
-
125
-
126
-
127
-
128
-
129
-
130
-
131
-
132
-
133
-
134
-
135
-
136
-
137
-
138
-
139
-
140
-
141
-
142
-
143
-
144
-
145
-
146
-
147
-
148
-
149
-
150
-
151
-
152
-
153
-
154
-
155
-
156
-
157
-
158
-
159
-
160
-
161
-
162
-
163
-
164
-
165
-
166
-
167
-
168
-
169
-
170
-
171
-
172
-
173
-
174
-
175
-
176
-
177
-
178
-
179
-
180
-
181
-
182
-
183
-
184
-
185
-
186
-
 187
187 -
 188
188 -
 189
189 -
 190
190 -
 191
191 -
 192
192 -
 193
193 -
 194
194 -
 195
195 -
 196
196 -
 197
197 -
198
-
199
-
200
-
201
-
202
-
203
-
204
-
205
-
206
-
207
-
208
-
209
-
210
-
211
-
212
-
213
-
214
-
215
-
216
-
217
-
218
-
219
-
220
-
221
-
222
-
223
-
224
 |
 |