Samsung CLX-9251NA User Manual Ver.1.03 (English) - Page 106
Using help, Setting Device Options, Using special print features
 |
View all Samsung CLX-9251NA manuals
Add to My Manuals
Save this manual to your list of manuals |
Page 106 highlights
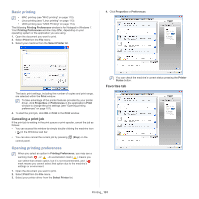
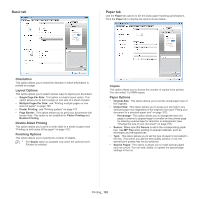
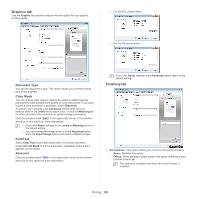
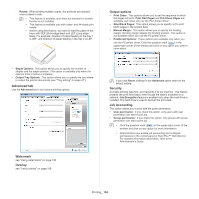
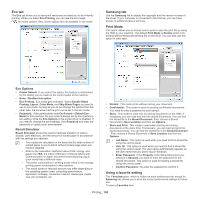
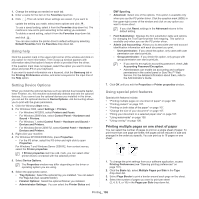
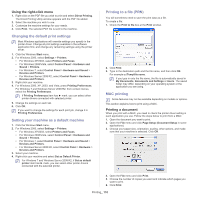
1. Change the settings as needed on each tab. 2. Enter a name for the item in the Favorites input box. 3. Click . Then all current driver settings are saved. If you want to update the setting you made, select more options and click . To use a saved setting, select it from the Favorites drop-down list. The machine is now set to print according to the setting you selected. To delete a saved setting, select it from the Favorites drop-down list and click . You can also restore the printer driver's default settings by selecting Default Favorites from the Favorites drop-down list. Using help Click the question mark in the upper-right corner of the window and click on any option for more information. Then a pop-up window appears with information about that option's feature which is provided from the driver. If the question mark does not appear, select the option you want to know about and press F1 on your keyboard. If you want to search information via a keyword, click the Samsung tab in the Printing Preferences window, and enter a keyword in the input line of the Help option. Setting Device Options When you install the optional devices such as optional dual cassette feeder, Inner Finisher, etc, this machine automatically detects and sets the optional devices. If you cannot use the optional devices you installed in this driver, you can set the optional devices in Device Options. Job Accounting allows you to print with the given permission. 1. Click the Windows Start menu. 2. For Windows 2000, select Settings > Printers. • For Windows XP/2003, select Printers and Faxes. • For Windows 2008/Vista, select Control Panel > Hardware and Sound > Printers. • For Windows 7, select Control Panel > Hardware and Sound > Devices and Printers. • For Windows Server 2008 R2, select Control Panel > Hardware > Devices and Printers. 3. Right-click your machine. 4. For Windows XP/2003/2008/Vista, press Properties. • For the PS driver, select the PS driver and right-click to open Properties. For Windows 7 and Windows Server 2008 R2, from context menus, select the Printer properties. If Printer properties item has a ► mark, you can select other printer drivers connected with the selected printer. 5. Select Device Options. The Properties window may differ depending on the driver or operating system you are using. 6. Select the appropriate option. • Tray Options: Select the optional tray you installed. You can select the Tray 3,4 (dual cassette feeder). • Finisher Options: Select the optional finisher you installed. • Administrator Settings: You can select the Printer Status and EMF Spooling. • Advanced: Select one of the options. This option is available only when you use the PS printer driver. Click the question mark ( ) in the upper-right corner of the window and click on any option you want to know about. If you click Reset, settings in the Advanced returns to the default setting. • Font Substitution: Displays the font substitution table and options for changing the TrueType-to-printer font mapping. This option is available only when you use the PS printer driver. • Admin Job Accounting: Allows you to associate user and account identification information with each document you print. - User permission: If you check this option, only users with user permission can start a print job. - Group permission: If you check this option, only groups with group permission can start a print job. • If you want to encrypt job accounting password, check Job Accounting Password Encryption. • Administrators can enable job accounting and configure permissions in the control panel or SyncThru™ Web Service. For the detailed information about them, refer to the Administrator's Guide. 7. Click OK until you exit the Properties or Printer properties window. Using special print features Special print features include: • "Printing multiple pages on one sheet of paper" on page 106. • "Printing posters" on page 107. • "Printing on both sides of the paper" on page 107. • "Change the size of your document" on page 107. • "Fitting your document to a selected paper size" on page 107. • "Using watermarks" on page 108. • "Using overlay" on page 108. Printing multiple pages on one sheet of paper You can select the number of pages to print on a single sheet of paper. To print more than one page per sheet, the pages will be reduced in size and arranged in the order you specify. You can print up to 16 pages on one sheet. 1. To change the print settings from your software application, access Printing Preferences (see "Opening printing preferences" on page 101). 2. Click the Basic tab, select Multiple Pages per Side in the Type drop-down list. 3. Select Page Border to print a border around each page on the sheet. 4. Select the number of pages you want to print per sheet (2, 4, 6, 9, or 16) in the Pages per Side drop-down list. Printing_ 106
-
 1
1 -
2
-
3
-
4
-
5
-
6
-
7
-
8
-
9
-
10
-
11
-
12
-
13
-
14
-
15
-
16
-
17
-
18
-
19
-
20
-
21
-
22
-
23
-
24
-
25
-
26
-
27
-
28
-
29
-
30
-
31
-
32
-
33
-
34
-
35
-
36
-
37
-
38
-
39
-
40
-
41
-
42
-
43
-
44
-
45
-
46
-
47
-
48
-
49
-
50
-
51
-
52
-
53
-
54
-
55
-
56
-
57
-
58
-
59
-
60
-
61
-
62
-
63
-
64
-
65
-
66
-
67
-
68
-
69
-
70
-
71
-
72
-
73
-
74
-
75
-
76
-
77
-
78
-
79
-
80
-
81
-
82
-
83
-
84
-
85
-
86
-
87
-
88
-
89
-
90
-
91
-
92
-
93
-
94
-
95
-
96
-
97
-
98
-
99
-
100
-
 101
101 -
 102
102 -
 103
103 -
 104
104 -
 105
105 -
 106
106 -
 107
107 -
 108
108 -
 109
109 -
 110
110 -
 111
111 -
112
-
113
-
114
-
115
-
116
-
117
-
118
-
119
-
120
-
121
-
122
-
123
-
124
-
125
-
126
-
127
-
128
-
129
-
130
-
131
-
132
-
133
-
134
-
135
-
136
-
137
-
138
-
139
-
140
-
141
-
142
-
143
-
144
-
145
-
146
-
147
-
148
-
149
-
150
-
151
-
152
-
153
-
154
-
155
-
156
-
157
-
158
-
159
-
160
-
161
-
162
-
163
-
164
-
165
-
166
-
167
-
168
-
169
-
170
-
171
-
172
-
173
-
174
-
175
-
176
-
177
-
178
 |
 |