Samsung CLX-9251NA User Manual Ver.1.03 (English) - Page 151
Paper feeding problems, Printing problems, Condition, Suggested solutions, Possible cause
 |
View all Samsung CLX-9251NA manuals
Add to My Manuals
Save this manual to your list of manuals |
Page 151 highlights
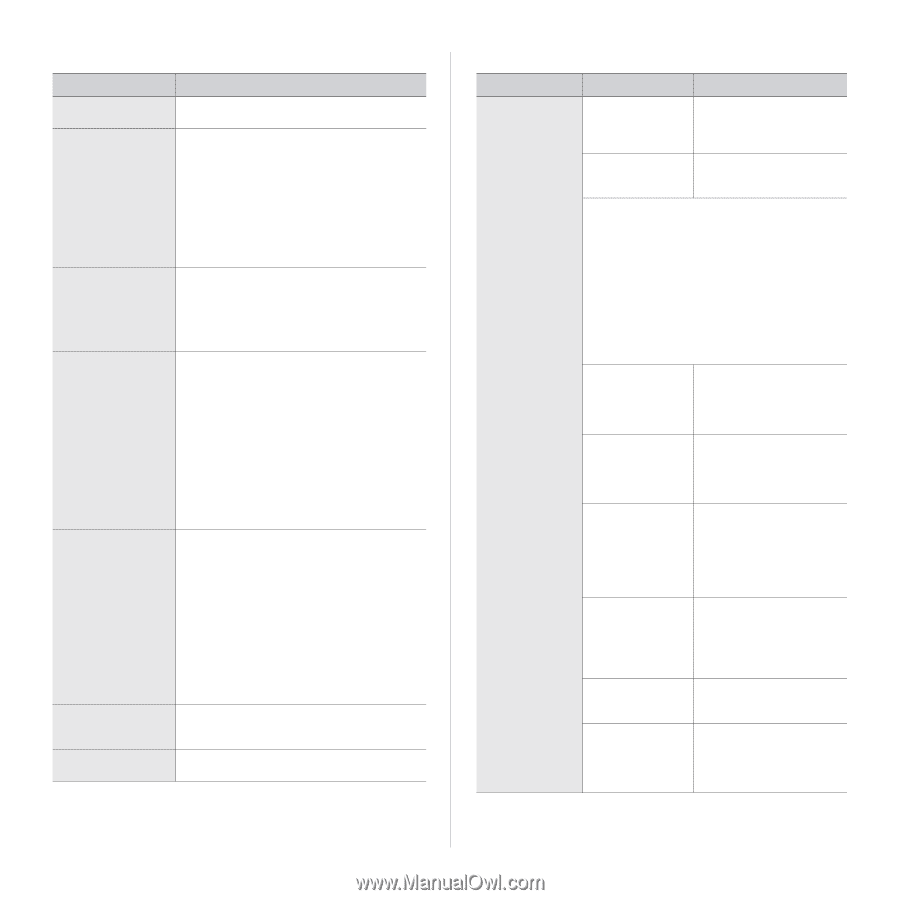
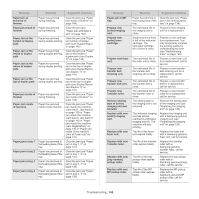
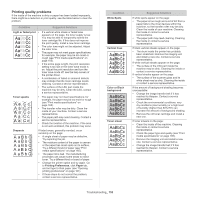
Paper feeding problems Condition Suggested solutions Paper jams during printing. Clear the paper jam (see "Clearing paper jams" on page 137). Paper sticks together. • Check the maximum paper capacity of the tray (see "Print media specifications" on page 165). • Make sure that you are using the correct type of paper (see "Print media specifications" on page 165). • Remove paper from the tray and flex or fan the paper. • Humid conditions may cause some paper to stick together. Multiple sheets of paper do not feed. • Different types of paper may be stacked in the tray. Load paper of only one type, size, and weight. • If multiple sheets have caused a paper jam, clear the paper jam (see "Clearing paper jams" on page 137). Paper does not feed • Remove any obstructions from inside the into the machine. machine. • Paper has not been loaded correctly. Remove paper from the tray and reload it correctly. • There is too much paper in the tray. Remove excess paper from the tray. • The paper is too thick. Use only paper that meets the specifications required by the machine (see "Print media specifications" on page 165). • If an original does not feed into the machine, the DADF rubber pad may require to be replaced. Contact a service representative. The paper keeps jamming. • There is too much paper in the tray. Remove excess paper from the tray. If you are printing on special materials, use the multi-purpose tray. • An incorrect type of paper is being used. Use only paper that meets the specifications required by the machine (see "Print media specifications" on page 165). • There may be debris inside the machine. Open the front door and remove any debris. • If an original does not feed into the machine, the DADF rubber pad may need to be replaced. Contact a service representative. Transparencies stick Use only transparencies specifically designed together in the paper for laser printers. Remove each transparency as exit. it exits from the machine. Envelopes skew or Ensure that the paper guides are against both fail to feed correctly. sides of the envelopes. Printing problems Condition The machine does not print. Possible cause Suggested solutions The machine is not receiving power. Check the power cord connections. Check the power switch and the power source. The machine is not selected as the default machine. Select your machine as your default machine in your Windows. Check the machine for the following: • The front door is not closed. Close the front door. • Paper is jammed. Clear the paper jam (see "Clearing paper jams" on page 137). • No paper is loaded. Load paper (see "Loading paper in the tray" on page 39). • The toner cartridge or the imaging unit is not installed. Install the toner cartridge or imaging unit. If a system error occurs, contact your service representative. The connection cable between the computer and the machine is not connected properly. Disconnect the machine cable and reconnect it. The connection cable between the computer and the machine is defective. If possible, attach the cable to another computer that is working properly and print a job. You can also try using a different machine cable. The port setting is incorrect. Check the Windows printer setting to make sure that the print job is sent to the correct port. If the computer has more than one port, make sure that the machine is attached to the correct one. The machine may be configured incorrectly. Check the Printing Preferences to ensure that all of the print settings are correct (see "Opening printing preferences" on page 101). The printer driver may be incorrectly installed. Repair the machine software. The machine is malfunctioning. Check the display message on the control panel to see if the machine is indicating a system error. Contact a service representative. Troubleshooting_ 151
-
 1
1 -
2
-
3
-
4
-
5
-
6
-
7
-
8
-
9
-
10
-
11
-
12
-
13
-
14
-
15
-
16
-
17
-
18
-
19
-
20
-
21
-
22
-
23
-
24
-
25
-
26
-
27
-
28
-
29
-
30
-
31
-
32
-
33
-
34
-
35
-
36
-
37
-
38
-
39
-
40
-
41
-
42
-
43
-
44
-
45
-
46
-
47
-
48
-
49
-
50
-
51
-
52
-
53
-
54
-
55
-
56
-
57
-
58
-
59
-
60
-
61
-
62
-
63
-
64
-
65
-
66
-
67
-
68
-
69
-
70
-
71
-
72
-
73
-
74
-
75
-
76
-
77
-
78
-
79
-
80
-
81
-
82
-
83
-
84
-
85
-
86
-
87
-
88
-
89
-
90
-
91
-
92
-
93
-
94
-
95
-
96
-
97
-
98
-
99
-
100
-
101
-
102
-
103
-
104
-
105
-
106
-
107
-
108
-
109
-
110
-
111
-
112
-
113
-
114
-
115
-
116
-
117
-
118
-
119
-
120
-
121
-
122
-
123
-
124
-
125
-
126
-
127
-
128
-
129
-
130
-
131
-
132
-
133
-
134
-
135
-
136
-
137
-
138
-
139
-
140
-
141
-
142
-
143
-
144
-
145
-
 146
146 -
 147
147 -
 148
148 -
 149
149 -
 150
150 -
 151
151 -
 152
152 -
 153
153 -
 154
154 -
 155
155 -
 156
156 -
157
-
158
-
159
-
160
-
161
-
162
-
163
-
164
-
165
-
166
-
167
-
168
-
169
-
170
-
171
-
172
-
173
-
174
-
175
-
176
-
177
-
178
 |
 |