Samsung CLX-9251NA User Manual Ver.1.03 (English) - Page 62
Stamp, Selecting the type of originals, Adjusting background, Text/Photo Text & Printed Photo
 |
View all Samsung CLX-9251NA manuals
Add to My Manuals
Save this manual to your list of manuals |
Page 62 highlights
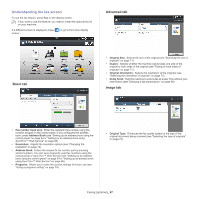
Stamp Prints the date and time, IP address, device information, and the entered comment on printouts. 1. Press Copy from the display screen. 2. Place the originals face up in the DADF or place a single original face down on the scanner glass and close the DADF (see "Loading originals" on page 38). 3. Adjust the settings for each copy such as Paper Source, Duplex and more in the Basic tab (see "Changing the settings for each copy" on page 52). 4. Press the Advanced tab > Stamp from the display screen. 5. Check the button on the right. 6. Press the checkbox on the right. • IP Address: This option allows you to print a IP Address on the printouts. • ID: This option allows you to print a user ID on the printouts. • Device information: This option allows you to print a device information on the printouts. • Comment: This option allows you to print your comment on the printouts. • Time & Date: This option allows you to print time and date stamps on the printouts. 7. Press OK from the display screen. 8. Press Start on the control panel to begin copying. Selecting the type of originals The original type setting is used to improve copy quality by selecting document types for current copy jobs. 1. Press Copy from the display screen. 2. Place the originals face up in the DADF or place a single original face down on the scanner glass and close the DADF (see "Loading originals" on page 38). 3. Adjust the settings for each copy such as Paper Source, Reduce/Enlarge, Duplex and more in the Basic tab (see "Changing the settings for each copy" on page 52). 4. Press the Image tab > Original Type from the display screen. 5. Press the appropriate option. • Text: Use for originals containing mostly text. • Text/Photo (Text & Printed Photo): Use for originals containing text mixed with photographs. • Photo: Use for photographs. • Copied Original: Use for copied documents. • Map: Use for maps. • Light Original: Use for light documents. 6. Press Start on the control panel to begin copying. Adjusting background This feature is helpful when copying originals containing color in the background, such as in newspapers or catalogs. 1. Press Copy from the display screen. 2. Place the originals face up in the DADF or place a single original face down on the scanner glass and close the DADF (see "Loading originals" on page 38). 3. Adjust the settings for each copy such as Paper Source, Reduce/Enlarge, Duplex and more in the Basic tab (see "Changing the settings for each copy" on page 52). 4. Press the Image tab > Adjust Background. 5. Press the appropriate option. • Off: Disables this feature. • Auto: Optimizes the background. • Enhance: The higher the number is, the more vivid the background. • Erase: The higher the number is, the lighter the background. 6. Press Start on the control panel to begin copying. Copying_ 62
-
 1
1 -
2
-
3
-
4
-
5
-
6
-
7
-
8
-
9
-
10
-
11
-
12
-
13
-
14
-
15
-
16
-
17
-
18
-
19
-
20
-
21
-
22
-
23
-
24
-
25
-
26
-
27
-
28
-
29
-
30
-
31
-
32
-
33
-
34
-
35
-
36
-
37
-
38
-
39
-
40
-
41
-
42
-
43
-
44
-
45
-
46
-
47
-
48
-
49
-
50
-
51
-
52
-
53
-
54
-
55
-
56
-
 57
57 -
 58
58 -
 59
59 -
 60
60 -
 61
61 -
 62
62 -
 63
63 -
 64
64 -
 65
65 -
 66
66 -
 67
67 -
68
-
69
-
70
-
71
-
72
-
73
-
74
-
75
-
76
-
77
-
78
-
79
-
80
-
81
-
82
-
83
-
84
-
85
-
86
-
87
-
88
-
89
-
90
-
91
-
92
-
93
-
94
-
95
-
96
-
97
-
98
-
99
-
100
-
101
-
102
-
103
-
104
-
105
-
106
-
107
-
108
-
109
-
110
-
111
-
112
-
113
-
114
-
115
-
116
-
117
-
118
-
119
-
120
-
121
-
122
-
123
-
124
-
125
-
126
-
127
-
128
-
129
-
130
-
131
-
132
-
133
-
134
-
135
-
136
-
137
-
138
-
139
-
140
-
141
-
142
-
143
-
144
-
145
-
146
-
147
-
148
-
149
-
150
-
151
-
152
-
153
-
154
-
155
-
156
-
157
-
158
-
159
-
160
-
161
-
162
-
163
-
164
-
165
-
166
-
167
-
168
-
169
-
170
-
171
-
172
-
173
-
174
-
175
-
176
-
177
-
178
 |
 |
