Samsung CLX-9251NA User Manual Ver.1.03 (English) - Page 57
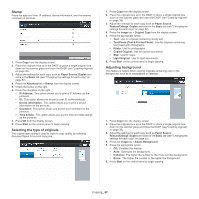
N-up copying, Start, Auto Fit, ID Copy, Booklet, Advanced, 2Up - 9Up, Paper source
 |
View all Samsung CLX-9251NA manuals
Add to My Manuals
Save this manual to your list of manuals |
Page 57 highlights
8. Press Start on the control panel to begin copying. • If the original is larger than the printable area, some portions may not be printed. • If you do not press the Start button, only the front side will be copied. • If you press the Stop button, the machine cancels the copy job and returns to ready mode. N-up copying The machine reduces the size of the original images and prints 2 - 9 pages onto one sheet of paper. • When you use this option Auto Fit, ID Copy, Booklet and Book Copy in the Advanced tab are inactivated. 1. Press Copy from the display screen. 2. Place the originals face up in the DADF or place a single original face down on the scanner glass and close the DADF (see "Loading originals" on page 38). 3. Press Advanced tab > N-Up from the display screen. 4. Press an option according to how many images to copy onto one page. • Off: Copies an original onto one sheet of paper. • 2Up - 9Up: Copies corresponding numbers of separate originals to one page. Depending on original document size, output paper size, and the reduced rate of image, some options may be inactivated. 5. Select a tray in Paper source. 6. Press the appropriate page order. • Depending on the options you select, the result will vary. Refer to the below table before using the 2Up option. Copying_ 57
-
 1
1 -
2
-
3
-
4
-
5
-
6
-
7
-
8
-
9
-
10
-
11
-
12
-
13
-
14
-
15
-
16
-
17
-
18
-
19
-
20
-
21
-
22
-
23
-
24
-
25
-
26
-
27
-
28
-
29
-
30
-
31
-
32
-
33
-
34
-
35
-
36
-
37
-
38
-
39
-
40
-
41
-
42
-
43
-
44
-
45
-
46
-
47
-
48
-
49
-
50
-
51
-
 52
52 -
 53
53 -
 54
54 -
 55
55 -
 56
56 -
 57
57 -
 58
58 -
 59
59 -
 60
60 -
 61
61 -
 62
62 -
63
-
64
-
65
-
66
-
67
-
68
-
69
-
70
-
71
-
72
-
73
-
74
-
75
-
76
-
77
-
78
-
79
-
80
-
81
-
82
-
83
-
84
-
85
-
86
-
87
-
88
-
89
-
90
-
91
-
92
-
93
-
94
-
95
-
96
-
97
-
98
-
99
-
100
-
101
-
102
-
103
-
104
-
105
-
106
-
107
-
108
-
109
-
110
-
111
-
112
-
113
-
114
-
115
-
116
-
117
-
118
-
119
-
120
-
121
-
122
-
123
-
124
-
125
-
126
-
127
-
128
-
129
-
130
-
131
-
132
-
133
-
134
-
135
-
136
-
137
-
138
-
139
-
140
-
141
-
142
-
143
-
144
-
145
-
146
-
147
-
148
-
149
-
150
-
151
-
152
-
153
-
154
-
155
-
156
-
157
-
158
-
159
-
160
-
161
-
162
-
163
-
164
-
165
-
166
-
167
-
168
-
169
-
170
-
171
-
172
-
173
-
174
-
175
-
176
-
177
-
178
 |
 |
