Symantec 10551441 Administration Guide - Page 107
Changing the POP3 and SMTP ports that are scanned, All Tasks, Symantec AntiVirus
 |
UPC - 037648270472
View all Symantec 10551441 manuals
Add to My Manuals
Save this manual to your list of manuals |
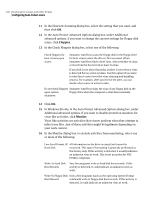
Page 107 highlights
Scanning for viruses and other threats 107 Configuring Auto-Protect scans To configure Auto-Protect scanning for Internet email 1 In the Symantec System Center console, right-click the server group or servers to configure, and then click All Tasks > Symantec AntiVirus > Client Auto-Protect Options. 2 In the Client Auto-Protect Options dialog box, on the Internet E-mail tab, check Enable Internet E-mail Auto-Protect. The settings that you choose apply to both the POP3 and SMTP protocols. 3 To set Auto-Protect options, do any of the following: ■ Select file types or extensions to scan. ■ Assign primary actions and secondary actions for detected viruses. ■ Display a warning message on infected computers. ■ Insert a warning into an email message. ■ Send an email message to the sender of an infected attachment. ■ Send an email message to selected recipients when a virus is detected. 4 Click Advanced to configure scanning of compressed files. 5 In the Internet E-mail Advanced Options dialog box, set the scanning options that you want, and then click OK. 6 On the Internet E-mail tab, lock or unlock options as desired. 7 Click Reset All to ensure that all of the computers are using the AutoProtect scanning configuration that you have specified. See "Configuring Auto-Protect scans" on page 96. Changing the POP3 and SMTP ports that are scanned Auto-Protect scanning for Internet email uses the standard POP3 and SMTP email ports by default. However, if you have configured your network to use a different port for either protocol, you must change the port setting in Symantec AntiVirus to match the port that you have selected. To change the POP3 and SMTP ports that are scanned 1 In the Symantec System Center console, right-click the server group or servers to configure, and then click All Tasks > Symantec AntiVirus > Client Auto-Protect Options. 2 In the Client Auto-Protect Options dialog box, on the Internet E-mail tab, check Enable Internet E-mail Auto-Protect. 3 Click Advanced.
-
 1
1 -
2
-
3
-
4
-
5
-
6
-
7
-
8
-
9
-
10
-
11
-
12
-
13
-
14
-
15
-
16
-
17
-
18
-
19
-
20
-
21
-
22
-
23
-
24
-
25
-
26
-
27
-
28
-
29
-
30
-
31
-
32
-
33
-
34
-
35
-
36
-
37
-
38
-
39
-
40
-
41
-
42
-
43
-
44
-
45
-
46
-
47
-
48
-
49
-
50
-
51
-
52
-
53
-
54
-
55
-
56
-
57
-
58
-
59
-
60
-
61
-
62
-
63
-
64
-
65
-
66
-
67
-
68
-
69
-
70
-
71
-
72
-
73
-
74
-
75
-
76
-
77
-
78
-
79
-
80
-
81
-
82
-
83
-
84
-
85
-
86
-
87
-
88
-
89
-
90
-
91
-
92
-
93
-
94
-
95
-
96
-
97
-
98
-
99
-
100
-
101
-
 102
102 -
 103
103 -
 104
104 -
 105
105 -
 106
106 -
 107
107 -
 108
108 -
 109
109 -
 110
110 -
 111
111 -
 112
112 -
113
-
114
-
115
-
116
-
117
-
118
-
119
-
120
-
121
-
122
-
123
-
124
-
125
-
126
-
127
-
128
-
129
-
130
-
131
-
132
-
133
-
134
-
135
-
136
-
137
-
138
-
139
-
140
-
141
-
142
-
143
-
144
-
145
-
146
-
147
-
148
-
149
-
150
-
151
-
152
-
153
-
154
-
155
-
156
-
157
-
158
-
159
-
160
-
161
-
162
-
163
-
164
-
165
-
166
-
167
-
168
-
169
-
170
-
171
-
172
-
173
-
174
-
175
-
176
-
177
-
178
-
179
-
180
-
181
-
182
-
183
-
184
-
185
-
186
-
187
-
188
-
189
-
190
-
191
-
192
-
193
-
194
-
195
-
196
-
197
-
198
-
199
-
200
-
201
-
202
-
203
-
204
-
205
-
206
-
207
-
208
-
209
-
210
-
211
-
212
-
213
-
214
-
215
-
216
 |
 |
