TP-Link Auranet EAP120 EAP Controller Software V2 User Guide - Page 40
Add Free Authentication Policy
 |
View all TP-Link Auranet EAP120 manuals
Add to My Manuals
Save this manual to your list of manuals |
Page 40 highlights
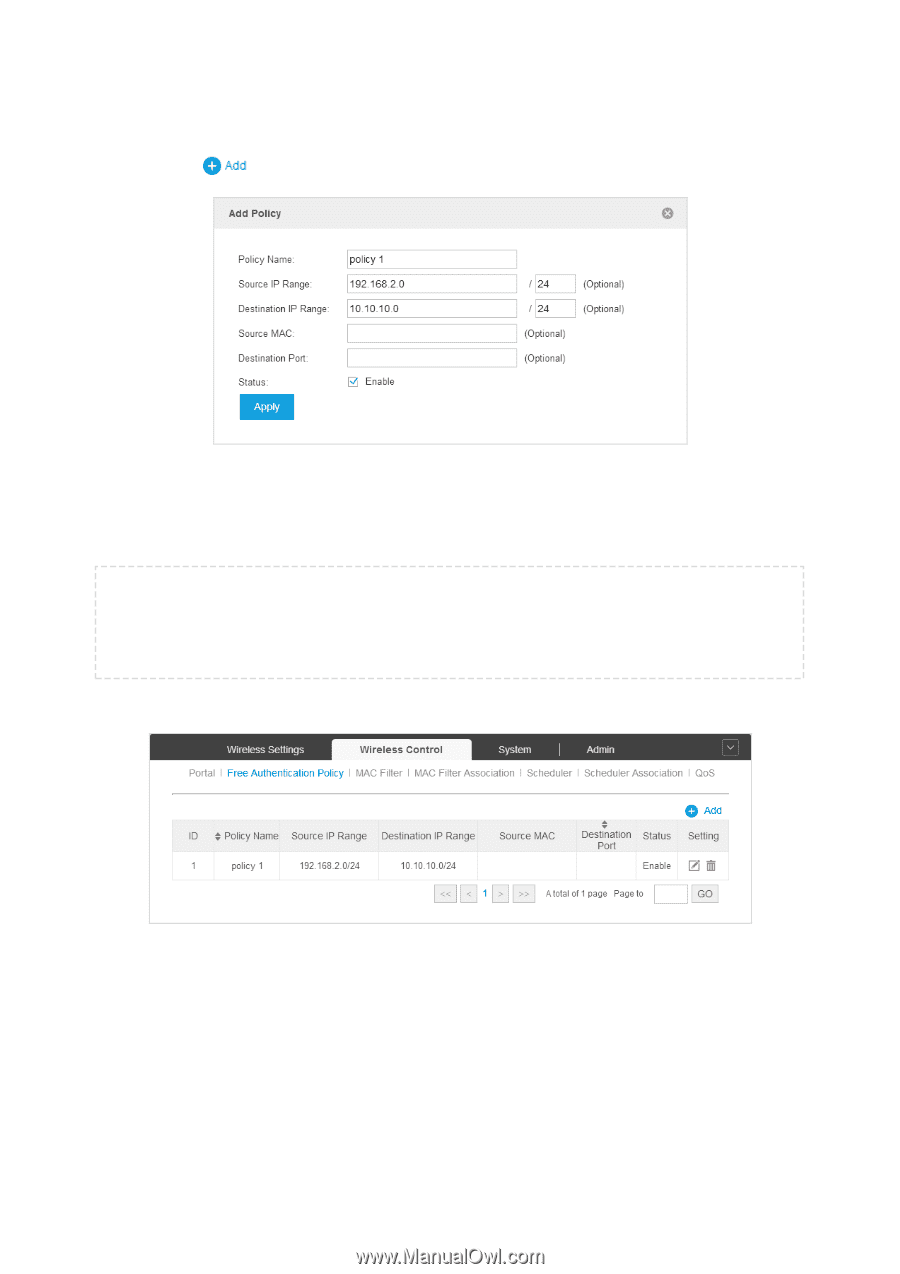
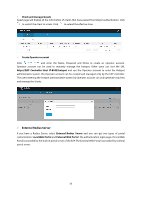
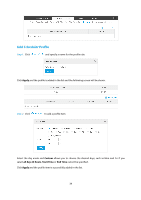
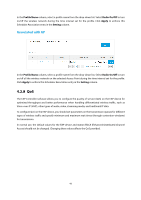
Add Free Authentication Policy Step 1: Click to add a new authentication policy and configure its parameters. Step 2: Specify the policy name. And set either Source IP Range with the subnet/mask of the clients or Source MAC. Then set the Destination IP Range with the destination IP address and subnet mask for free authentication policy. Assign the service port as the Destination Port. Check the Status box to enable the policy. NOTE: When External Radius Server is configured and External Web Portal is selected, please set the IP address and subnet mask of your external web portal server as the Destination IP Range. Otherwise, clients cannot access it before authenticated Step 3: Click Apply and the policy is successfully added as the following screen. 36
-
 1
1 -
2
-
3
-
4
-
5
-
6
-
7
-
8
-
9
-
10
-
11
-
12
-
13
-
14
-
15
-
16
-
17
-
18
-
19
-
20
-
21
-
22
-
23
-
24
-
25
-
26
-
27
-
28
-
29
-
30
-
31
-
32
-
33
-
34
-
 35
35 -
 36
36 -
 37
37 -
 38
38 -
 39
39 -
 40
40 -
 41
41 -
 42
42 -
 43
43 -
 44
44 -
 45
45 -
46
-
47
-
48
-
49
-
50
-
51
-
52
-
53
-
54
-
55
-
56
-
57
-
58
-
59
-
60
-
61
-
62
-
63
-
64
-
65
-
66
-
67
-
68
-
69
-
70
-
71
-
72
 |
 |