TRENDnet TEW-311BRP Manual - Page 50
IP Filter
 |
View all TRENDnet TEW-311BRP manuals
Add to My Manuals
Save this manual to your list of manuals |
Page 50 highlights
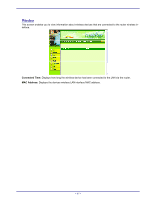
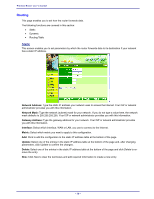
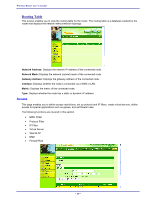
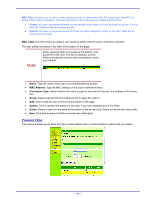
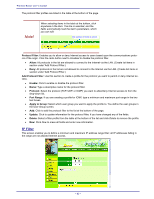
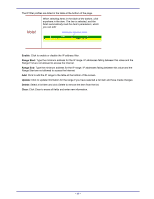
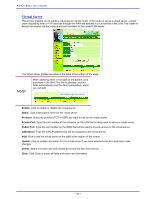
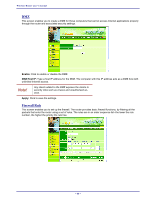
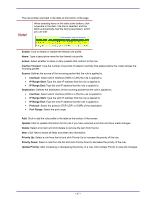
Wireless Router user's manual The protocol filter profiles are listed in the table at the bottom of the page. Note! When selecting items in the table at the bottom, click anywhere in the item. The line is selected, and the fields automatically load the item's parameters, which you can edit: Click anywhere in the line to select it. Protocol Filter: Enables you to allow or deny Internet access to users based upon the communications protocol of the origin. Click the radio button next to Disabled to disable the protocol filter. • Allow: All protocols in the list are allowed to connect to the Internet via the LAN. (Create list items in section under 'Add Protocol Filter.) • Deny: All protocols in the list are not allowed to connect to the Internet via the LAN. (Create list items in section under 'Add Protocol Filter.) Add Protocol Filter: Use this section to create a profile for the protocol you want to permit or deny Internet access. • Enable: Click to enable or disable the protocol filter. • Name: Type a descriptive name for the protocol filter. • Protocol: Select the protocol (TCP, UDP, or ICMP) you want to allow/deny Internet access to from the drop-down list. • Port Range: If you are creating a profile for ICMP, type a minimum and maximum port range in the two text boxes. • Apply to Group: Select which user group you want to apply the profile to. You define the user groups in the User Group screen. • Add: Click to add the protocol filter to the list at the bottom of the page. • Update: Click to update information for the protocol filter, if you have changed any of the fields. • Delete: Select a filter profile from the table at the bottom of the list and click Delete to remove the profile. • New: Click New to erase all fields and enter new information. IP Filter This screen enables you to define a minimum and maximum IP address range filter; all IP addresses falling in the range are not allowed Internet access. - 42 -
-
 1
1 -
2
-
3
-
4
-
5
-
6
-
7
-
8
-
9
-
10
-
11
-
12
-
13
-
14
-
15
-
16
-
17
-
18
-
19
-
20
-
21
-
22
-
23
-
24
-
25
-
26
-
27
-
28
-
29
-
30
-
31
-
32
-
33
-
34
-
35
-
36
-
37
-
38
-
39
-
40
-
41
-
42
-
43
-
44
-
 45
45 -
 46
46 -
 47
47 -
 48
48 -
 49
49 -
 50
50 -
 51
51 -
 52
52 -
 53
53 -
 54
54 -
 55
55 -
56
-
57
-
58
-
59
-
60
-
61
-
62
-
63
-
64
-
65
-
66
-
67
-
68
-
69
-
70
-
71
-
72
-
73
-
74
-
75
-
76
-
77
-
78
-
79
-
80
-
81
-
82
-
83
-
84
-
85
-
86
-
87
-
88
-
89
-
90
-
91
-
92
-
93
-
94
-
95
-
96
-
97
-
98
-
99
-
100
-
101
-
102
-
103
-
104
-
105
-
106
-
107
-
108
-
109
-
110
-
111
-
112
-
113
-
114
-
115
-
116
-
117
-
118
-
119
-
120
-
121
-
122
-
123
-
124
-
125
-
126
-
127
 |
 |
