TRENDnet TPE-1620WS User's Guide
TRENDnet TPE-1620WS Manual
 |
View all TRENDnet TPE-1620WS manuals
Add to My Manuals
Save this manual to your list of manuals |
TRENDnet TPE-1620WS manual content summary:
- TRENDnet TPE-1620WS | User's Guide - Page 1
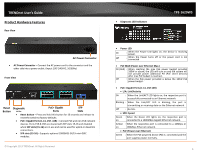
TRENDnet User's Guide Cover Page - TRENDnet TPE-1620WS | User's Guide - Page 2
TRENDnet User's Guide Table of Contents Product Overview 5 Package Contents ...5 Features ...5 Product Hardware Features 6 Application Diagram ...7 Switch Installation 8 Desktop Hardware Installation 8 Rack Mount Hardware Installation 8 Basic Installation ...9 Connect additional devices to your - TRENDnet TPE-1620WS | User's Guide - Page 3
Settings 84 Firmware Upgrade via TFTP Settings 85 Backup and restore your switch configuration settings 85 Backup/Restore via HTTP Settings 85 Backup/Restore via TFTP Settings 86 Cable Diagnostics Test 87 Enable IEEE 802.3az Power Saving Mode 88 Reboot/Reset to factory defaults 88 Network - TRENDnet TPE-1620WS | User's Guide - Page 4
TRENDnet User's Guide Using the Utility ...91 Launching the Utility 91 Discovery List ...92 Monitor List ...92 Device Setting ...93 Main Menu Options 94 Switch Management Page Structure 95 Technical Specifications 96 Troubleshooting 98 Appendix 99 Table of Contents © Copyright 2013 TRENDnet. - TRENDnet TPE-1620WS | User's Guide - Page 5
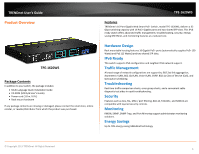
the product was purchased. TPE-1620WS Features TRENDnet's 16-Port Gigabit Web Smart PoE+ Switch, model TPE-1620WS, delivers a 32 Gbps switching capacity with 16 PoE+ Gigabit ports and two shared SFP slots. This IPv6 ready switch offers advanced traffic management, troubleshooting, security, energy - TRENDnet TPE-1620WS | User's Guide - Page 6
seconds and release to reset the switch to factory defaults. • PoE+ Gigabit Ports (1-14, 15R -16R) - Connect PoE and non-PoE network devices. Ports 15R Supports optional 1000BASE-SX/LX mini-GBIC modules. © Copyright 2013 TRENDnet. All Rights Reserved. • Diagnostic LED Indicators TPE-1620WS - TRENDnet TPE-1620WS | User's Guide - Page 7
link Application Diagram TPE-1620WS The PoE WebSmart switch is installed a server room within an EIA standard-size, 19-inch rack The PoE switch supplying power and providing data connectivity to through Ethernet to PoE devices (access point and IP camera). The PoE connects the PoE devices to your - TRENDnet TPE-1620WS | User's Guide - Page 8
the rubber feet to the bottom of each device. The rubber feet cushion the hub and protect the hub case from scratching. TPE-1620WS Rack Mount Hardware Installation The switch can be mounted in an EIA standard-size, 19-inch rack, which can be placed in a wiring closet with other equipment. Attach - TRENDnet TPE-1620WS | User's Guide - Page 9
Setup. TPE-1620WS 3. Assign a static IP address to your computer's network adapter in the subnet of 192.168.10.x (e.g. 192.168.10.25) and a subnet mask of 255.255.255.0. 4. Open your web browser, and type the IP address of the switch in the address bar, and then press Enter. The default IP address - TRENDnet TPE-1620WS | User's Guide - Page 10
TRENDnet User's Guide TPE-1620WS Connect additional devices to your switch You can connect additional computers or other network devices PoE (Power over Ethernet) or non-PoE devices to your switch using Ethernet cables to connect them to one of the available PoE+ Gigabit Ports (1-14, 15R-16R). - TRENDnet TPE-1620WS | User's Guide - Page 11
User's Guide. 1. Open your web browser and go to the IP address http://192.168.10.200. Your switch will prompt you for a user name and password. 2. Enter the user name and password. By default: User Name: admin Password: admin Note: User Name and Password are case sensitive. TPE-1620WS System Info - TRENDnet TPE-1620WS | User's Guide - Page 12
under the System section. TPE-1620WS IPv6 Information • IPv6 Unicast Address / Prefix Length: Displays the current IPv6 address and prefix assigned to your switch. • IPv6 Default Gateway: Displays the current IPv6 default gateway address assigned to your switch. • Link Local Address / Prefix - TRENDnet TPE-1620WS | User's Guide - Page 13
up to 30 characters. • System Contact - Specifies the name of the network administrator responsible for managing the switch. This contact name is optional and may contain up to 30 characters. TPE-1620WS 4. Click Save Settings to Flash (menu). 5. Click Save Settings to Flash (button), then click OK - TRENDnet TPE-1620WS | User's Guide - Page 14
the drop-down list and select Static to manually specify your IP address settings or DHCP to allow your switch to obtain IP address settings automatically from a DHCP server on your network. 4. Click Save Settings to Flash (menu). TPE-1620WS 5. Click Save Settings to Flash (button), then click - TRENDnet TPE-1620WS | User's Guide - Page 15
entered into the field. • IPv6 Dynamic Gateway: To configure the switch to automatically obtain its IP configuration from a DHCP server on your network. © Copyright 2013 TRENDnet. All Rights Reserved. TPE-1620WS • NS Retransmit Time Settings: A constant that defines a nonzero number of seconds - TRENDnet TPE-1620WS | User's Guide - Page 16
TRENDnet User's Guide TPE-1620WS • Link Layer MAC Address: Specifies the link layer MAC address. Settings This settings allows you to manually define IPv6 supported neighboring devices on your network. 1. Log into your switch management page (see "Access your switch management page" on page 11). - TRENDnet TPE-1620WS | User's Guide - Page 17
page (see "Access your switch management page" on page 11). 2. Click on System, and click on IP Access List. 3. Review the settings. First, enter the IPv4 or IPv6 address to allow access and click Add for each entry. 4. Click Save Settings to Flash (menu). TPE-1620WS 5. Click Save Settings to - TRENDnet TPE-1620WS | User's Guide - Page 18
. Note: This default administrator account cannot be deleted. In the Password field, enter the new password and enter the new password again the Confirm Password field to verify. Then, click Apply. Note: The password consists of up to 12 alphanumeric characters. TPE-1620WS To create additional - TRENDnet TPE-1620WS | User's Guide - Page 19
the SNMP agent is inactive. • Web Server Status - Displays the current SNMP status. TPE-1620WS • Web Idle Timeout - Enter the idle period in minutes, when the switch will automatically log out a user from the switch management page. 4. Click Save Settings to Flash (menu). 5. Click Save Settings to - TRENDnet TPE-1620WS | User's Guide - Page 20
zone. • Clock Mode: Select Local Time to manually configure your date and time settings or select SNTP to configure your switch to automatically obtain settings from an network time server. TPE-1620WS o SNTP - Allows you to configure your switch to pull time and date settings automatically from - TRENDnet TPE-1620WS | User's Guide - Page 21
SSL Settings. 3. Review the settings. Click Apply to save changes. • SSL Status: o Enabled - Enables HTTPS/SSL management access and disables HTTP unsecured mode. o Disabled - Disabled HTTPS/SSL management access and enabled HTTP unsecured mode. (Default setting). TPE-1620WS Click Continue, Proceed - TRENDnet TPE-1620WS | User's Guide - Page 22
switch is rebooted or power cycled, the configuration changes will still be applied. © Copyright 2013 TRENDnet. All Rights Reserved. TPE-1620WS View and setup your switch server for troubleshooting or monitoring. o Syslog Status - Enable - Enable syslog and in the Syslog Server IP section, enter - TRENDnet TPE-1620WS | User's Guide - Page 23
TRENDnet User's Guide o Logging Level - Click © Copyright 2013 TRENDnet. All Rights Reserved. TPE-1620WS Physical Interface Configure your switch ports and view into your switch management page (see "Access your switch management page" on page 11). 2. Click on Physical Interface. 3. Review the - TRENDnet TPE-1620WS | User's Guide - Page 24
is configured for 100Mbps operation in half-duplex mode. TPE-1620WS o 10/Half -This parameter indicates the port is problem when connecting an end node with a fixed duplex mode of full-duplex to a switch port, disable Auto-Negotiation on the port and set the port's speed and duplex mode manually - TRENDnet TPE-1620WS | User's Guide - Page 25
all configuration changes to the NV-RAM to ensure that if the switch is rebooted or power cycled, the configuration changes will still be applied. © Copyright 2013 TRENDnet. All Rights Reserved. TPE-1620WS Spanning Tree (STP, RSTP, MSTP) Configure Spanning Tree Protocol settings Bridge > Spanning - TRENDnet TPE-1620WS | User's Guide - Page 26
root information. TPE-1620WS Configure Spanning Tree Protocol port settings Bridge > Spanning Tree > Port Settings 1. Log into your switch management page (see "Access your switch management page" on page 11). 2. Click on Bridge, click on Spanning Tree, and click on Port Settings. 3. Review the - TRENDnet TPE-1620WS | User's Guide - Page 27
TRENDnet User's Guide to the root bridge than another on the switch causes a switching loop and is placed in the blocking state of STP. However, a network administrator can manually disable a port. • Edge: Indicates if automatically. The default setting for this parameter is Auto. TPE-1620WS • P2P: - TRENDnet TPE-1620WS | User's Guide - Page 28
TRENDnet User's Guide Configure Spanning Tree Protocol MST settings (MSTP) Bridge > Spanning Tree > MST Settings 1. Log into your switch management page (see "Access your switch management page" on page 11). 2. Click on Bridge, click on Spanning Tree, and click on MST Settings. 3. Review the - TRENDnet TPE-1620WS | User's Guide - Page 29
device priority. The field range is 0-61440. The field default is 32768. TPE-1620WS Configure Spanning Tree Protocol MST Port Settings (MSTP) Bridge > Spanning Tree > MST Settings 1. Log into your switch management page (see "Access your switch management page" on page 11). 2. Click on Bridge - TRENDnet TPE-1620WS | User's Guide - Page 30
(see "Access your switch management page" on page 11). 2. Click on Bridge, click on Trunk Config, and click on Trunking. 3. Review the settings. For each trunk group, click Apply to save changes. For each Trunk ID/Group, check the port numbers to add for each trunk group. TPE-1620WS Click the drop - TRENDnet TPE-1620WS | User's Guide - Page 31
(link aggregation group). TPE-1620WS Configure your port priority Bridge > Trunk Config > Port Priority 1. Log into your switch management page (see "Access your switch management page" on page 11). 2. Click on Bridge, click on Trunk Config, and click on Port Priority. 3. Review the settings. Click - TRENDnet TPE-1620WS | User's Guide - Page 32
set up to capture the data for monitoring and troubleshooting purposes. 1. Log into your switch management page (see "Access your switch management page" on page 11). 2. Click on Bridge, click on Trunk Config, and click on Port Priority. TPE-1620WS To copy data transmitted on specific port, check - TRENDnet TPE-1620WS | User's Guide - Page 33
feature. • Interval - Defines the interval your switch will check for loops. • Recover Time - Defines the time period when connectivity will be restored to a port where a loop was previously detected and blocked. Click Apply to save changes. TPE-1620WS In the Loopback Detection table, select one of - TRENDnet TPE-1620WS | User's Guide - Page 34
reside. Note: By default, all switch ports are part of the default VLAN, VLAN ID 1. • MAC Address - Enter the MAC address of the device to add. • Port Member - Select the port where the MAC address will reside. Click Apply to add the Static Unicast entry to the list. TPE-1620WS In the list, you - TRENDnet TPE-1620WS | User's Guide - Page 35
switch ports are part of the default VLAN, VLAN ID 1. • MAC Address - Enter the multicast group MAC address. • Group Member - Check the port(s) where the MAC address will reside. Note: You can click All to select all ports. Click Apply to add the Static Multicast Group entry to the list. TPE-1620WS - TRENDnet TPE-1620WS | User's Guide - Page 36
TRENDnet User's Guide IGMP Snooping Configure IGMP Snooping Settings Bridge > IGMP Snooping > IGMP Snooping Settings 1. Log into your switch management page (see "Access your switch management page" on page 11). 2. Click on Bridge and click on IGMP Snooping. 3. Review the settings. Click Apply to - TRENDnet TPE-1620WS | User's Guide - Page 37
to default. 4. Click Save Settings to Flash (menu). 5. Click Save Settings to Flash (button), then click OK. Note: This step saves all configuration changes to the NV-RAM to ensure that if the switch is rebooted or power cycled, the configuration changes will still be applied. TPE-1620WS Bandwidth - TRENDnet TPE-1620WS | User's Guide - Page 38
, will apply the settings to all ports. TPE-1620WS Set Egress Rate Limiting Bridge > Bandwidth Control > Egress Rate Limiting This section allows you to set the egress (transmit) rate for each switch port. 1. Log into your switch management page (see "Access your switch management page" on page 11 - TRENDnet TPE-1620WS | User's Guide - Page 39
TRENDnet User's Guide VLAN Add, modify, and remove VLANs Bridge > VLAN > Tagged VLAN A the switch management page through the new VLAN. If you want to restrict management access through this VLAN, select Disabled. Note: By default, the default VLAN VID 1 is set as the Management VLAN. TPE-1620WS - TRENDnet TPE-1620WS | User's Guide - Page 40
TRENDnet User's Guide Note: The default VLAN VID1 switch is rebooted or power cycled, the configuration changes will still be applied. TPE-1620WS switch management page (see "Access your switch management page" on page 11). 2. Click on Bridge, click on VLAN, and click on Port Settings. 3. Review - TRENDnet TPE-1620WS | User's Guide - Page 41
TRENDnet User's Guide Configure the VLAN Forwarding Table Mode Bridge > VLAN > Forwarding Table Mode This section allows you to configure your switch to and click Apply to save settings. Note: The default mode is IVL. TPE-1620WS View the switch VLAN dynamic forwarding table Bridge > VLAN > Dynamic - TRENDnet TPE-1620WS | User's Guide - Page 42
TRENDnet User's Guide , allowing you to isolate the ports on the switch from each other. A subdomain consists of a guidelines apply when configuring private VLANs: The default VLAN 1 cannot be a private VLAN. 10. © Copyright 2013 TRENDnet. All Rights Reserved. TPE-1620WS • Click on the Forwarding Ports ratio - TRENDnet TPE-1620WS | User's Guide - Page 43
TRENDnet User's Guide 4. Click Save Settings to Flash (menu). 5. Click Save Settings to Flash (button), then click OK. Note: This step saves all configuration changes to the NV-RAM to ensure that if the switch pages. TPE-1620WS GVRP ( switch. Without GVRP, you have to manually configure your switches - TRENDnet TPE-1620WS | User's Guide - Page 44
is de-active for the port row selected. TPE-1620WS 4. Click Save Settings to Flash (menu). 5. Click Save Settings to Flash (button), then click OK. Note: This step saves all configuration changes to the NV-RAM to ensure that if the switch is rebooted or power cycled, the configuration changes - TRENDnet TPE-1620WS | User's Guide - Page 45
-1620WS 4. Click Save Settings to Flash (menu). 5. Click Save Settings to Flash (button), then click OK. Note: This step saves all configuration changes to the NV-RAM to ensure that if the switch is rebooted or power cycled, the configuration changes will still be applied. © Copyright 2013 TRENDnet - TRENDnet TPE-1620WS | User's Guide - Page 46
QoS Status field. © Copyright 2013 TRENDnet. All Rights Reserved. TPE-1620WS 4. Click Save Settings to Flash (menu). 5. Click Save Settings to Flash (button), then click OK. Note: This step saves all configuration changes to the NV-RAM to ensure that if the switch is rebooted or power cycled, the - TRENDnet TPE-1620WS | User's Guide - Page 47
"Access your switch management page" on page 11). 2. Click on Bridge, click on QoS and click on Port Priority. 3. For each port whose priority you want to change, select a priority (0-7) in the User Priority column. Click Apply to save the settings. TPE-1620WS Set DSCP (Differentiated Services Code - TRENDnet TPE-1620WS | User's Guide - Page 48
TRENDnet User's Guide TPE-1620WS Set the Scheduling Algorithm Bridge > QoS > Scheduling Algorithm 1. Log into your switch management page (see "Access your switch management page" on page 11). 2. Click on Bridge, click on QoS and click on Scheduling Algorithm. 3. Review the settings. Click Apply to - TRENDnet TPE-1620WS | User's Guide - Page 49
TRENDnet User's Guide Configure the IPv6 Traffic Class Priority Settings Bridge > QoS > IPv6 Traffic Class Priority Settings 1. Log into your switch management page (see "Access your switch to add the traffic class setting entry to the table. TPE-1620WS In the list, you can click Modify to modify an - TRENDnet TPE-1620WS | User's Guide - Page 50
is two hexadecimal digits. The Engine ID must be defined before SNMP is enabled. • Reset to Default - Use the device-generated Engine ID (Reset to Default will override any entry in the Engine ID field). TPE-1620WS Configure the SNMP View Table SNMP > View Table The SNMP View table specifies the - TRENDnet TPE-1620WS | User's Guide - Page 51
switch is rebooted or power cycled, the configuration changes will still be applied. © Copyright 2013 TRENDnet. All Rights Reserved. TPE-1620WS into your switch management page (see "Access your switch management page" on page 11). 2. Click on SNMP and click on Group Access Table. 3. Review the - TRENDnet TPE-1620WS | User's Guide - Page 52
This step saves all configuration changes to the NV-RAM to ensure that if the switch is rebooted or power cycled, the configuration changes will still be applied. © Copyright 2013 TRENDnet. All Rights Reserved. TPE-1620WS Configure the SNMP User/Group Table SNMP > SNMP User/Group An SNMP User Name - TRENDnet TPE-1620WS | User's Guide - Page 53
TRENDnet User's Guide TPE-1620WS Configure the SNMP Community Table SNMP > Community Table A community string has attributes for controlling who can use the string and what the string will allow a network management station to do on the switch. The Web Management Utility does not provide any default - TRENDnet TPE-1620WS | User's Guide - Page 54
all configuration changes to the NV-RAM to ensure that if the switch is rebooted or power cycled, the configuration changes will still be applied. TPE-1620WS Configure the SNMP Trap Management SNMP > Trap Management A Host IP address is used to specify a management device that needs to receive SNMP - TRENDnet TPE-1620WS | User's Guide - Page 55
switch is rebooted or power cycled, the configuration changes will still be applied. © Copyright 2013 TRENDnet. All Rights Reserved. TPE-1620WS switch management page (see "Access your switch management page" on page 11). 2. Click on Access Control Config and click on Policy Settings. 3. Review the - TRENDnet TPE-1620WS | User's Guide - Page 56
TRENDnet User's Guide Services Code Point) value in the IP header ranging from 0 - 63. o Source Layer 4 Port - Indicates the source layer 4 port ranging from 1 - 65535. © Copyright 2013 TRENDnet. All Rights Reserved. TPE-1620WS -DSCP to be processed by the switch. Note: You must enter a selection - TRENDnet TPE-1620WS | User's Guide - Page 57
TRENDnet User's Guide © Copyright 2013 TRENDnet. All Rights Reserved. TPE-1620WS IP ranging from 1- 128. o IPv6 Destination IP Address - Specifies the IPv6 Destination IP address. o Prefix Length - Indicates the length of the Destination IP -DSCP to be processed by the switch. Note: You must enter a - TRENDnet TPE-1620WS | User's Guide - Page 58
TRENDnet User's Guide o Replaced-CoS: to display data. • Click Add to add the policy to the Policy Table. TPE-1620WS In the list, you can click Modify to modify an entry or click Delete ensure that if the switch is rebooted or power cycled, the configuration changes will still be applied. © - TRENDnet TPE-1620WS | User's Guide - Page 59
to the Rate Control Table. 4. Click Save Settings to Flash (menu). TPE-1620WS 5. Click Save Settings to Flash (button), then click OK. Note: This step saves all configuration changes to the NV-RAM to ensure that if the switch is rebooted or power cycled, the configuration changes will still be - TRENDnet TPE-1620WS | User's Guide - Page 60
is rebooted or power cycled, the configuration changes will still be applied. TPE-1620WS RMON The RMON (Remote MONitoring) MIB is used with SNMP applications to monitor the operations of network devices. The Switch supports the four RMON MIB groups listed here: • Statistic group- This group is - TRENDnet TPE-1620WS | User's Guide - Page 61
TRENDnet User's Guide if the switch is rebooted or power cycled, the configuration changes will still be applied. TPE-1620WS Configure parameters into your switch management page (see "Access your switch management page" on page 11). 2. Click on RMON and click on Statistics. 3. Review the settings - TRENDnet TPE-1620WS | User's Guide - Page 62
TRENDnet User's Guide if the switch is rebooted or power cycled, the configuration changes will still be applied. TPE-1620WS Configure parameters Log into your switch management page (see "Access your switch management page" on page 11). 2. Click on RMON and click on History. 3. Review the settings. - TRENDnet TPE-1620WS | User's Guide - Page 63
that if the switch is rebooted or power cycled, the configuration changes will still be applied. TPE-1620WS Configure parameters for switch to perform an event. The thresholds of an alarm can have the same event or different events. The switch supports up to eight alarms. © Copyright 2013 TRENDnet - TRENDnet TPE-1620WS | User's Guide - Page 64
the person who created an entry. It is primarily intended for switches that are managed by morethan one person, and is an optional field. © Copyright 2013 TRENDnet. All Rights Reserved. Click Add to add the entry to the table. TPE-1620WS In the list, you can click Modify to modify an entry - TRENDnet TPE-1620WS | User's Guide - Page 65
used to identify the person who created an entry. It is primarily intended for switches that are managed by more than one person, and is an optional field. Click Add to add the entry to the table. TPE-1620WS In the list, you can click Modify to modify an entry or click Delete - TRENDnet TPE-1620WS | User's Guide - Page 66
TRENDnet User's Guide Voice VLAN This chapter contains a description of the Switch , then no other IP phone MAC addresses need to be entered into the configuration. TPE-1620WS However, it is will serve as the voice VLAN uplink/downlink. By default, a tagged or untagged port is a static member of - TRENDnet TPE-1620WS | User's Guide - Page 67
TRENDnet User's Guide Note: Link Layer Discovery Protocol for Media Endpoint Devices (LLDP- MED) is not supported on the switch. Each IP phone that is VLAN aware should be manually configured for the VLAN ID that matches your voice VLAN ID. Each of the voice VLAN ports connected to an IP phone - TRENDnet TPE-1620WS | User's Guide - Page 68
TRENDnet User's Guide 4. Click Save Settings to Flash (menu). TPE-1620WS • Enter the MAC address in the User Defined OUI - Telephony OUI field of one of the IP phones with the manufacturer's OUI. • Click Add. The new OUI entry is displayed in the table at the bottom of the page. Note: If you - TRENDnet TPE-1620WS | User's Guide - Page 69
TRENDnet User's Guide Security supported authentication server for this feature. 1. Log into your switch management page (see "Access your switch management page" on page 11). 2. Click on Security and click on Port Access Control. © Copyright 2013 TRENDnet. All Rights Reserved. TPE-1620WS 3. Review - TRENDnet TPE-1620WS | User's Guide - Page 70
TRENDnet User's Guide Create your switch management page (see "Access your switch management page" on page 11). 2. Click on Security and click on Dial-In User. 3. Review the will be ignored. Click Add to add the entry to the table. TPE-1620WS In the list, you can click Modify to modify an entry or - TRENDnet TPE-1620WS | User's Guide - Page 71
TRENDnet User's Guide Add RADIUS Servers (RADIUS Authentication Method) Security > RADIUS 1. Log into your switch management page (see "Access your switch management page" on page 11). 2. Click on Security and click on RADIUS. 3. Review the settings. • Server Priority - Enter the RADIUS Server - TRENDnet TPE-1620WS | User's Guide - Page 72
query, or switching to the next server. Possible field values are 1-255. The default value is 5. • Shared Secret - Enter the default authentication and encryption key for TACACS+ communication between the device and the TACACS+ server. Click Add to add the entry to the table. TPE-1620WS In the list - TRENDnet TPE-1620WS | User's Guide - Page 73
. When a packet destined for the Accounting server is received by the Sales group switch, the switch drops the packet. The Destination MAC Filter is a subset of the static MAC address. TPE-1620WS 4. The MAC address will be added to the table. In the list, you can click Modify to modify an entry - TRENDnet TPE-1620WS | User's Guide - Page 74
. The Gigabit Web Smart PoE+ Switch supports all five classes. Class 0 1 2 3 4 Maximum Power Output from a Switch Port 15.4W 4.0W 7.0W 15.4W 34.2W Power Ranges of the PDs 0.44W to 12.95W 0.44W to 3.84W 3.84W to 6.49W 6.49W to 12.95W 25.5W to 38.9W TPE-1620WS Power Budget Power budget is - TRENDnet TPE-1620WS | User's Guide - Page 75
TRENDnet User's Guide Configure PoE settings PoE Configuration 1. Log into your switch management page (see "Access your switch management page" on page 11). 2. Click on PoE Configuration. 3. Review milliamps that the port is supplyng to the PD. TPE-1620WS 4. Click Save Settings to Flash (menu). 5. - TRENDnet TPE-1620WS | User's Guide - Page 76
altered. o Disable - Blocks an Option 82 packet from passing through the switch. • Verify MAC Address - Select one of the following choices from the pull-down menu: © Copyright 2013 TRENDnet. All Rights Reserved. TPE-1620WS o Enable - The MAC address of each ingress ARP packet is validated when - TRENDnet TPE-1620WS | User's Guide - Page 77
TRENDnet User's Guide TPE-1620WS Enable DHCP Snooping DHCP Snooping > VLAN Settings In this section, you can define an existing VLAN to apply DHCP snooping. 1. Log into your switch management page (see "Access your switch management page" on page 11). 2. Click on DHCP Snooping and click on VLAN - TRENDnet TPE-1620WS | User's Guide - Page 78
can select the row labeled ALL to apply settings to all ports. TPE-1620WS Configure Binding Database DHCP Snooping > Binding Database The Binding Database displays learned and statically assigned MAC Address and IP Address information for each host on the local area network. Dynamically assigned - TRENDnet TPE-1620WS | User's Guide - Page 79
TRENDnet User's Guide Click Add to add the database entry to the table. TPE-1620WS 4. Click Save IP address assignment by the DHCP server is valid. 5. Click Save Settings to Flash (button), then click OK. Note: This step saves all configuration changes to the NV-RAM to ensure that if the switch - TRENDnet TPE-1620WS | User's Guide - Page 80
on LLDP Global Settings. 3. Review the settings. Enabling or Disabling LLDP • From the LLDP parameter, select one of the following radio button choices and click Apply to save the settings. • Enable: The LLDP feature is active. • Disable: The LLDP feature is inactive. TPE-1620WS LLDP Reinit Delay - TRENDnet TPE-1620WS | User's Guide - Page 81
TRENDnet User's Guide View LLDP System Information • Chassis ID Subtype: This parameter describes the Chassis ID subtype which is "macAddress". You cannot change this parameter. • Chassis ID: This parameter lists the MAC Address of the switch the switch. You cannot change this parameter TPE-1620WS - TRENDnet TPE-1620WS | User's Guide - Page 82
TRENDnet User's Guide View LLDP Neighbor Information LLDP > LLDP Neighbor Information 1. Log into your switch management page (see "Access your switch Page to navigate the pages. TPE-1620WS Statistic Statistics provide important information for troubleshooting switch problems at the port level. - TRENDnet TPE-1620WS | User's Guide - Page 83
TRENDnet User's Guide © Copyright 2013 TRENDnet. All Rights Reserved. TPE-1620WS View Error Information Statistics Statistic > Error Information 1. Log into your switch management page (see "Access your switch management page" on page 11). 2. Click on Statistic and click on Traffic Information. 3. - TRENDnet TPE-1620WS | User's Guide - Page 84
TRENDnet User's Guide Switch Maintenance Upgrade your switch firmware Tools > Firmware Upgrade TRENDnet may periodically release firmware upgrades that may add features or fix problems associated with your TRENDnet switch model and version. To check if there is a firmware upgrade available for your - TRENDnet TPE-1620WS | User's Guide - Page 85
Click Apply to start the firmware upgrade. TPE-1620WS Backup and restore your switch configuration settings Tools > Config File Backup/Restore You may have added many customized settings to your switch and in the case that you need to reset your switch to default, all your customized settings would - TRENDnet TPE-1620WS | User's Guide - Page 86
directory. • TFTP Server IP: Enter the IP address of your TFTP server. • Config File Name: Enter the configuration file name for the backup. (Default: config.bin) TPE-1620WS To restore your switch configuration: 1. Log into your switch management page (see "Access your switch management page" on - TRENDnet TPE-1620WS | User's Guide - Page 87
TRENDnet User's Guide Cable Diagnostics Test Tools > Cable Diagnostics The switch provides a basic cable diagnostic tool in the GUI for verifying the pairs in copper cabling and estimated distance for troubleshooting purposes. Note: 1. If the cable length displays N/A, it means that the cable length - TRENDnet TPE-1620WS | User's Guide - Page 88
TRENDnet User's Guide Enable IEEE 802.3az Power Saving Mode Tools > IEEE 802.3az TPE-1620WS Reboot/Reset to factory defaults Tools > Reboot This section provides the procedures for rebooting or resetting the switch to factory default settings. To reboot your switch: You may want to reboot your switch - TRENDnet TPE-1620WS | User's Guide - Page 89
following options • Factory Default: Resets all switch configuration settings to factory defaults including the IP address. • Factory Default Except IP: Resets all switch configuration settings to factory defaults and leaves the current IP address configuration. TPE-1620WS Network Connectivity Test - TRENDnet TPE-1620WS | User's Guide - Page 90
's Guide Using the Web Smart Switch Management Utility The Powerline Utility allows you to do the following: • You can easily discover all TRENDnet web smart switches on your network using the discover feature. • You can modify the IP address settings, change the admin password, and upgrade firmware - TRENDnet TPE-1620WS | User's Guide - Page 91
TRENDnet User's Guide 6. At the Installation, click Install. 7. In the Completion window, click Finish. TPE-1620WS Using the Utility Launching the Utility Upon completing the software installation, a desktop shortcut is automatically created. Double-click the icon to start the utility or - TRENDnet TPE-1620WS | User's Guide - Page 92
system name. IP Mode: Shows the DHCP status of the device. Location: Shows where the device is located. Subnet Mask: Shows the Subnet Mask set of the device. Gateway: Shows the Gateway set of the device. Group Interval: TPE-1620WS Monitor List All the Web Smart switches in the Monitor - TRENDnet TPE-1620WS | User's Guide - Page 93
TRENDnet User's Guide Device Setting TPE-1620WS Firmware Upgrade: When the device has a new function, there will be a new firmware to press the "Set" to process the data change immediately. The default password of TRENDnet Web Smart Switches is "admin". Password Change: You can use this Password - TRENDnet TPE-1620WS | User's Guide - Page 94
it will auto load the default recorded setting. Monitor Save As: To record the setting of the Monitor List in appointed filename and file path. Monitor Load: To manually load the setting file of version of the Web Management Utility. © Copyright 2013 TRENDnet. All Rights Reserved. TPE-1620WS 94 - TRENDnet TPE-1620WS | User's Guide - Page 95
TRENDnet User's Guide Switch Management Page Structure Switch Info System • System Management • IPv4 Setup • IPv6 System Settings • IPv6 Neighbor Settings • IP Tools • Firmware Upgrade • Config File Backup/Restore • Cable Diagnostics • IEEE 802.3az EEE • Reboot o Reset to factory defaults • Ping - TRENDnet TPE-1620WS | User's Guide - Page 96
TRENDnet User's Guide MAC address entries Switch Fabric/Capacity TRENDnet. All Rights Reserved. TPE-1620WS o Gigabit Activity (Blinking Green) Power Input: 100~240VAC, 50/60Hz internal power supply Power Consumption 198W (max.) PoE Discovery, IPv6 Static IP, DHCPv6, Auto Service 802.1p Class of - TRENDnet TPE-1620WS | User's Guide - Page 97
o VLAN ID o Ether Type (IPv4 only) o IP Protocol 0-255 o TCP/UDP Port 1-65535 o 802.1p Service (DoS) 10KBytes (max.) © Copyright 2013 TRENDnet. All Rights Reserved. TPE-1620WS Flow Control 802.3x Flow Control for Full-Duplex and back pressure for HalfDuplex Firmware Update Support TFTP firmware - TRENDnet TPE-1620WS | User's Guide - Page 98
: If you are experiencing difficulties, please contact your computer or operating system manufacturer for assistance. © Copyright 2013 TRENDnet. All Rights Reserved. TPE-1620WS Q: If my switch IP address is different than my network's subnet, what should I do? Answer: You should still configure the - TRENDnet TPE-1620WS | User's Guide - Page 99
TRENDnet User's Guide Appendix How to find your IP address? Note: Please note that although the following Show:", select Network Status. You'll see your network status and your IP address settings displayed. TPE-1620WS Note: If you are experiencing difficulties, please contact your computer or - TRENDnet TPE-1620WS | User's Guide - Page 100
TRENDnet User's Guide In MAC OS 10.4, from the Show drop-down list, select Built-in Ethernet and select the TCP/IP tab. In MAC OS 10.5/10.6, in the left column, select Ethernet. e. Configure TCP/IP to use a static IP. In MAC 10.4, from the Configure IPv4, drop-down list, select Manually and assign - TRENDnet TPE-1620WS | User's Guide - Page 101
TRENDnet User's Guide Federal Communication Commission Interference Statement This device can be expected to comply with Part 15 of the FCC Rules provided it is assembled in exact accordance with the instructions RoHS This product is RoHS compliant. TPE-1620WS Europe - EU Declaration of Conformity - TRENDnet TPE-1620WS | User's Guide - Page 102
TRENDnet User's Guide Česky [Czech] TRENDnet tímto prohlašuje, že tento TPE-1620WS je ve shodě se základními požadavky a dalšími příslušnými ustanoveními směrnice 2004/108/ES a 2009/95/ES. Dansk [Danish] Undertegnede TRENDnet erklærer herved, at følgende udstyr TPE1620WS overholder de væsentlige - TRENDnet TPE-1620WS | User's Guide - Page 103
TRENDnet User's Guide Limited Warranty TRENDnet warrants its products against defects in material and workmanship, under normal use and service, for the following lengths of time from the date of purchase. TPE-1620WS - 3 Years Warranty AC/DC Power Adapter, Cooling Fan, and Power Supply carry 1 year - TRENDnet TPE-1620WS | User's Guide - Page 104
-
 1
1 -
 2
2 -
 3
3 -
 4
4 -
 5
5 -
 6
6 -
 7
7 -
8
-
9
-
10
-
11
-
12
-
13
-
14
-
15
-
16
-
17
-
18
-
19
-
20
-
21
-
22
-
23
-
24
-
25
-
26
-
27
-
28
-
29
-
30
-
31
-
32
-
33
-
34
-
35
-
36
-
37
-
38
-
39
-
40
-
41
-
42
-
43
-
44
-
45
-
46
-
47
-
48
-
49
-
50
-
51
-
52
-
53
-
54
-
55
-
56
-
57
-
58
-
59
-
60
-
61
-
62
-
63
-
64
-
65
-
66
-
67
-
68
-
69
-
70
-
71
-
72
-
73
-
74
-
75
-
76
-
77
-
78
-
79
-
80
-
81
-
82
-
83
-
84
-
85
-
86
-
87
-
88
-
89
-
90
-
91
-
92
-
93
-
94
-
95
-
96
-
97
-
98
-
99
-
100
-
101
-
102
-
103
-
104
 |
 |

TRENDnet User’s Guide
Cover Page