TRENDnet TPE-1620WS User's Guide - Page 60
View your policy database, RMON, Enable RMON, Global Settings
 |
View all TRENDnet TPE-1620WS manuals
Add to My Manuals
Save this manual to your list of manuals |
Page 60 highlights
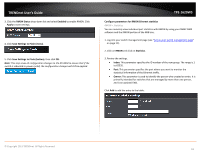
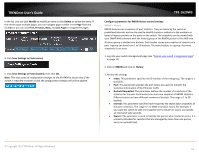
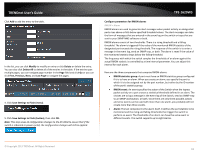
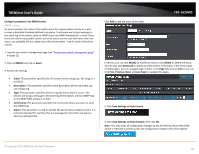
TRENDnet User's Guide View your policy database Access Control Config > Policy Database Allows you to view current policies assigned to each port by Index or Sequence. 1. Log into your switch management page (see "Access your switch management page" on page 11). 2. Click on Access Control Config and click on Policy Database. 3. Click the Select Port drop-down list to select the port you would like to view associated with the selected port. Then select the order to sort Index or Sequence. Note: The Any option will display policies for all ports. 4.View the active poicies associated with the specified port. 5. Click Save Settings to Flash (menu). 6. Click Save Settings to Flash (button), then click OK. Note: This step saves all configuration changes to the NV-RAM to ensure that if the switch is rebooted or power cycled, the configuration changes will still be applied. TPE-1620WS RMON The RMON (Remote MONitoring) MIB is used with SNMP applications to monitor the operations of network devices. The Switch supports the four RMON MIB groups listed here: • Statistic group- This group is used to view port statistics remotely with SNMP programs. • History group- This group is used to collect histories of port statistics to identify traffic trends or patterns. • Event group- This group is used with alarms to define the actions of the switch when packet statistic thresholds are crossed. • Alarm group-This group is used to create alarms that trigger event log messages or SNMP traps when statistics thresholds are exceeded. You can use your SNMP Network Management System (NMS) software and the RMON section of the MIB tree to view the RMON statistics, history and alarms associated with specific ports. Since RMON uses the SNMP agent for communicating with your NMS software, the SNMP Agent must be enabled and the SNMP feature must be configured on your switch. Since RMON works in conjunction with the SNMP agent, the SNMP agent must be enabled for the RMON feature to be active. Enable RMON RMON > Global Settings This section allows you to enable or disable RMON functionality. 1. Log into your switch management page (see "Access your switch management page" on page 11). 2. Click on RMON and click on Global Settings. © Copyright 2013 TRENDnet. All Rights Reserved. 60
-
 1
1 -
2
-
3
-
4
-
5
-
6
-
7
-
8
-
9
-
10
-
11
-
12
-
13
-
14
-
15
-
16
-
17
-
18
-
19
-
20
-
21
-
22
-
23
-
24
-
25
-
26
-
27
-
28
-
29
-
30
-
31
-
32
-
33
-
34
-
35
-
36
-
37
-
38
-
39
-
40
-
41
-
42
-
43
-
44
-
45
-
46
-
47
-
48
-
49
-
50
-
51
-
52
-
53
-
54
-
 55
55 -
 56
56 -
 57
57 -
 58
58 -
 59
59 -
 60
60 -
 61
61 -
 62
62 -
 63
63 -
 64
64 -
 65
65 -
66
-
67
-
68
-
69
-
70
-
71
-
72
-
73
-
74
-
75
-
76
-
77
-
78
-
79
-
80
-
81
-
82
-
83
-
84
-
85
-
86
-
87
-
88
-
89
-
90
-
91
-
92
-
93
-
94
-
95
-
96
-
97
-
98
-
99
-
100
-
101
-
102
-
103
-
104
 |
 |
