TRENDnet TPE-1620WS User's Guide - Page 70
Create Dial-In Users (Local Authentication Method), Dial-In User
 |
View all TRENDnet TPE-1620WS manuals
Add to My Manuals
Save this manual to your list of manuals |
Page 70 highlights
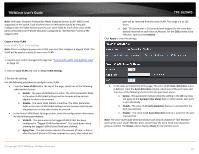
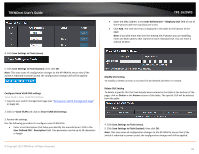
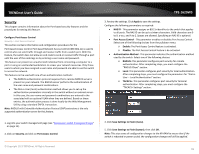
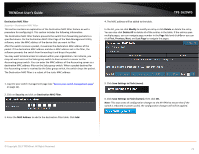
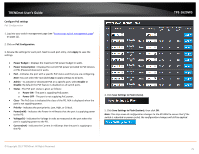
TRENDnet User's Guide Create Dial-In Users (Local Authentication Method) Security > Dial-in User Dial-in User feature provides the local authentication server for port security when a remote (RADIUS) server is not available. The Dial-in User (local) authentication method allows you to set up 802.1x authentication parameters internally in the Switch. In this case, the user name and password combinations are entered with an optional VLAN when they are defined. Based on these entries, the authentication process of a supplicant is done locally by the Switch Management Utility using a standard EAPOL (EAP over LAN) transaction. 1. Log into your switch management page (see "Access your switch management page" on page 11). 2. Click on Security and click on Dial-In User. 3. Review the settings. To create a dial-in user for local authentication, use the following procedure: • In the User Name field, type a name for the user. • In the Password field, type a password for the user. • In the Dynamic VLAN field, enter the VID of the VLAN which you will allow the user to access. If you enter 0, this field will be ignored. Click Add to add the entry to the table. TPE-1620WS In the list, you can click Modify to modify an entry or click Delete or delete the entry. You can also click Delete All to delete all of the entries in the table. If the entries span multiple pages, you can navigate page number in the Page field and click Go or you can click First, Previous, Next, and Last Page to navigate the pages. 4. Click Save Settings to Flash (menu). 5. Click Save Settings to Flash (button), then click OK. Note: This step saves all configuration changes to the NV-RAM to ensure that if the switch is rebooted or power cycled, the configuration changes will still be applied. © Copyright 2013 TRENDnet. All Rights Reserved. 70
-
 1
1 -
2
-
3
-
4
-
5
-
6
-
7
-
8
-
9
-
10
-
11
-
12
-
13
-
14
-
15
-
16
-
17
-
18
-
19
-
20
-
21
-
22
-
23
-
24
-
25
-
26
-
27
-
28
-
29
-
30
-
31
-
32
-
33
-
34
-
35
-
36
-
37
-
38
-
39
-
40
-
41
-
42
-
43
-
44
-
45
-
46
-
47
-
48
-
49
-
50
-
51
-
52
-
53
-
54
-
55
-
56
-
57
-
58
-
59
-
60
-
61
-
62
-
63
-
64
-
 65
65 -
 66
66 -
 67
67 -
 68
68 -
 69
69 -
 70
70 -
 71
71 -
 72
72 -
 73
73 -
 74
74 -
 75
75 -
76
-
77
-
78
-
79
-
80
-
81
-
82
-
83
-
84
-
85
-
86
-
87
-
88
-
89
-
90
-
91
-
92
-
93
-
94
-
95
-
96
-
97
-
98
-
99
-
100
-
101
-
102
-
103
-
104
 |
 |
