TRENDnet TPE-1620WS User's Guide - Page 9
Basic Installation, Enter, Login., admin, System, IPv4 Setup, Apply., Save Settings to Flash menu - default ip
 |
View all TRENDnet TPE-1620WS manuals
Add to My Manuals
Save this manual to your list of manuals |
Page 9 highlights
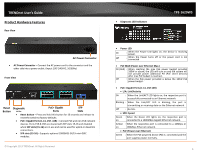
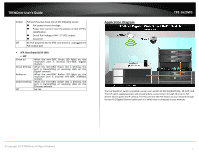
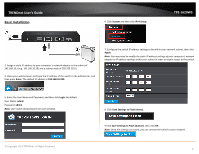
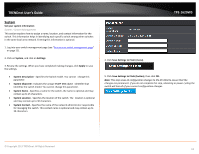
TRENDnet User's Guide Basic Installation 6. Click System and then click IPv4 Setup. TPE-1620WS 3. Assign a static IP address to your computer's network adapter in the subnet of 192.168.10.x (e.g. 192.168.10.25) and a subnet mask of 255.255.255.0. 4. Open your web browser, and type the IP address of the switch in the address bar, and then press Enter. The default IP address is 192.168.10.200. 7. Configure the switch IP address settings to be within your network subnet, then click Apply. Note: You may need to modify the static IP address settings of your computer's network adapter to IP address settings within your subnet in order to regain access to the switch. 5. Enter the User Name and Password, and then click Login. By default: User Name: admin Password: admin Note: User name and password are case sensitive. © Copyright 2013 TRENDnet. All Rights Reserved. 8. Click Save Settings to Flash (menu). 9.Click Save Settings to Flash (button), then click OK. Note: Once the settings are saved, you can connect the switch to your network. 9
-
 1
1 -
2
-
3
-
 4
4 -
 5
5 -
 6
6 -
 7
7 -
 8
8 -
 9
9 -
 10
10 -
 11
11 -
 12
12 -
 13
13 -
 14
14 -
15
-
16
-
17
-
18
-
19
-
20
-
21
-
22
-
23
-
24
-
25
-
26
-
27
-
28
-
29
-
30
-
31
-
32
-
33
-
34
-
35
-
36
-
37
-
38
-
39
-
40
-
41
-
42
-
43
-
44
-
45
-
46
-
47
-
48
-
49
-
50
-
51
-
52
-
53
-
54
-
55
-
56
-
57
-
58
-
59
-
60
-
61
-
62
-
63
-
64
-
65
-
66
-
67
-
68
-
69
-
70
-
71
-
72
-
73
-
74
-
75
-
76
-
77
-
78
-
79
-
80
-
81
-
82
-
83
-
84
-
85
-
86
-
87
-
88
-
89
-
90
-
91
-
92
-
93
-
94
-
95
-
96
-
97
-
98
-
99
-
100
-
101
-
102
-
103
-
104
 |
 |
