Toshiba Portege M780 PPM78C-005006 Users Manual Canada; English - Page 126
TOSHIBA Button Support, How to enable fingerprint boot authentication and Single, sign-on feature
 |
View all Toshiba Portege M780 PPM78C-005006 manuals
Add to My Manuals
Save this manual to your list of manuals |
Page 126 highlights
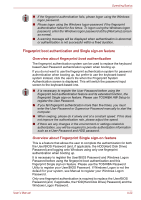
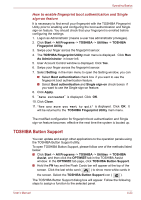
Operating Basics How to enable fingerprint boot authentication and Single sign-on feature It is necessary to first enroll your fingerprint with the TOSHIBA Fingerprint Utility prior to enabling and configuring the boot authentication and Single sign-on feature. You should check that your fingerprint is enrolled before configuring the settings. 1. Logon as Administrator (means a user has administrator privileges). 2. Click Start -> All Programs -> TOSHIBA -> Utilities -> TOSHIBA Fingerprint Utility. 3. Swipe your finger across the fingerprint sensor. 4. The TOSHIBA Fingerprint Utility main menu is displayed. Click Run As Administrator in lower left. 5. User Account Control window is displayed. Click Yes. 6. Swipe your finger across the fingerprint sensor. 7. Select Setting in the main menu to open the Setting window, you can ■ Select Boot authentication check box if you want to use the fingerprint boot authentication feature. ■ Select Boot authentication and Single sign-on check boxes if you want to use the Single sign-on feature. 8. Click Apply. 9. "Save succeeded" is displayed. Click OK. 10. Click Close. 11. "Are you sure you want to quit" is displayed. Click OK. It will be returned to the TOSHIBA Fingerprint Utility main menu. The modified configuration for fingerprint boot authentication and Single sign-on feature becomes effective the next time the system is booted up. TOSHIBA Button Support You can update and assign other applications to the operation panels using the TOSHIBA Button Support utility. To open TOSHIBA Button Support, please follow one of the methods listed below: ■ Click Start -> All Programs -> TOSHIBA -> Utilities -> TOSHIBA Assist, and then click the OPTIMIZE tab in the TOSHIBA Assist window. In the OPTIMIZE tab page, click TOSHIBA Button Support. ■ Hold the FN key and the Flash Cards bar will appear at the top of the screen. Click the last white card ( ) to show more white cards in the screen. Select the TOSHIBA Button Support icon ( ). The TOSHIBA Button Support dialog box will appear. Follow the following steps to assign a function to the selected panel. User's Manual 4-23
-
 1
1 -
2
-
3
-
4
-
5
-
6
-
7
-
8
-
9
-
10
-
11
-
12
-
13
-
14
-
15
-
16
-
17
-
18
-
19
-
20
-
21
-
22
-
23
-
24
-
25
-
26
-
27
-
28
-
29
-
30
-
31
-
32
-
33
-
34
-
35
-
36
-
37
-
38
-
39
-
40
-
41
-
42
-
43
-
44
-
45
-
46
-
47
-
48
-
49
-
50
-
51
-
52
-
53
-
54
-
55
-
56
-
57
-
58
-
59
-
60
-
61
-
62
-
63
-
64
-
65
-
66
-
67
-
68
-
69
-
70
-
71
-
72
-
73
-
74
-
75
-
76
-
77
-
78
-
79
-
80
-
81
-
82
-
83
-
84
-
85
-
86
-
87
-
88
-
89
-
90
-
91
-
92
-
93
-
94
-
95
-
96
-
97
-
98
-
99
-
100
-
101
-
102
-
103
-
104
-
105
-
106
-
107
-
108
-
109
-
110
-
111
-
112
-
113
-
114
-
115
-
116
-
117
-
118
-
119
-
120
-
 121
121 -
 122
122 -
 123
123 -
 124
124 -
 125
125 -
 126
126 -
 127
127 -
 128
128 -
 129
129 -
 130
130 -
 131
131 -
132
-
133
-
134
-
135
-
136
-
137
-
138
-
139
-
140
-
141
-
142
-
143
-
144
-
145
-
146
-
147
-
148
-
149
-
150
-
151
-
152
-
153
-
154
-
155
-
156
-
157
-
158
-
159
-
160
-
161
-
162
-
163
-
164
-
165
-
166
-
167
-
168
-
169
-
170
-
171
-
172
-
173
-
174
-
175
-
176
-
177
-
178
-
179
-
180
-
181
-
182
-
183
-
184
-
185
-
186
-
187
-
188
-
189
-
190
-
191
-
192
-
193
-
194
-
195
-
196
-
197
-
198
-
199
-
200
-
201
-
202
-
203
-
204
-
205
-
206
-
207
-
208
-
209
-
210
-
211
-
212
-
213
-
214
-
215
-
216
-
217
-
218
-
219
-
220
-
221
-
222
-
223
-
224
-
225
-
226
-
227
-
228
-
229
-
230
-
231
-
232
-
233
-
234
-
235
-
236
-
237
-
238
-
239
-
240
-
241
-
242
-
243
-
244
-
245
-
246
-
247
-
248
-
249
-
250
-
251
-
252
-
253
-
254
-
255
-
256
-
257
-
258
-
259
-
260
-
261
-
262
-
263
-
264
-
265
-
266
-
267
-
268
 |
 |