Toshiba Qosmio G40 PQG40C-MM108C Users Manual Canada; English - Page 137
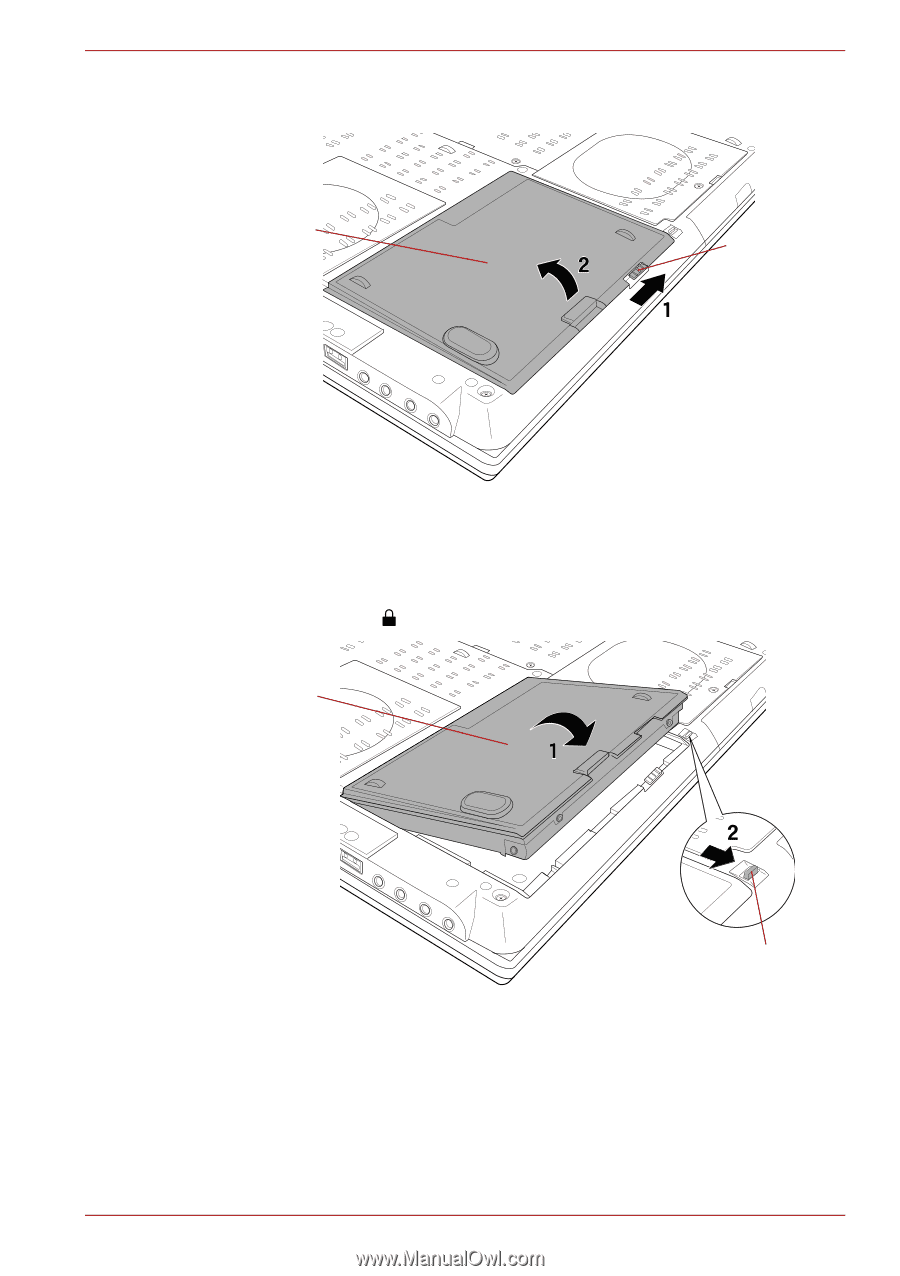
Ensure that the battery pack is securely in place and the battery safety, lock 2 is in its
 |
View all Toshiba Qosmio G40 PQG40C-MM108C manuals
Add to My Manuals
Save this manual to your list of manuals |
Page 137 highlights
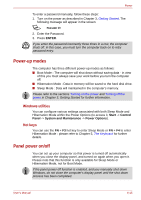
Power 6. Slide and hold the battery release latch (1) to disengage the battery pack and then remove it from the computer (2). Battery pack Battery release latch Figure 6-2 Releasing the battery pack (2) To install a battery, follow the steps as detailed below: 7. Insert the battery pack as far as it will go into the computer (1). 8. Ensure that the battery pack is securely in place and the battery safety lock (2) is in its ( ) position. Battery pack Battery safety lock Figure 6-3 Securing the battery pack 9. Turn your computer over. User's Manual 6-12
-
 1
1 -
2
-
3
-
4
-
5
-
6
-
7
-
8
-
9
-
10
-
11
-
12
-
13
-
14
-
15
-
16
-
17
-
18
-
19
-
20
-
21
-
22
-
23
-
24
-
25
-
26
-
27
-
28
-
29
-
30
-
31
-
32
-
33
-
34
-
35
-
36
-
37
-
38
-
39
-
40
-
41
-
42
-
43
-
44
-
45
-
46
-
47
-
48
-
49
-
50
-
51
-
52
-
53
-
54
-
55
-
56
-
57
-
58
-
59
-
60
-
61
-
62
-
63
-
64
-
65
-
66
-
67
-
68
-
69
-
70
-
71
-
72
-
73
-
74
-
75
-
76
-
77
-
78
-
79
-
80
-
81
-
82
-
83
-
84
-
85
-
86
-
87
-
88
-
89
-
90
-
91
-
92
-
93
-
94
-
95
-
96
-
97
-
98
-
99
-
100
-
101
-
102
-
103
-
104
-
105
-
106
-
107
-
108
-
109
-
110
-
111
-
112
-
113
-
114
-
115
-
116
-
117
-
118
-
119
-
120
-
121
-
122
-
123
-
124
-
125
-
126
-
127
-
128
-
129
-
130
-
131
-
 132
132 -
 133
133 -
 134
134 -
 135
135 -
 136
136 -
 137
137 -
 138
138 -
 139
139 -
 140
140 -
 141
141 -
 142
142 -
143
-
144
-
145
-
146
-
147
-
148
-
149
-
150
-
151
-
152
-
153
-
154
-
155
-
156
-
157
-
158
-
159
-
160
-
161
-
162
-
163
-
164
-
165
-
166
-
167
-
168
-
169
-
170
-
171
-
172
-
173
-
174
-
175
-
176
-
177
-
178
-
179
-
180
-
181
-
182
-
183
-
184
-
185
-
186
-
187
-
188
-
189
-
190
-
191
-
192
-
193
-
194
-
195
-
196
-
197
-
198
-
199
-
200
-
201
-
202
-
203
-
204
-
205
-
206
-
207
-
208
-
209
-
210
-
211
-
212
-
213
-
214
-
215
-
216
-
217
-
218
-
219
-
220
-
221
-
222
-
223
-
224
-
225
-
226
-
227
-
228
-
229
-
230
-
231
-
232
-
233
-
234
-
235
-
236
-
237
-
238
-
239
-
240
-
241
-
242
-
243
-
244
-
245
-
246
-
247
-
248
-
249
-
250
-
251
-
252
-
253
-
254
-
255
-
256
-
257
-
258
-
259
-
260
-
261
-
262
-
263
-
264
-
265
-
266
-
267
-
268
-
269
-
270
-
271
-
272
-
273
-
274
-
275
-
276
-
277
-
278
-
279
-
280
-
281
 |
 |
User’s Manual
6-12
Power
6.
Slide and hold the battery release latch (1) to disengage the battery
pack and then remove it from the computer (2).
Figure 6-2 Releasing the battery pack (2)
To install a battery, follow the steps as detailed below:
7.
Insert the battery pack as far as it will go into the computer (1).
8.
Ensure that the battery pack is securely in place and the battery safety
lock (2) is in its (
) position.
Figure 6-3 Securing the battery pack
9.
Turn your computer over.
Battery pack
Battery release
latch
Battery safety lock
Battery pack