WestBend 41077 Instruction Manual - Page 4
Precautions For Use Around Children, Getting To Know Your Breadmaker
 |
View all WestBend 41077 manuals
Add to My Manuals
Save this manual to your list of manuals |
Page 4 highlights
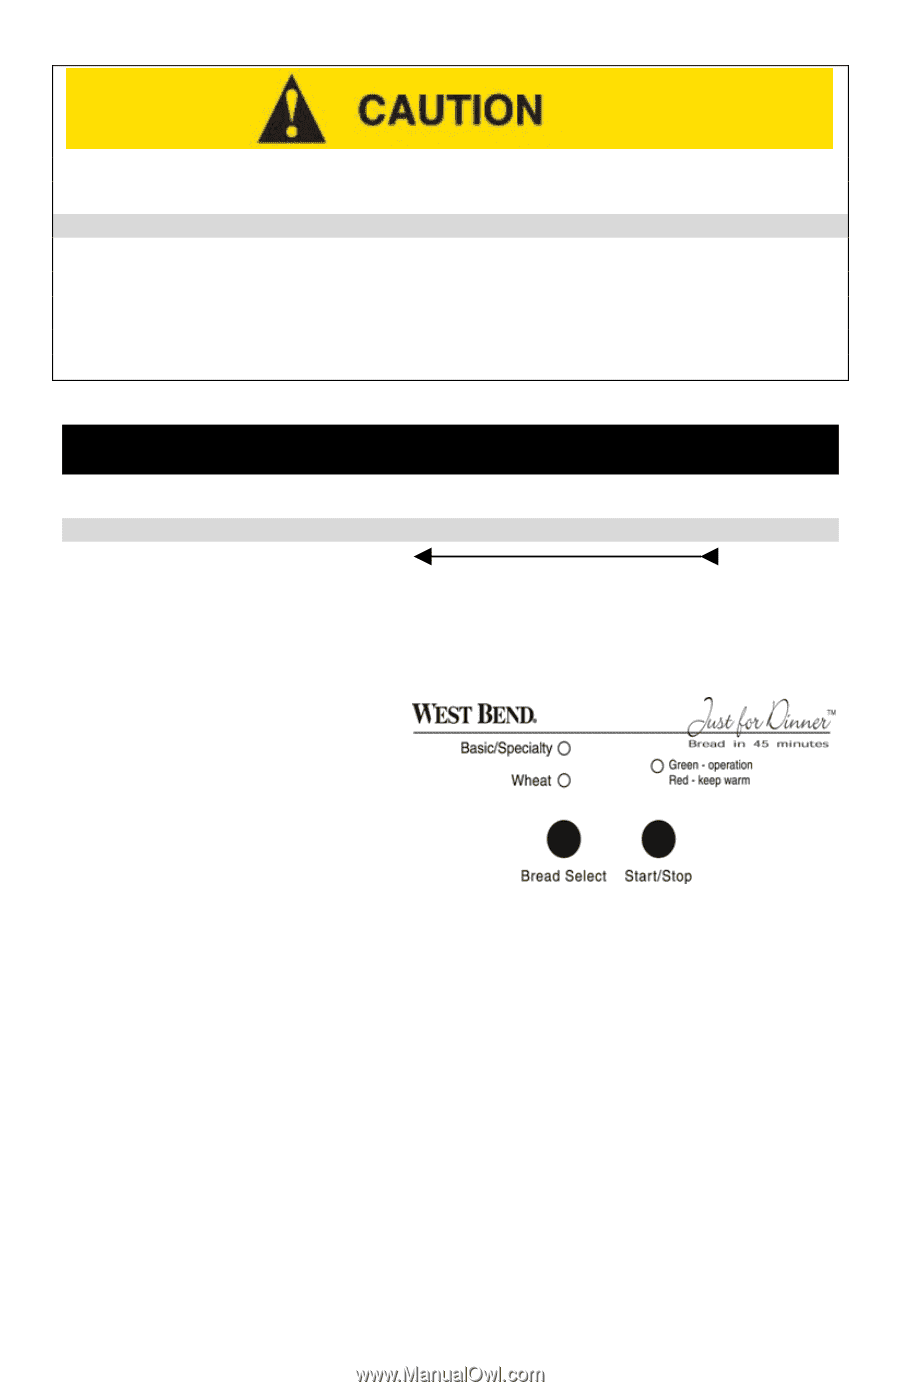
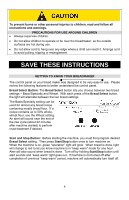
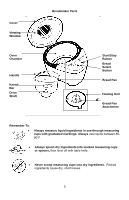
To prevent burns or other personal injuries to children, read and follow all instructions and warnings. PRECAUTIONS FOR USE AROUND CHILDREN • Always supervise children. • Do not allow children to operate or be near the breadmaker, as the outside surfaces are hot during use. • Do not allow cord to hang over any edge where a child can reach it. Arrange cord to avoid pulling, tripping or entanglement. SAVE THESE INSTRUCTIONS GETTING TO KNOW YOUR BREADMAKER The control panel on your bread maker was designed to be very easy to use. Please review the following features to better understand the control panel. Bread Select Button: The Bread Select button lets you choose between two bread settings - Basic/Specialty and Wheat. With each press of the Bread Select button, the light will alternate between the two bread settings. The Basic/Specialty setting can be used for almost any bread recipe containing mostly bread flour. If a recipe contains up to 50% wholewheat flour, use the Wheat setting. An alert will sound near the end of the rise cycle (about 22 minutes after machine started) to perform crust treatment if desired. Start and Stop Button: Before starting the machine, you must first program desired Bread Select setting. Then press Start/Stop button once to turn machine on. When the machine is on, green "operation" light will glow. When bread is done, light will change to red to let you know machine is in "keep warm" mode for one hour. Alert will also sound when bread is done. Turn off by holding Start/Stop button until alert sounds and "keep warm" light goes out. If machine is not turned off after completion of one-hour "keep warm" period, machine will automatically turn itself off. 4
-
 1
1 -
 2
2 -
 3
3 -
 4
4 -
 5
5 -
 6
6 -
 7
7 -
 8
8 -
 9
9 -
 10
10 -
11
-
12
-
13
-
14
-
15
-
16
-
17
-
18
-
19
-
20
-
21
-
22
-
23
-
24
-
25
-
26
-
27
-
28
-
29
-
30
-
31
-
32
-
33
-
34
-
35
-
36
-
37
-
38
-
39
-
40
-
41
-
42
-
43
-
44
-
45
-
46
-
47
-
48
-
49
-
50
-
51
-
52
-
53
-
54
-
55
-
56
-
57
-
58
-
59
-
60
 |
 |